[PYTHON] Measure temperature, humidity, etc. with SensorTag and send it to Ambient via Raspberry Pi 3 to graph it Part 2
Measure temperature, humidity, pressure, illuminance, and battery level with TI SensorTag and use Bluetooth Low Energy (BLE) for Raspberry I sent it to Pi3 (RPi3) and sent it from RPi3 to IoT data visualization service "Ambient" to graph the data. Part 1 is a simple one that scans BLE, reads the found SensorTag data, and sends it to Ambient repeatedly every 5 seconds. However, this time, it supports multiple SensorTags and the reading interval is set to 5 minutes. We are challenging long-term measurement with coin battery drive.
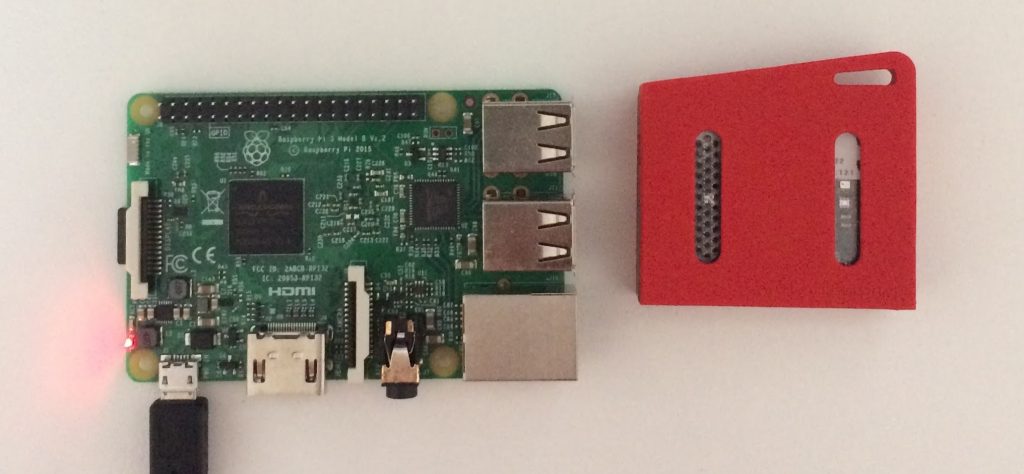
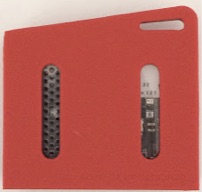
SensorTag
SensorTag has 3 types of devices with different communication modules. This time I used a "multi-standard SensorTag" that communicates via BLE. The sensors include ambient and surface temperature sensors, humidity sensors, pressure sensors, ambient light sensors, acceleration sensors, gyroscopes, compasses, and magnetic sensors, which are powered by a single button cell battery (CR2032).
Since SensorTag communicates with BLE, I decided to use Raspberry Pi3 (RPi3) as a gateway, acquire SensorTag data from RPi3 with BLE, and send it to Ambient.
In BLE communication, the terminal (Peripheral) sends the advertisement data, scans it on the central side, finds the necessary terminal, connects to it and sends and receives data.
SensorTag sends advertisement data and if there is no connection for 2 minutes, it goes to sleep mode and consumes less power. When you enter sleep mode, you cannot wake up the terminal from the central side because it does not communicate, and you can return to advertisement mode by clicking the power button of the terminal.
Since the SensorTag can only connect to one central, you need to wait in advertisement mode if you want to connect to multiple centrals, but if you use it as an environmental sensor, you can connect to only one gateway as central. It's okay. If you try to acquire measurement data periodically while connected to the gateway, the acquisition interval will not shift to sleep mode even if the acquisition interval is 2 minutes or more. If the connection is lost for some reason, try to reconnect.
Part 1 states that "SensorTag will enter sleep mode and cannot communicate if left for 2 minutes in the advertised state, so it can be used as a terminal for long-term measurement. I wrote that it is difficult, but I found that it can be used as a terminal for long-term measurement without problems because it will not enter sleep mode if it is left connected.
Programs on Raspberry Pi 3 (RPi3)
The program on RPi3 was written in Python. The general operation is as follows.
- Scan BLE for SensorTag
- Once you find the SensorTag, connect it, measure temperature, humidity, barometric pressure, illuminance and battery level once every 5 minutes and send it to Ambient
- If the connection with the SensorTag is lost, reconnect and continue the measurement.
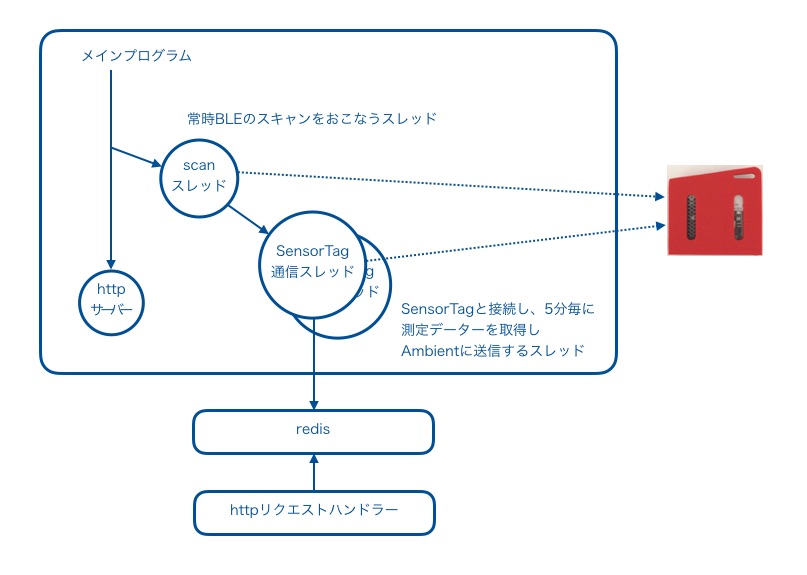
When a SensorTag is found, an independent thread is started for each SensorTag so that it can handle multiple SensorTags, and one thread connects to one SensorTag for communication.
I also ran a web server in Python and launched the SensorTag settings portal. The channel ID and write key when sending to Ambient are not described in the program, but can be set from the browser.
The figure below shows the structure of the program on the RPi3.
RPi3 environment construction
I used bluepy as a library to access BLE. This library is well documented and is recommended as it also contains modules to access SensorTags.
First, install bluepy on RPi3.
pi$ cd /var
pi$ sudo mkdir -p www/html
pi$ cd www/html
pi$ sudo apt-get install python-pip libglib2.0-dev
pi$ git clone https://github.com/IanHarvey/bluepy.git
pi$ cd bluepy
pi$ python3 setup.py build
pi$ sudo python3 setup.py install
pi$ cd bluepy
pi$ cp blescan.py btle.py bluepy-helper __init__.py sensortag.py uuids.json ../..
Changed to set the channel ID and write key of Ambient from the browser. To do this, you need to pass data from the HTTP request handler to the main program that communicates with the SensorTag. There are various methods of interprocess communication, but this time I used Redis, which seems to have a good affinity with Python. There, install Redis and the Redis Python library.
pi$ sudo apt-get install redis-server
pi$ sudo pip3 install redis
Finally, install Ambient's Python library as well.
pi$ sudo pip3 install git+https://github.com/TakehikoShimojima/ambient-python-lib.git
The files required for the Python program and the SensorTag configuration portal have been published on Github.
pi$ cd /var/www/html
pi$ sudo wget https://github.com/TakehikoShimojima/sensortag-ambient/archive/master.zip
pi$ sudo unzip master.zip
pi$ cd sensortag-ambient-master
pi$ sudo chmod +x cgi-bin/sensortaglist.py cgi-bin/result.py
pi$ sudo mv * ..
pi$ cd ..
Start-up
Since root authority is required to run a program that accesses BLE on RPi3, run the program as follows.
pi$ sudo python3 st2ambient2.py -v
If you log out of the RPi3, the program will end, so to keep it running even if you log out, do the following.
pi$ sudo nohup python3 st2ambient2.py -v < /dev/null &
There are two program options:
- -i n: Specify the measurement interval in n seconds. If omitted, the interval is 300 seconds (5 minutes).
- -v: Output the operating status.
After a while the program starts running, you will find the SensorTag. If you start it with the -v option, you will see a message similar to the following:
New SensorTag 24:71:89:bc:63:84
After "New Sensor Tag" is the MAC address of the terminal.
If you can't find the SensorTag, press the SensorTag's power button for at least 3 seconds to turn off your device, then click the power button again. The advertisement will start and the green LED on the SensorTag will start blinking every second. After a while the program should find the terminal.
Once you find your device, connect your browser to the Raspberry Pi 3 address. Then, the following SensorTag setting portal will be displayed, and the MAC address and signal strength (rssi) of the found terminal will be displayed.
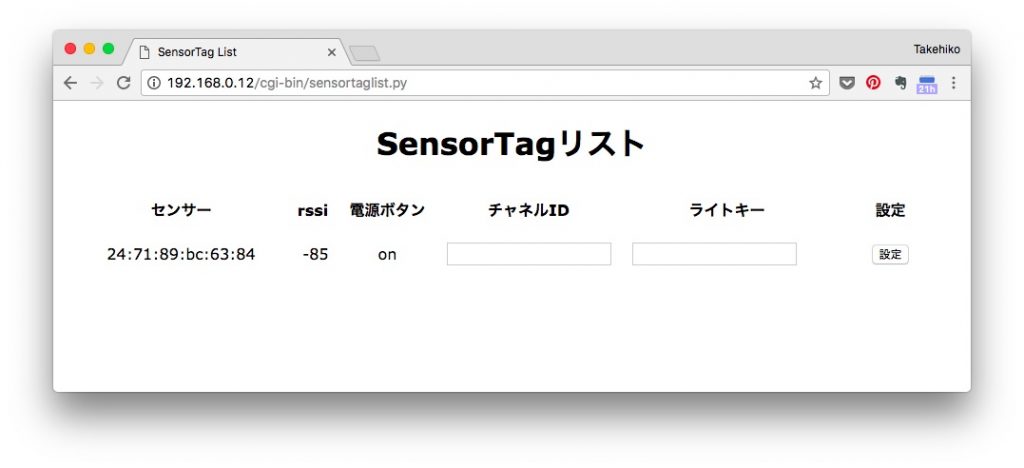
Enter the channel ID and light key of the Ambient to send the data on this screen, click the setting button, the channel ID and the write key will be passed to the Python program, and the measurement data will be sent to the Ambient.
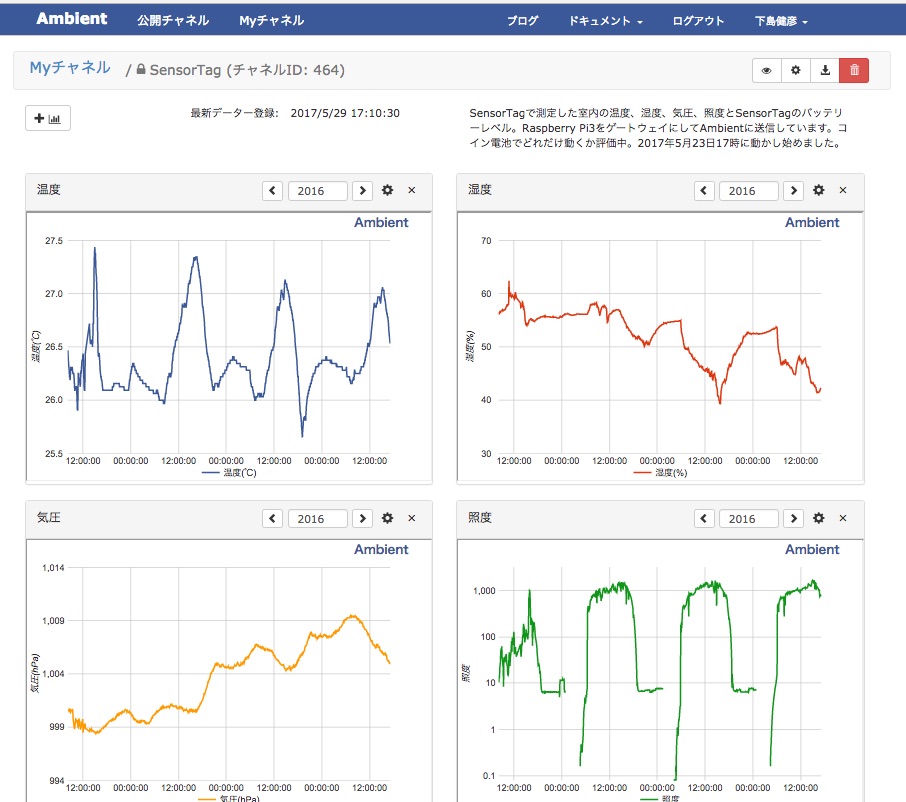
If you check with Ambient, you can check the measured data as follows.
Recommended Posts