[LINUX] Install VS Code on your Chromebook
Overview
I saw some articles, but it didn't work because the information was out of date or the machine was different, so I made it an article for the time being. After half a year, the OS may be updated and the installation method may change.
As you can see in the article from the VS Code official below, I installed it and it worked. https://code.visualstudio.com/blogs/2020/12/03/chromebook-get-started
I have translated a part of the above article into this Qiita article.
Installation procedure
- Enable Linux

- Open a Linux terminal
- Execute the following command
sudo apt-get update
sudo apt-get install -y gnome-keyring
- Find out which VS Code package to download
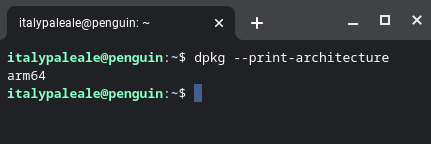
dpkg --print-architecture
Select "64bit" when amd64 is displayed, and select" ARM64 "when" arm64is displayed (Lenovo IdeaPad Duet was "ARM64"). (* 1 quote)  5. Go to VS Code's Download Site (https://code.visualstudio.com/download) and download 6. There is a file with the extension.deb` in the download folder, so double-click it and install it as it is
7. End
environment
- Lenovo IdeaPad Duet Chromebook
- ChromeOS 87.0.4280.109
Article translation (until VS Code installation)
Learn with VS Code on your Chromebook
December 3, 2020 Alessandro Segala, @ItalyPaleAle
For the past few years, Chromebooks running on Google Chrome OS have provided an alternative to "traditional" laptops. Chromebooks are very popular with students who use them for learning, submitting assignments, and attending virtual lessons, thanks to a variety of choices from very affordable models to high-end models.
While Chromebooks and Chrome OS are especially web browser-centric, they can take advantage of the Linux environment, so you can install native desktop apps, including VS Code.
With VS Code on your Chromebook, you can start coding easily and quickly in a variety of languages and frameworks. Languages include Python, JavaScript, Node.js, Java, C # and much more.
In this article, I'll start by showing you how to install Visual Studio Code on your Chromebook and set up an environment where you can start coding with Python or JavaScript/Node.js. Next, we'll see how to use VS Code's Remote Development Extensions (https://marketplace.visualstudio.com/items?itemName=ms-vscode-remote.vscode-remote-extensionpack) to connect to a more powerful development environment.
What to do
If you can enable your Linux app via Crostini, VS Code will work on modern Chromebooks. We'll see this soon.
Visual Studio Code is a lightweight editor that can run on low-performance Chromebooks with less than 1GB of RAM. In addition, VS Code is capable of Linux on ARMv7 and ARM64, so it can run on Chromebooks running on ARM chips.
This tutorial utilizes an entry-level Chromebook (ARM64 CPU, 4GB RAM, 32GB disk). Despite its low specs, VS Code works well on this machine.
Enable Linux on your Chromebook
Before installing VS Code on Chrome OS, you need to leverage Crostini to enable support for native Linux apps.
First, open System Settings, find Linux (Beta) in the sidebar, and enable Linux support.
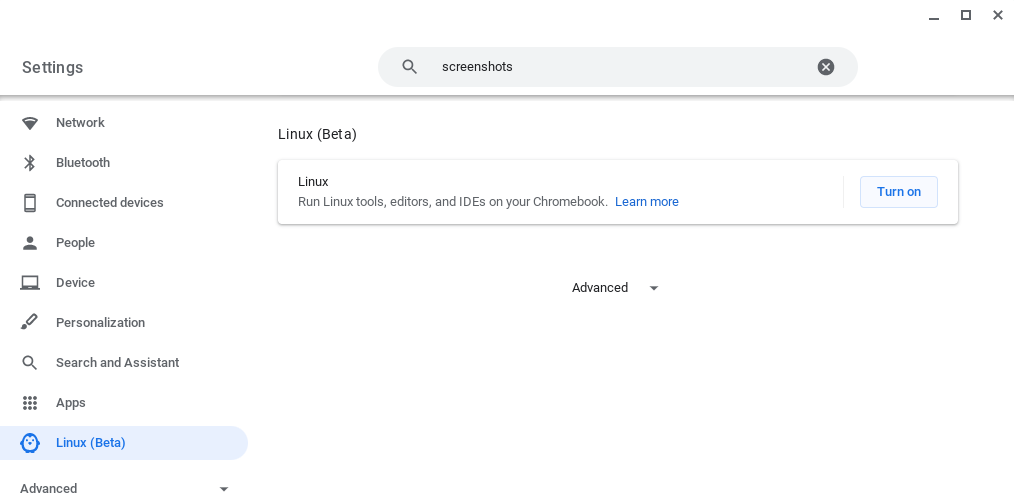
Follow the on-screen instructions to set up your Linux environment (default settings are sufficient for most people). Chromebook downloads and configures tools to build a Linux environment. Behind the screen, we're building a container running Debian 10, so you can try out a full Linux distribution.
When you set up your Linux environment, a new terminal window will pop up.

Before installing VS Code, you need to run some commands in your Linux terminal. You need to update the list of Linux packages and install the optional (highly recommended) dependent package gnome-keyring. Type the following two commands in the terminal (press the Enter key at the end of each command to execute):
sudo apt-get update
sudo apt-get install -y gnome-keyring
The output looks like this:
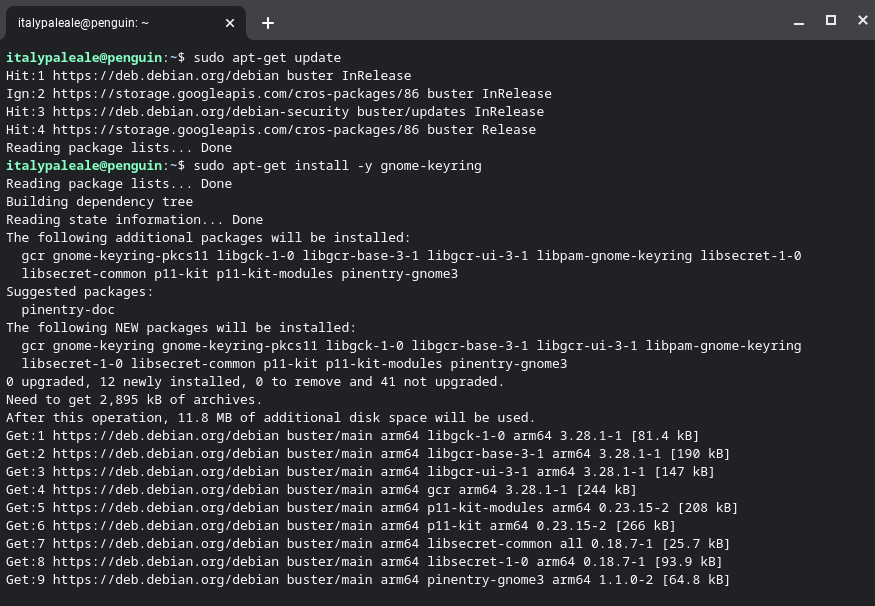
After completing the second command, you can move on to the next step.
Install VS Code
You're ready to install VS Code.
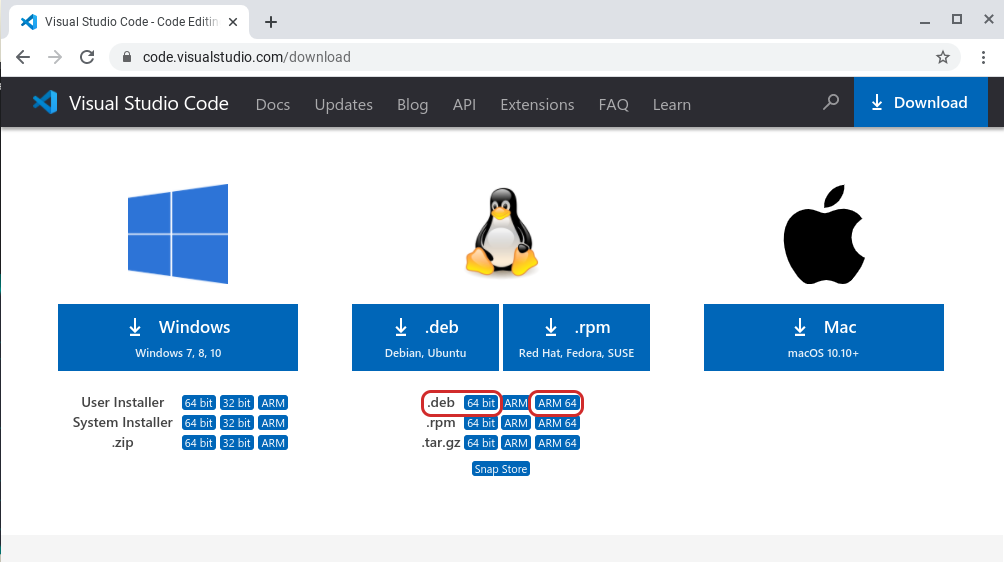
You will be taken to the Download page of Visual Studio Code. Here you need to choose the right package for your Chromebook:
--For Chromebooks running on Intel or AMD chips, select 64-bit .deb. --For Chromebooks running on ARM64 chips (tested with this), select the ARM64 .deb package.
If you don't know what kind of Chromebook CPU you are using, you can find it by running this command dpkg --print-architecture in a Linux terminal. amd64 (for Intel and AMD chips: select the 64-bit version of VS Code) or arm64 (select ARM64) is displayed.
After downloading VS Code, you will see that there are packages in the download folder. Double-click the package to launch the installer:
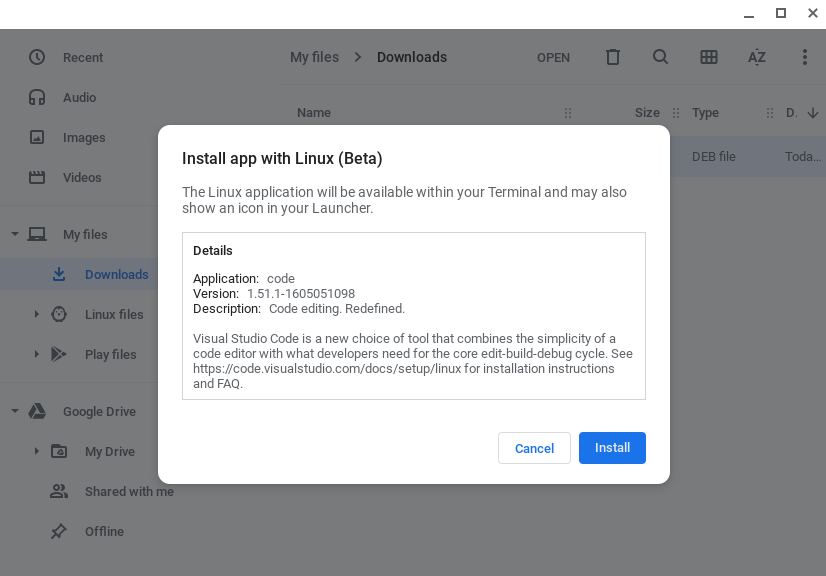
Install VS Code and other dependencies on your Chromebook.
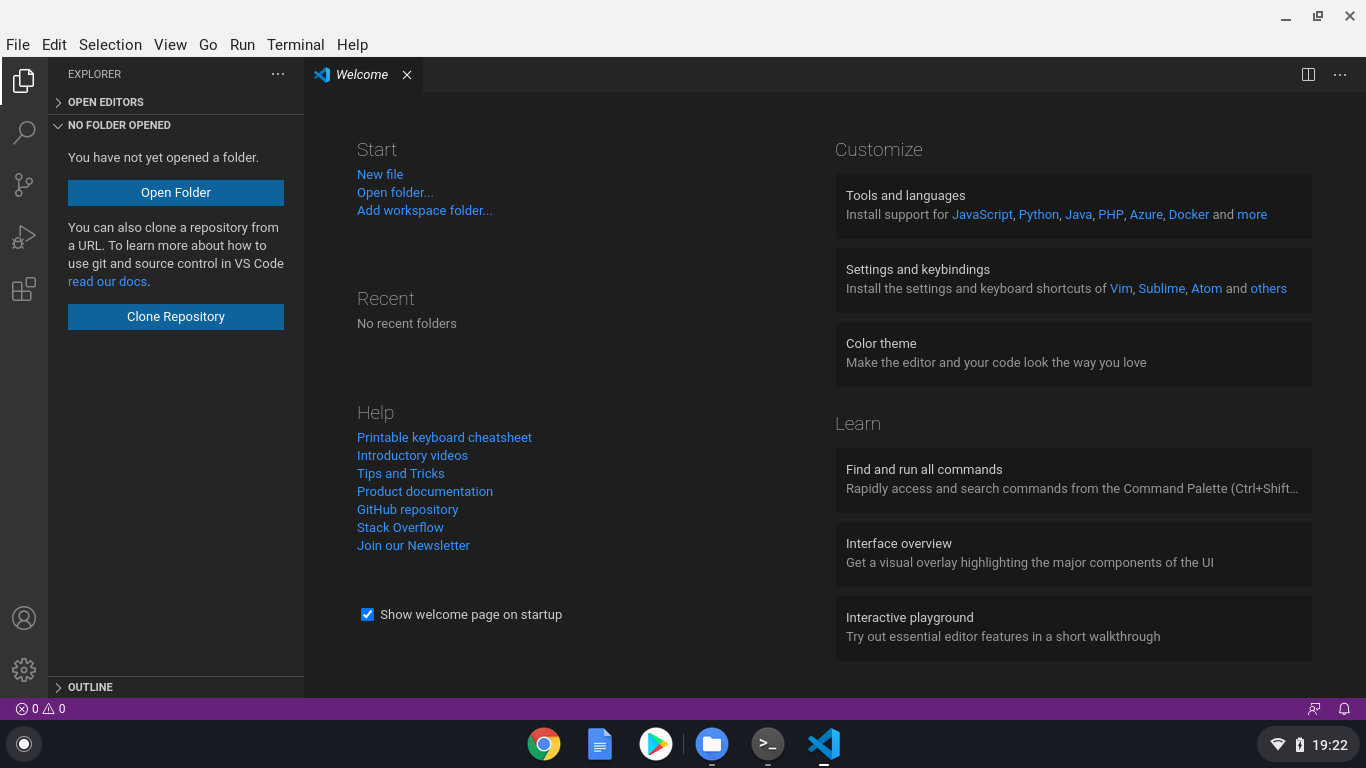
Once the installation is complete, you'll see Visual Studio Code in a folder called Linux Apps in the list of apps (next to your Linux terminal). You can now launch VS Code.

After running VS Code, you're ready to start coding.
If you're new to VS Code and want to know how to use it, here are some references:
-VS Code Introductory Videos: This video explains how to use VS Code to open files and folders, install themes and extensions, set up an editor, and more. -Learn to code with VS Code: The "Learn" section contains some articles, tutorials and videos for those who are new to coding or want to get started.
(Hereafter omitted)
reference
- https://code.visualstudio.com/blogs/2020/12/03/chromebook-get-started
- https://www.webcyou.com/?p=8765
- https://forest.watch.impress.co.jp/docs/serial/yajiuma/1286826.html
Recommended Posts