[PYTHON] Try Deep Learning with FPGA
Introduction
With the release of a project called BNN-PYNQ by Xilinx, even beginners of FPGA can easily execute Deep Learning on FPGA. I bought the board immediately and tried it until the demo was executed.
Prior explanation
PYNQ It seems to be an open source project of Xilinx that makes it easy to use FPGA logic implemented in Xilinx's Zynq from Python.

Normally, when a program is executed by Zynq, it is divided into PS (Processing System) which is executed by CPU and PL (Programmable Logic) which is executed by FPGA. In Deep Learning, is it an image of implementing an application that uses Deep Learning on PS, and implementing convolution processing that can be expected to speed up by parallelization and calculation processing of each layer of the neural network on PL? PYNQ allows you to write PS in Python.
Furthermore, as a major feature, it has the idea of Overlay. Overlay allows you to dynamically change the PL part from Python by treating the PL like a software library. For example, when running MNIST, just load the MNIST Overlay in Python and the MNIST Network will be expanded to PL.
For details on PYNQ, please refer to the following.
- Introduction to Overlays
- Reading PYNQ-Z1 Overlay and controlling FPGA PL from Python
- FPGA Extreme Computing Extra Edition: PYNQ Festival
PYNQ-Z1 Board The board that officially supports the PYNQ project is the PYNQ-Z1 Board. It is equipped with Dual-Core ARM® Cortex®-A9. It also has HDMI IN / OUT, so it seems to be useful for image and video processing.
 PYNQ: PYTHON PRODUCTIVITY ON ZYNQ
Currently, it seems that it is not possible to purchase in Japan, so I purchased it from the Digilent site. The amount is about 30,000 yen including shipping fee, and it arrived in about a week from the order. The delivery was FedEx, but I received a tax invoice (about 1,500 yen) separately from the product. I was able to pay the invoice at the convenience store.
BNN-PYNQ BNN-PYNQ is a project that allows you to run a Binarized Neural Network (BNN) on PYNQ. Deep Learning consists of inference and learning, but only inference is published in BNN-PYNQ.
algorithm
In FPGA, it seems that it is mainstream to use a binarized algorithm due to the limitation of computational resources. Also, by binarizing it, it becomes XNOR calculation and it seems that speedup can be expected. In BNN-PYNQ, CNV and LFC introduced in the paper [FINN: A Framework for Fast, Scalable Binarized Neural Network Inference] are released as PYNQ Overlay. It has been.
For more information on BNN, I think it's best to read the paper. Also, regarding the binarization algorithm, the following will be helpful.
- [Survey]Binarized Neural Networks: Training Deep Neural Networks with Weights and Activations Constrained to +1 or -1
- GPU and Gachinko Battle with Binarized CNN on FPGA (Published Version)
- BinaryNet and Binarized Deep Neural Network
Implementation
BNN-PYNQ implements Deep Learning using a library called xilinx-tiny-cnn. xilinx-tiny-cnn is based on tiny-dnn, and the following points have been changed. BNN-PYNQ uses tiny-dnn.
- added batchnorm layer (currently feedforward only, no training)
- support for offloaded layer
- interleave layer
- binarized layers
The developer of tiny-dnn seems to be Japanese. It's amazing. .. .. Introduction of Deep Learning, tiny-dnn only with C ++ header
Run demo
environment
In order to execute BNN-PYNQ, we prepared the following.
- PYNQ-Z1 Board
- Micro-SD card (8GB or more recommended)
- LAN cable
- USB cable Used for power supply. I think the AC adapter is better.
- Mac mini
Used to burn PYNQ images to SD card and to open PYNQ Jupyter.
Initial setting of PYNQ
Follow the documentation for Getting Started (https://pynq.readthedocs.io/en/latest/1_getting_started.html).
Creating an image
First, download the image. Download from Download and the PYNQ-Z1 image in the procedure of the above document. You can also download it from the Digilent site. (I don't know the difference)
At the time of writing the article, pynq_z1_image_2017_02_10.zip was downloaded.
Unzip the downloaded PYNQ-Z1 Image zip file.
$ tar zxvf pynq_z1_image_2017_02_10.zip
x pynq_z1_image_2017_02_10.img
Install the unzipped image on the SD card. First, check the SD card where you want to install the image.
$ df -ah
Filesystem      Size   Used  Avail Capacity   iused    ifree %iused  Mounted on
/dev/disk1s1    30Gi  2.5Mi   30Gi     1%         0        0  100%   /Volumes/UNTITLED
Format the SD card with FAT32.
$ diskutil eraseDisk FAT32 PYNQ /dev/disk1
Started erase on disk1
Unmounting disk
Creating the partition map
Waiting for the disks to reappear
Formatting disk1s2 as MS-DOS (FAT32) with name PYNQ
512 bytes per physical sector
/dev/rdisk1s2: 62501024 sectors in 1953157 FAT32 clusters (16384 bytes/cluster)
bps=512 spc=32 res=32 nft=2 mid=0xf8 spt=32 hds=255 hid=411648 drv=0x80 bsec=62531584 bspf=15260 rdcl=2 infs=1 bkbs=6
Mounting disk
Finished erase on disk1
Unmount the SD card.
- Do not remove the SD card.
$ diskutil unmountDisk /dev/disk1
Unmount of all volumes on disk1 was successful
Write the previous image to the SD card.
$ sudo dd bs=1024m if=pynq_z1_image_2017_02_10.img of=/dev/rdisk1
Password:
The SD card is now ready!
Start-up
Set the PYNQ Board according to the image below.

⓪ Make sure the power switch is off ① Set JP4 (next to USB HOST) to SD ② Insert the SD card you created earlier ③ Connect the USB cable (power cable) ④ Connect the LAN cable
In my case, I changed JP5 (next to the power switch) to USB in addition to the above because the power is taken from USB. After setting everything ...
⑤ Turn on the power of PYNQ
Jupyter Notebook / SSH In PYNQ, Jupyter Notebook is running. Therefore, you can program Python on Jupyter Notebook by accessing the link below.
http://[PYNQのIPアドレス]:9090
When you first access it, you will see the login page as shown below. The password is "xilinx".

Usage is the same as normal Jupyter.
You can also access PYNQ via SSH. The account name is "xilinx" and the password is "xilinx".
Execute the following command to update PYNQ.
xilinx@pynq:~$ sudo /home/xilinx/scripts/update_pynq.sh
[sudo] password for xilinx:
Info: This operation will overwrite all the example notebooks
Press any key to continue...

Github Repo Detected. Pulling latest changes from upstream..
fatal: A branch named 'master' already exists.
Already on 'master'
Your branch is up-to-date with 'origin/master'.
remote: Counting objects: 13, done.
remote: Compressing objects: 100% (13/13), done.
remote: Total 13 (delta 2), reused 0 (delta 0), pack-reused 0
Unpacking objects: 100% (13/13), done.
From https://github.com/Xilinx/PYNQ
   3ed304a..0309566  master     -> origin/master
Updating 3ed304a..0309566
Fast-forward
 python/pynq/gpio.py            | 210 ++++++++++++++++++++++++++++++++++++++----------------
 python/pynq/iop/iop.py         |  22 +++---
 python/pynq/tests/test_gpio.py |   1 +
 3 files changed, 161 insertions(+), 72 deletions(-)

checking out v1.4

Verifying current SDCard image supports this pynq release.
Completed

Build libsds_lib

cd /home/xilinx/pynq_git/scripts/xlnkutils && make && make install
make[1]: Entering directory '/home/xilinx/pynq_git/scripts/xlnkutils'
gcc wrapper.c -fPIC -shared -rdynamic -o libsds_lib.so -Wl,--whole-archive libsds_lib.a -l pthread  -Wl,--no-whole-archive
make[1]: Leaving directory '/home/xilinx/pynq_git/scripts/xlnkutils'
make[1]: Entering directory '/home/xilinx/pynq_git/scripts/xlnkutils'
cp -avf libsds_lib.so /usr/lib/
‘libsds_lib.so’ -> ‘/usr/lib/libsds_lib.so’
cp -arvf libxlnk_cma.h /usr/include/
‘libxlnk_cma.h’ -> ‘/usr/include/libxlnk_cma.h’
make[1]: Leaving directory '/home/xilinx/pynq_git/scripts/xlnkutils'

Pip install latest pynq python package

python3.6 /home/xilinx/scripts/stop_pl_server.py
rm -rf /opt/python3.6/lib/python3.6/site-packages/pynq/*
cp -rf /home/xilinx/pynq_git/Pynq-Z1/sdk/bin/*.bin /home/xilinx/pynq_git/python/pynq/iop/
cp -rf /home/xilinx/pynq_git/Pynq-Z1/bitstream /home/xilinx/pynq_git/python/pynq/
cd /home/xilinx/pynq_git/python ; sudo -H python3.6 -m pip install --upgrade .
Processing /home/xilinx/pynq_git/python
Installing collected packages: pynq
  Found existing installation: pynq 1.4
    Uninstalling pynq-1.4:
      Successfully uninstalled pynq-1.4
  Running setup.py install for pynq ... done
Successfully installed pynq-1.4
python3.6 /home/xilinx/scripts/start_pl_server.py &

Update scripts and notebooks

cp -arf /home/xilinx/pynq_git/Pynq-Z1/notebooks/* /home/xilinx/jupyter_notebooks
cp -f /home/xilinx/pynq_git/scripts/linux/rc.local /etc/
mkdir -p /home/xilinx/jupyter_notebooks/getting_started
mkdir -p /home/xilinx/jupyter_notebooks/getting_started/images
cp /home/xilinx/pynq_git/docs/source/3_jupyter_notebook.ipynb \
/home/xilinx/jupyter_notebooks/getting_started/1_jupyter_notebook.ipynb
cp /home/xilinx/pynq_git/docs/source/4_programming_python.ipynb \
/home/xilinx/jupyter_notebooks/getting_started/2_programming_python.ipynb
cp /home/xilinx/pynq_git/docs/source/5_programming_onboard.ipynb \
/home/xilinx/jupyter_notebooks/getting_started/3_programming_onboard.ipynb
cp /home/xilinx/pynq_git/docs/source/8_base_overlay_iop.ipynb \
/home/xilinx/jupyter_notebooks/getting_started/4_base_overlay_iop.ipynb
cp /home/xilinx/pynq_git/docs/source/9_base_overlay_video.ipynb \
/home/xilinx/jupyter_notebooks/getting_started/5_base_overlay_video.ipynb
cp /home/xilinx/pynq_git/docs/source/10_base_overlay_audio.ipynb \
/home/xilinx/jupyter_notebooks/getting_started/6_base_overlay_audio.ipynb
chown -R xilinx:xilinx /opt/python3.6/lib/python3.6/site-packages/pynq/*
chmod -R a+rw /home/xilinx/jupyter_notebooks /opt/python3.6/lib/python3.6/site-packages/pynq
chmod -R a+x /home/xilinx/scripts/*
chmod a+x /root/*.sh
chmod a+x /etc/rc.local
chown -R xilinx:xilinx /home/xilinx/jupyter_notebooks /home/xilinx/scripts /opt/python3.6/lib/python3.6/site-packages/pynq
Notebooks     folder is at: /home/xilinx/jupyter_notebooks
Scripts       folder is at: /home/xilinx/scripts

Completed PYNQ update.

xilinx@pynq:~$
It became PYNQ 1.4.
BNN-PYNQ installation
Install BNN-PYNQ. It is described in [Quick Start] of BNN-PYNQ (https://github.com/Xilinx/BNN-PYNQ#quick-start), but you can install it with the following command.
xilinx@pynq:~$ sudo pip3.6 install git+https://github.com/Xilinx/BNN-PYNQ.git
[sudo] password for xilinx:
The directory '/home/xilinx/.cache/pip/http' or its parent directory is not owned by the current user and the cache has been disabled. Please check the permissions and owner of that directory. If executing pip with sudo, you may want sudo's -H flag.
The directory '/home/xilinx/.cache/pip' or its parent directory is not owned by the current user and caching wheels has been disabled. check the permissions and owner of that directory. If executing pip with sudo, you may want sudo's -H flag.
Collecting git+https://github.com/Xilinx/BNN-PYNQ.git
  Cloning https://github.com/Xilinx/BNN-PYNQ.git to /tmp/pip-7pt0wn6t-build
Installing collected packages: bnn-pynq
  Running setup.py install for bnn-pynq ... done
Successfully installed bnn-pynq-0.1
Executing BNN-PYNQ
When the installation is complete, you should have a bnn folder on Jupyter.
Some samples are prepared in this folder.
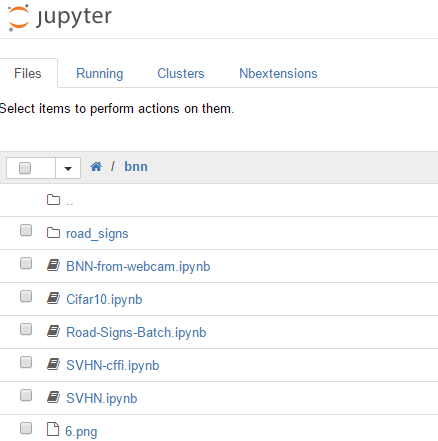
From this, I would like to run Cifar10. Cifar10 is a sample that classifies images into 10 types. For the time being, try [Run All].

Everything was done. As you can see by looking at the source code, Python just loads the image to be inferred and calls classify_image.
The comparison result of speed by CPU and FPGA is displayed in the following place.
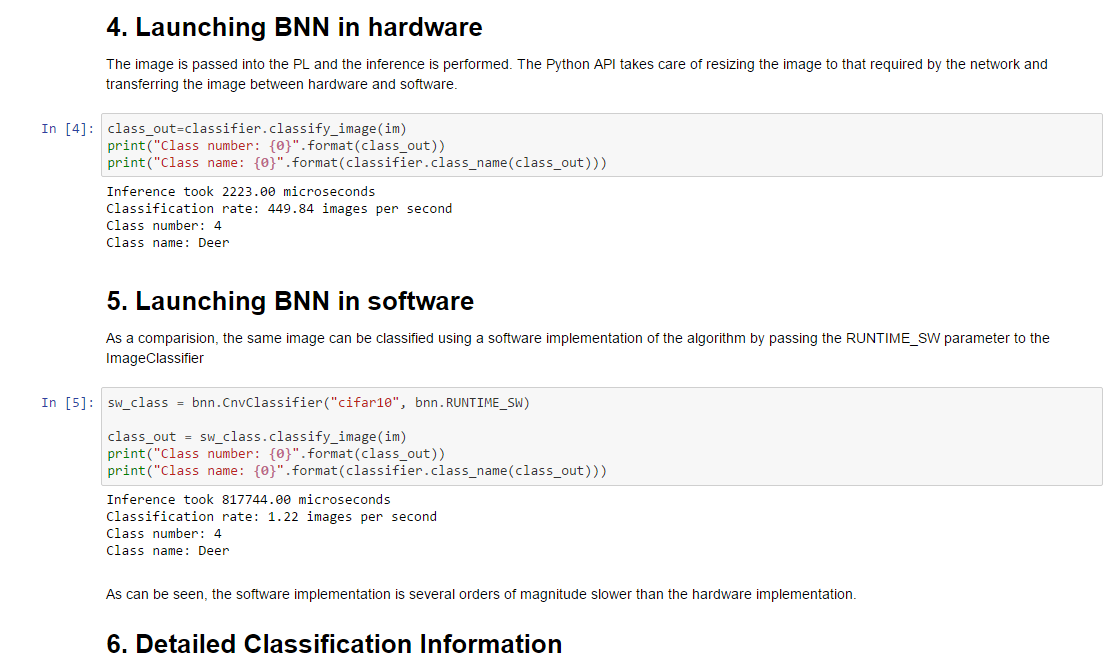
The CPU of PYNQ may be slow, but the difference is more than 360 times.
 4.Launching BNN in hardware → Use FPGA
    2223.00 microseconds
 5.Launching BNN in software → Use only CPU
    817744.00 microseconds
Source code
Let's take a quick look at bnn.py of BNN-PYNQ installed by PIP.
First is the initialization of the CnvClassifier class.
class CnvClassifier:
    def __init__(self, params, runtime=RUNTIME_HW):
        self.bnn = PynqBNN(runtime, network=NETWORK_CNV)
        self.bnn.load_parameters(params)
Here we are instantiating PynqBNN and loading the learning parameters for the network.
Next is the initialization of the PynqBNN class.
class PynqBNN:

    def __init__(self, runtime=RUNTIME_HW, network=NETWORK_CNV, load_overlay=True):
        self.bitstream_name = None
        if runtime == RUNTIME_HW:
            self.bitstream_name="{0}-pynq.bit".format(network)
            self.bitstream_path=os.path.join(BNN_BIT_DIR, self.bitstream_name)
            if PL.bitfile_name != self.bitstream_path:
                if load_overlay:
                    Overlay(self.bitstream_path).download()
                else:
                    raise RuntimeError("Incorrect Overlay loaded")
        dllname = "{0}-{1}.so".format(runtime, network)
        if dllname not in _libraries:
            _libraries[dllname] = _ffi.dlopen(
		os.path.join(BNN_LIB_DIR, dllname))
        self.interface = _libraries[dllname]
        self.num_classes = 0
Here, the Overlay is loaded according to the specified network.
By the way, in ʻOverlay (self.bitstream_path) .download (), it seems that the bitstream file is read and written to the device file / dev / xdevcfg`.
Reading PYNQ-Z1 Overlay and controlling FPGA PL from Python
It is also loading the shared library to access the FPGA. In BNN-PYNQ, by accessing the shared library with cffi.FFI.dlopen, you are using the FPGA via the shared library.
Finally, inference of the PynqBNN class.
    def inference(self, path):
        usecperimage = _ffi.new("float *")
        result_ptr = self.interface.inference(path.encode(), _ffi.NULL, len(self.classes), usecperimage)
        print("Inference took %.2f microseconds" % (usecperimage[0]))
        print("Classification rate: %.2f images per second" % (1000000.0/usecperimage[0]))
        return result_ptr
I'm calling self.interface.inference to infer.
The inference time that was displayed earlier seems to have been printed here.
in conclusion
Currently, only inference, but I was able to perform Deep Learning on the FPGA. It was much faster than the CPU. Also, since it can be used with Python (Jupyter Notebook), I thought it would be easy to embed it in an application and test it.
However, since I haven't touched PL this time, I didn't really feel that I used FPGA. Source code after the shared library is also open to the public, and [Rebuild method](https://github. com / Xilinx / BNN-PYNQ # hardware-design-rebuilt) is also listed, so I would like to take a look.
PYNQ was introduced and it was a very interesting article. Why software engineers should learn FPGAs in 2017 when machine learning / deep learning jobs increase
Recommended Posts