Python: Try using the UI on Pythonista 3 on iPad
Introduction
I bought an iPad Air 4 that just came out. The purpose of use is mainly to create handwritten memos, but in many cases, memos are created while calculating. If the handwritten memo is only text and numbers, you can type it in with a text editor without having to bother to handwrite it, but if you need an explanatory diagram, handwriting is still convenient. When I need to calculate, I used to start Python on the iMac and let it calculate while doing hand-drawn sketches and memos on the iPad, but it's awkward to start the iMac even though I have an iPad Not smart. So, I haven't heard about it recently, but I decided to use Pythonista 3, which I had purchased for the iPad mini 4.
Pythonista 3 includes numpy and matplotlib, which almost certainly work. You should think that other libraries such as scipy and pandas cannot be used. For this reason, code that uses only numpy and matplotlib for complex calculations is practical. It seems that you can also use the GUI, but I haven't used it myself before, so I tried to make a simple calculation program that I use frequently into an app-like one on the iPad. (The point is that I'm happy to buy the iPad Air 4, so I'm going to do various things with it.)
What you are doing
What I'm doing is rewriting the "program for finding the same depth of steep waterways" on my Mac for Pythonista so that it works with the GUI. The original code was posted in "Hatena" below.
https://damyarou.hatenablog.com/entry/2020/10/23/073643
Since this program solves nonlinear equations, scipy is used in the program for Mac, but scipy cannot be used in Pythonista, so the dichotomy part for solving nonlinear equations is rewritten by myself. Furthermore, this is my first challenge, but I tried to finish it using the GUI like an app.
The execution result is as shown in the picture below. Enter the data in the upper four squares and press the button `` `Execute```, and the result will be shown in the lower square.

I referred to the following sites when creating the program.
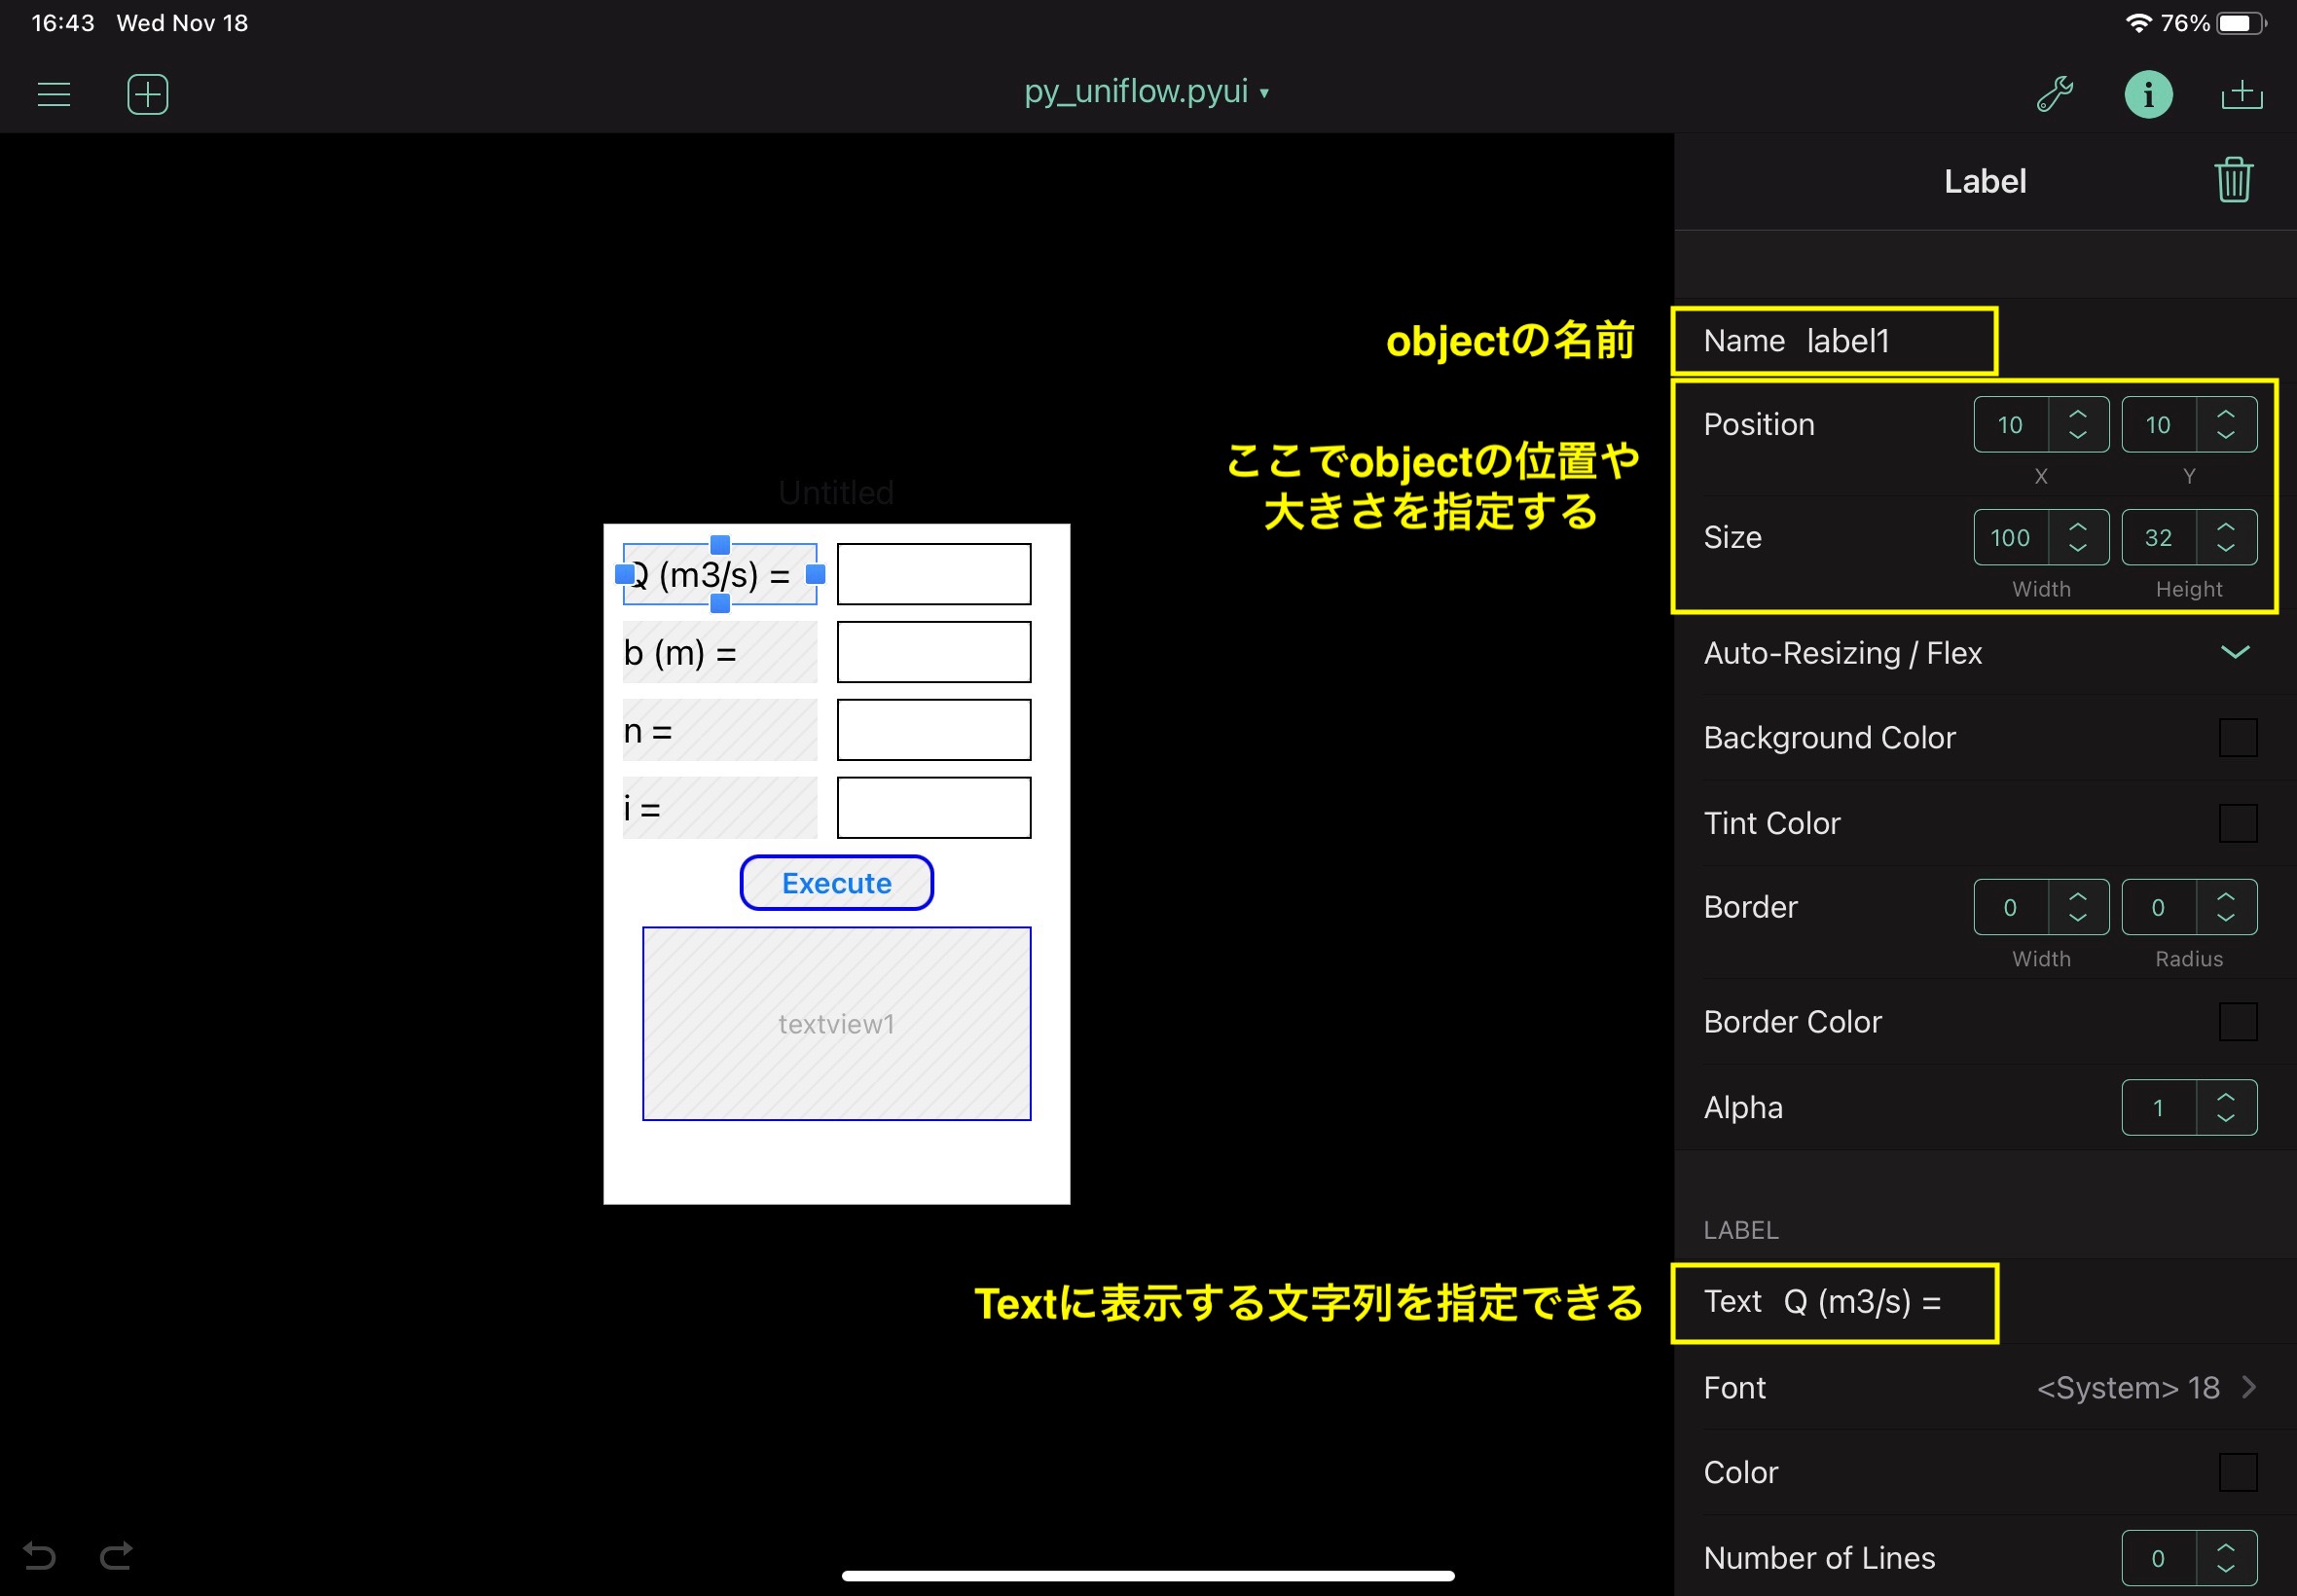
In Pythonista 3, if you specify UI programming, you will have two files. In the photo below. You can see the files py_uniflow.py and py_uniflow.pyui```. "Xxx.py" is a program that writes code, and "xxx.pyui" is a file that defines the layout and characteristics of the UI.

A list of objects that can be placed is displayed by pressing the + mark surrounded by the upper left square on `` `py_uniflow.pyui``` that defines the layout and characteristics of the UI, so select the one you want to use from there. select.

This program uses the following four types of objects.
- label
- textfield
- button
- textview
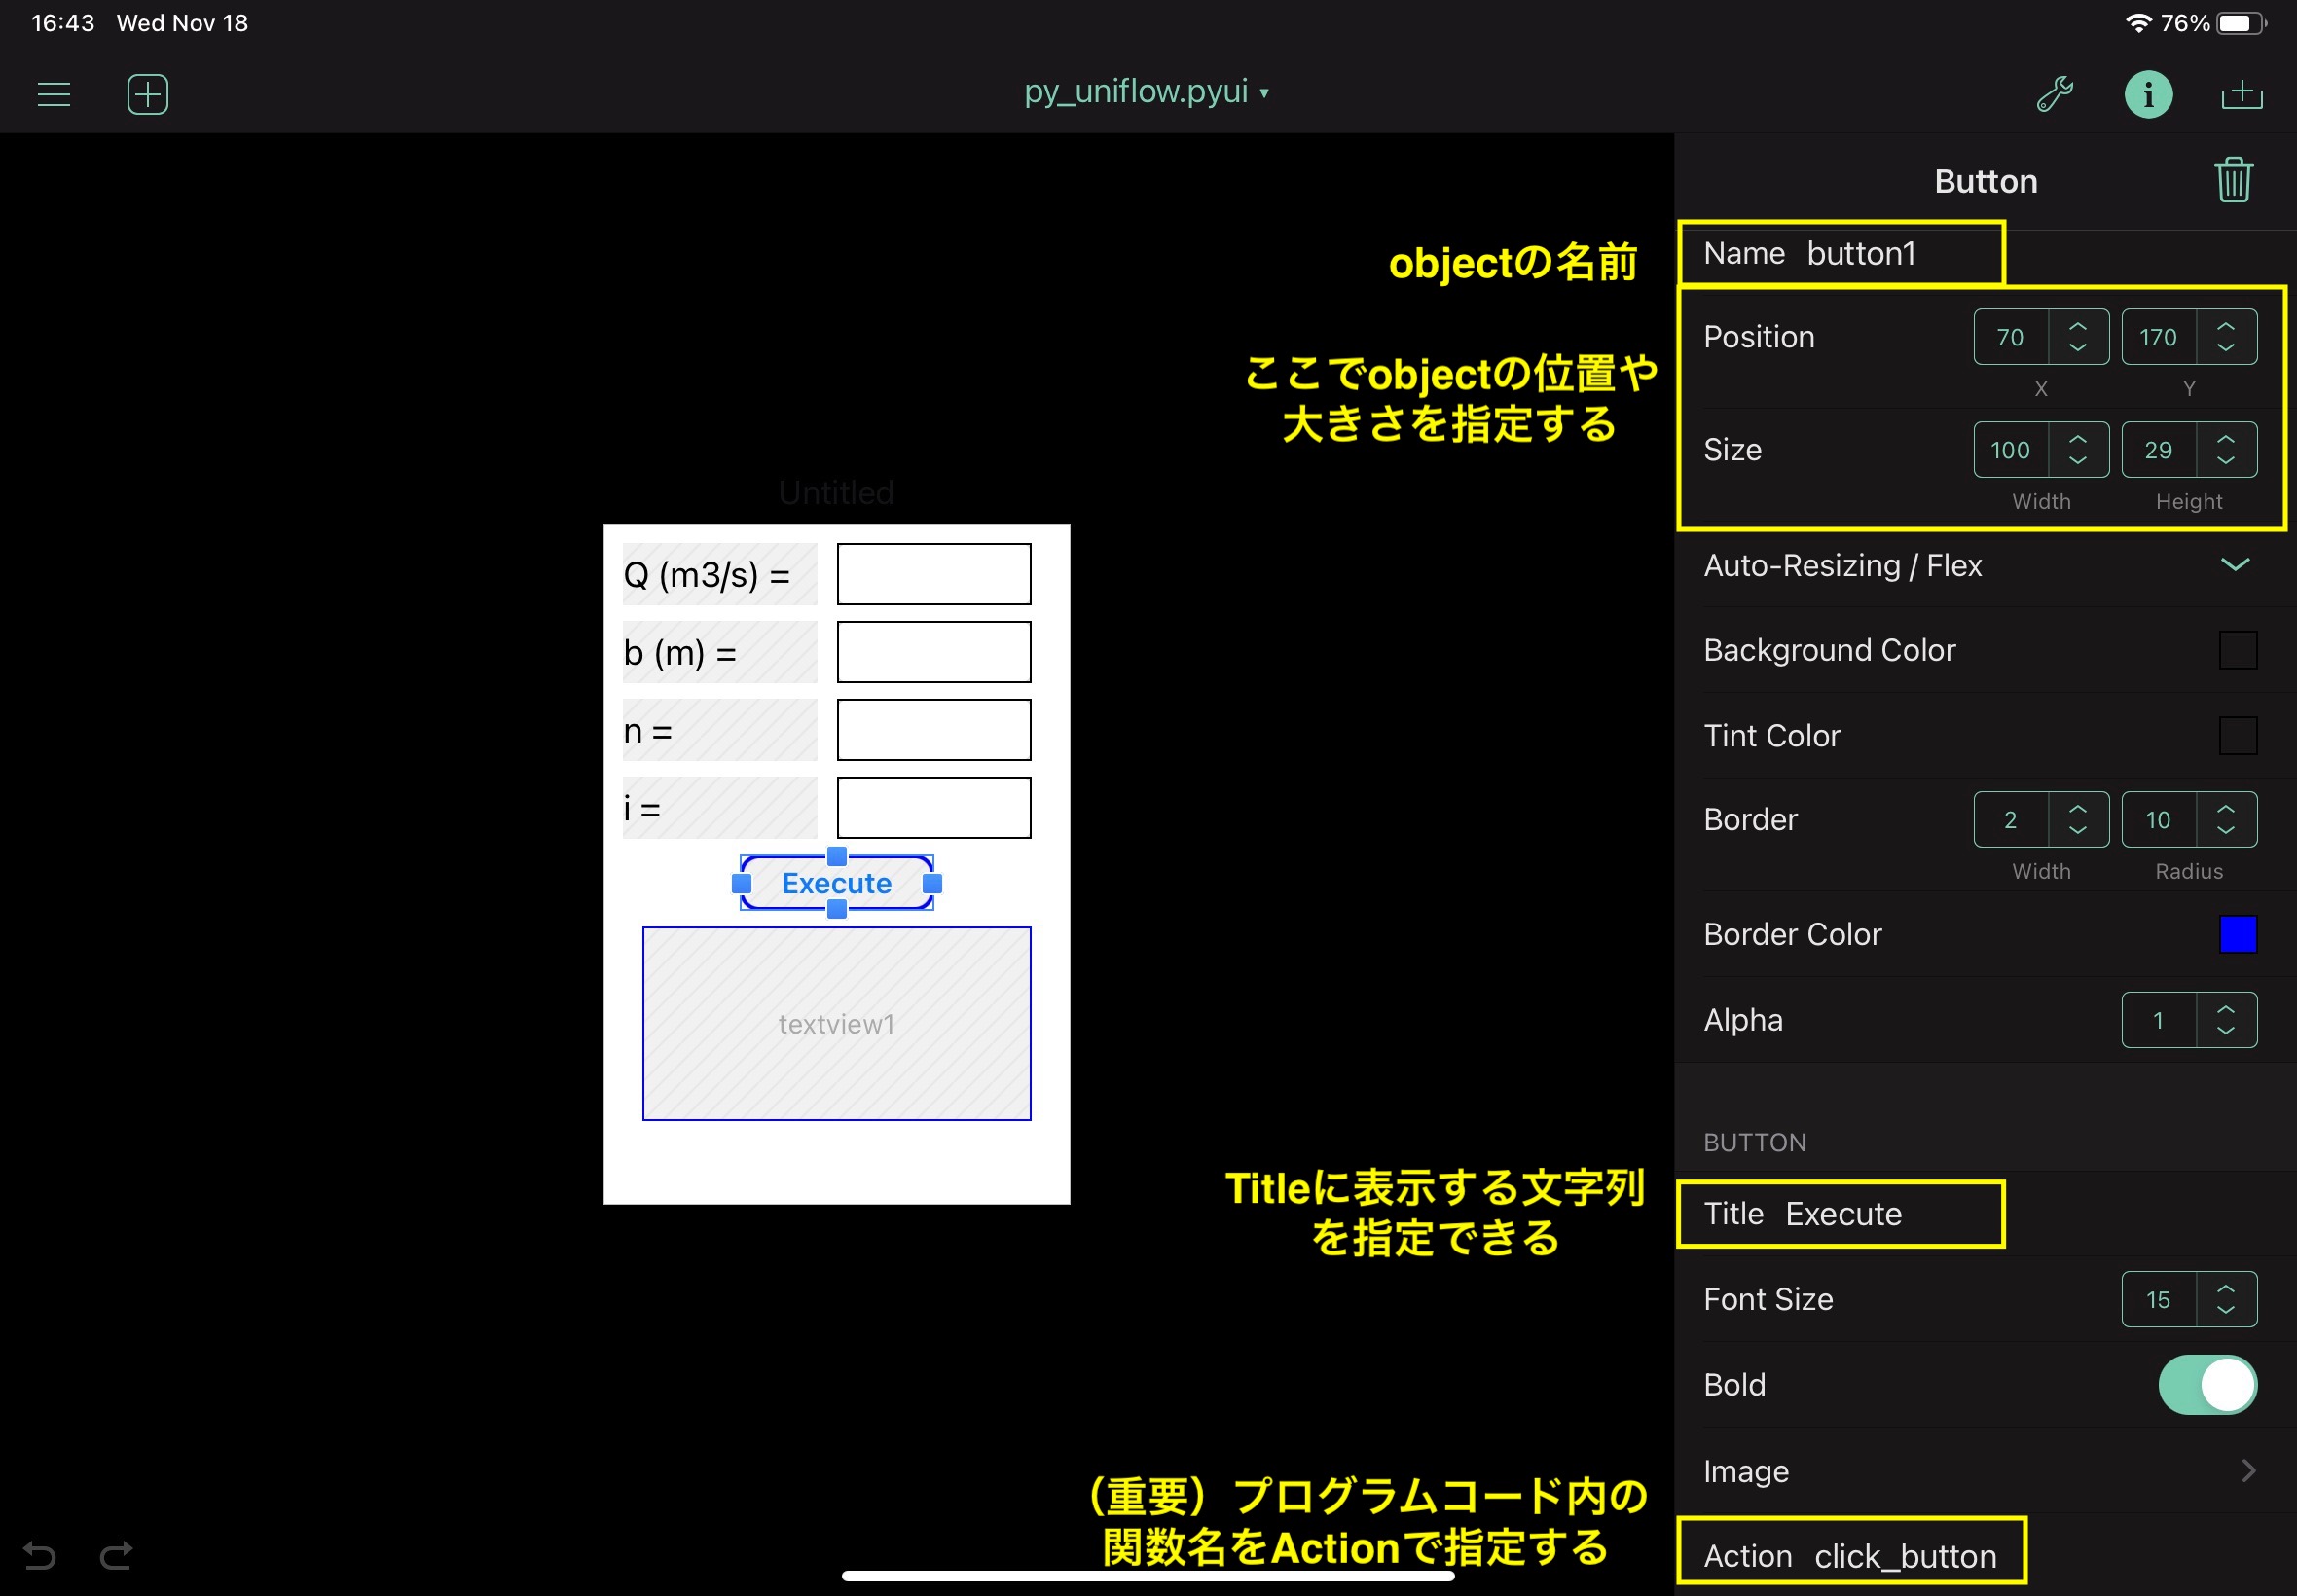
For label and buttan, py_uniflow.Here is a picture of the specified characteristic value in pyui.
```textfield```When```textview```Is just adjusting the position and size, so the photo is omitted.
Finish the program on the iPad like this.
## code
#### **`py_uniflow.The full code for py is below. Function def click_All the main processing is packed in the button.`**
```The full code for py is below. Function def click_All the main processing is packed in the button.
```python
# Calculation of normal depth
import ui
import numpy as np
def cal_hc(q,b,cs):
# critical depth
g=9.8
hc=(q**2/g/b**2/cs)**(1/3)
return hc
def func(h,q,b,n,sn):
f=q-b*h/n*(b*h/(b+2*h))**(2/3)*sn**(1/2)
return f
def bisection(q,b,n,sn,ha,hb):
for k in range(100):
hi=0.5*(ha+hb)
fa=func(ha,q,b,n,sn)
fb=func(hb,q,b,n,sn)
fi=func(hi,q,b,n,sn)
if fa*fi<0: hb=hi
if fb*fi<0: ha=hi
#print(fa,fi,fb)
if np.abs(hb-ha)<1e-10: break
return hi
def click_button(sender):
tf1=v['textfield1']
tf2=v['textfield2']
tf3=v['textfield3']
tf4=v['textfield4']
q=float(tf1.text) # discharge
b=float(tf2.text) # channel width
n=float(tf3.text) # Manning's roughness coefficient
i=float(tf4.text) # invert gradient
theta=np.arctan(i)
sn=np.sin(theta)
cs=np.cos(theta)
ha=0.0 # lower initial value for bisection method
hb=10.0 # upper initial value for bisection method
hn=bisection(q,b,n,sn,ha,hb)
vn=q/b/hn
hc=cal_hc(q,b,cs)
# hn: normal depth
# vn: flow velocity
# hc: critical depth
tv=v['textview1']
ss='ang={0:.3f} deg.\n'.format(np.degrees(theta))
ss=ss+'hn={0:.3f} m\n'.format(hn)
ss=ss+'vn={0:.3f} m/s\n'.format(vn)
ss=ss+'hc={0:.3f} m'.format(hc)
tv.text=ss
v = ui.load_view()
v.name='Uniform flow'
v.present('sheet')
that's all
Recommended Posts