Web application made with Python3.4 + Django (Part.1 Environment construction)
Overview
We will create a web application using Django, Python's web framework. I'm a network engineer and a beginner in web application development, so I am writing from the point of building an infrastructure environment on a zero basis with the intention of summarizing memorandums and procedures.
When I started writing, it turned out to be a huge memo, so I divided it into about 3 times. For the first time, we will mainly introduce the environment construction.
If you want to create a Django app suddenly, start here. [Web application created with Python3.4 + Django (Part.2 application development)] (http://qiita.com/taijijiji/items/343fb56ab94eee28c401)
Python web framework
When it comes to web application development in Japan, Ruby and its web framework, Ruby on Rails, are overwhelmingly famous. Python also has several web frameworks, and here are two of the most famous and popular ones.
Django It is the most used Python web framework. It is an all-in-one web framework that includes a template engine, ORM (a function that maps objects in a database and a program), a test function, and a Japanese localization function. There is also a convenient function that automatically generates a GUI for the administrator of the Web application. Since there are many target files to operate, there is a learning cost, but since it can be operated sufficiently even with actual services, it can be used for a long time.
Flask Flask is a lightweight web framework that seems to be the second most popular after Django. Compared to all-in-one Django, it has a smaller file structure and lower learning costs. It is suitable for developing small-scale Web applications that do not use a database. If you want to create a large-scale web application, you will develop it by combining other Python packages.
In addition to these, Python has web frameworks such as Bottle, Pyramid, Tornade, and Plone. At the moment, the above two seem to be used very often.
This time, we will develop a web application using Django. If you're developing a web application for business use, you can use Django to cover a wide range of features. You may have a hard time at first, but it's a good idea to get used to Django early on. You can also learn the modern web development process with Django.
Environment
First of all, we will proceed with the environment construction. We will proceed with development in the following environment.
--Host machine - MacBookAir OSX Yosemite 10.10.5 --Virtual machine management software - Virtualbox 4.3.18 - Vagrant 1.7.4 --Virtual machine - CentOS 7.1.1503
- Python version
- Python 3.4.3 --Web framework
- Django 1.8.4 --Database
- MariaDB 10.1.7 --Web server
- nginx 1.9.4
Build a virtual machine with Vagrant
Vagrant is useful if you often create or destroy virtual machines for development purposes. Also, by using Vagrant's folder sharing function, you can edit the files on the virtual machine with the familiar text editor of the host machine, so You can easily develop your application.
First, create an appropriate directory.
% mkdir django_apps
% cd django_apps
Next, create a vagrant configuration file with the following command.
% vagrant init
Then, the following file will be created.
% ls -al
total 8
drwxr-xr-x   3 taiji  staff   102  9 18 01:04 ./
drwxr-xr-x  18 taiji  staff   612  9 18 01:03 ../
-rw-r--r--   1 taiji  staff  3016  9 18 01:04 Vagrantfile
Next, download and install the CentOS 7 image published in the Vagrant box. First, download the CentOS 7 box file published at http://www.vagrantbox.es/. (It will take a few minutes to complete.)
% vagrant box add centos70 https://github.com/holms/vagrant-centos7-box/releases/download/7.1.1503.001/CentOS-7.1.1503-x86_64-netboot.box

==> box: Box file was not detected as metadata. Adding it directly...
==> box: Adding box 'centos70' (v0) for provider:
    box: Downloading: https://github.com/holms/vagrant-centos7-box/releases/download/7.1.1503.001/CentOS-7.1.1503-x86_64-netboot.box
==> box: Successfully added box 'centos70' (v0) for 'virtualbox'!
Edit the vagrantfile and change it to something like the following. I've also added network settings for http access to web applications created with Django.
Vagrant.configure(2) do |config|
   config.vm.box = "centos70"
   config.vm.network "private_network", ip: "192.168.33.15"
end
Start the virtual machine with the settings described in the Vagrantfile. (It takes a few minutes to start)
% vagrant up
If the virtual machine starts up normally, you can check it with the following command.
% vagrant status
Current machine states:

default                   running (virtualbox)

The VM is running. To stop this VM, you can run `vagrant halt` to
shut it down forcefully, or you can run `vagrant suspend` to simply
suspend the virtual machine. In either case, to restart it again,
simply run `vagrant up`.
Log in to see if it was created correctly
% vagrant ssh
Welcome to your Vagrant-built virtual machine.
[vagrant@localhost ~]$
Check if folder sharing on the virtual machine and host machine is enabled. By default, the virtual machine's / vagrant directory and the host machine's Vagrantfile directory are shared. Here, we will set up a simple file to test the sharing function.
Virtual machine
[vagrant@localhost ~]$ cd /vagrant/
[vagrant@localhost vagrant]$ date >date.txt
[vagrant@localhost vagrant]$ cat date.txt
Fri Sep 18 04:57:51 UTC 2015

[vagrant@localhost vagrant]$ ls -la
total 12
drwxr-xr-x   1 vagrant vagrant  170 Sep 18 04:57 .
dr-xr-xr-x. 18 root    root    4096 Sep 18 04:48 ..
drwxr-xr-x   1 vagrant vagrant  102 Sep 17 16:11 .vagrant
-rw-r--r--   1 vagrant vagrant 3226 Sep 18 04:44 Vagrantfile
-rw-r--r--   1 vagrant vagrant   29 Sep 18 04:57 date.txt
Host machine
% ls -la
total 16
drwxr-xr-x   5 taiji  staff   170  9 18 13:57 ./
drwxr-xr-x  18 taiji  staff   612  9 18 01:03 ../
drwxr-xr-x   3 taiji  staff   102  9 18 01:11 .vagrant/
-rw-r--r--   1 taiji  staff  3226  9 18 13:44 Vagrantfile
-rw-r--r--   1 taiji  staff    29  9 18 13:57 date.txt

% cat date.txt
Fri Sep 18 04:57:51 UTC 2015
I was able to confirm that the virtual machine was created successfully.
Keep all packages installed on CentOS up to date.
[vagrant@localhost vagrant]$ sudo yum update -y
Now the virtual machine is ready.
In the next chapter, Python and Django for virtual machines Will be installed.
Install Python3 series
On CentOS7, Python 2.7.5 is installed by default.
[vagrant@localhost vagrant]$ python --version
Python 2.7.5
Here, we will install Python 3.4.3, which is the latest version of Python3 series.
[vagrant@localhost ~]$ cd /usr/local/src
[vagrant@localhost src]$ sudo wget https://www.python.org/ftp/python/3.4.3/Python-3.4.3.tgz
[vagrant@localhost src]$ sudo tar xzvf Python-3.4.3.tgz
[vagrant@localhost src]$ ls -al
total 19108
drwxr-xr-x.  3 root   root         48 Sep 18 05:05 .
drwxr-xr-x. 12 root   root       4096 Jul 14 05:11 ..
drwxrwxr-x  15 veewee veewee     4096 Feb 25  2015 Python-3.4.3
-rw-r--r--   1 root   root   19554643 Feb 25  2015 Python-3.4.3.tgz
[vagrant@localhost src]$ cd Python-3.4.3
[vagrant@localhost Python-3.4.3]$ sudo ./configure
[vagrant@localhost Python-3.4.3]$ sudo make
[vagrant@localhost Python-3.4.3]$ sudo make altinstall
You can see that python3.4 is installed under / usr / local / bin /.
[vagrant@localhost Python-3.4.3]$ ls -al /usr/local/bin
total 22356
drwxr-xr-x.  2 root root     4096 Sep 18 05:09 .
drwxr-xr-x. 12 root root     4096 Jul 14 05:11 ..
-rwxr-xr-x   1 root root      101 Sep 18 05:09 2to3-3.4
-rwxr-xr-x   1 root root      241 Sep 18 05:09 easy_install-3.4
-rwxr-xr-x   1 root root       99 Sep 18 05:09 idle3.4
-rwxr-xr-x   1 root root      213 Sep 18 05:09 pip3.4
-rwxr-xr-x   1 root root       84 Sep 18 05:09 pydoc3.4
-rwxr-xr-x   2 root root 11423753 Sep 18 05:09 python3.4
-rwxr-xr-x   2 root root 11423753 Sep 18 05:09 python3.4m
-rwxr-xr-x   1 root root     3032 Sep 18 05:09 python3.4m-config
-rwxr-xr-x   1 root root      236 Sep 18 05:09 pyvenv-3.4
Check the version of Python installed.
[vagrant@localhost ~]$ /usr/local/bin/python3.4 --version
Python 3.4.3
Put the PATH of the Python 3.4.3 command.
[vagrant@localhost Python-3.4.3]$ sudo ln -s /usr/local/bin/python3.4 /usr/bin/python3
By doing this, you can call Python3.4.3 with the "python3" command, so you can use Python2 series or Python3 series properly according to the purpose.
[vagrant@localhost Python-3.4.3]$ python3 --version
Python 3.4.3
[vagrant@localhost Python-3.4.3]$ python --version
Python 2.7.5
install pip
Build an environment that uses pip, the Python package manager. Pip is installed as a default function from 2.7.9 or later on Python2 series and from 3.4 or later on Python3 series.
[vagrant@localhost ~]$ python3 -m pip list
You are using pip version 6.0.8, however version 7.1.2 is available.
You should consider upgrading via the 'pip install --upgrade pip' command.
pip (6.0.8)
setuptools (12.0.5)
Since the version of pip seems to be old, upgrade pip with the following command.
[vagrant@localhost ~]$ sudo python3 -m pip install --upgrade pip

[vagrawnt@localhost ~]$ sudo python3 -m pip --version
pip 7.1.2 from /usr/local/lib/python3.4/site-packages (python 3.4)
It's a hassle to type the command "python3 -m pip" every time you use pip, so Here, the symbolic link calls the Python3 pip with the "pip3" command.
[vagrant@localhost Python-3.4.3]$ sudo ln -s /usr/local/bin/pip3.4  /usr/bin/pip3

[vagrant@localhost Python-3.4.3]$ pip3 --version
pip 7.1.2 from /usr/local/lib/python3.4/site-packages (python 3.4)
Reference: Install pip on Python 2.7.8 or earlier, Python 3.3 or earlier
For Python 2.7.8 and earlier, Python 3.3 and earlier, pip needs to be installed separately. In that case, please try the following procedure. This time, we will use Python 3.4 series, so you don't have to execute it.
$ sudo wget https://bootstrap.pypa.io/get-pip.py

#Install as root user
$ sudo python get-pip.py

#Installed as non-root user
$ python get-pip.py –user
Build a virtual execution environment with pyvenv
Next, build the pyvenv environment. pyenv is a virtual execution environment that allows you to switch the package to be used and the version of python for each project. In the development stage, multiple function implementations are often developed in parallel, By using the virtual execution environment, you can switch the development environment for each application and test it. You can articulate the package for the application to work. In Python2 series, it was necessary to install virtualenv etc., In Python3 series, it is provided as a default function called pyvenv.
First, create a directory for allocation in the / vagrant directory.
[vagrant@localhost ~]$ cd /vagrant/
[vagrant@localhost vagrant]$ mkdir django_apps
[vagrant@localhost vagrant]$ cd django_apps/
Next, build a virtual environment with pyvenv in the created directory. At this time, Python 3.4.3 should be set as the default.
[vagrant@localhost app1]$ pyvenv-3.4 venv_app1

[vagrant@localhost django_apps]$ ls -la
total 0
drwxr-xr-x 1 vagrant vagrant 102 Sep 18 06:05 .
drwxr-xr-x 1 vagrant vagrant 204 Sep 18 06:02 ..
drwxr-xr-x 1 vagrant vagrant 238 Sep 18 06:04 venv_app1
Load it into the created virtual execution environment.
[vagrant@localhost django_apps]$ source venv_app1/bin/activate
(venv_app1) [vagrant@localhost django_apps]$
We were able to build a dedicated virtual execution environment. Let's check the status of the virtual environment.
(venv_app1) [vagrant@localhost django_apps]$ python --version
Python 3.4.3
(venv_app1) [vagrant@localhost django_apps]$ which python
/vagrant/django_apps/venv_app1/bin/python
In this way, you can see that a new Python execution environment has been created under the created venv_app1 directory. Similarly, you can see that pip is created under the venv_app1 directory.
(venv_app1) [vagrant@localhost django_apps]$ pip --version
pip 6.0.8 from /vagrant/django_apps/venv_app1/lib/python3.4/site-packages (python 3.4)
The version of pip in the pyvenv environment is also old, so upgrade it.
(venv_app1) [vagrant@localhost django_apps]$ pip install --upgrade pip
To leave the virtual execution environment, do the following.
(env_app1)[vagrant@localhost app1]$ deactivate
[vagrant@localhost app1]$
To log in to the virtual execution environment again, enter the same command as when you created it.
[vagrant@localhost django_apps]$ source venv_app1/bin/activate
(venv_app1) [vagrant@localhost django_apps]$
In the following chapters, we will proceed using the created virtual execution environment "venv_app1".
Install MriaDB
MariaDB is a project launched by forking MySQL and is functionally compatible with MySQL. You can use database manipulation commands and Python packages similar to MySQL.
I will install MariaDB.
(venv_app1) [vagrant@localhost django_apps]$ sudo yum install -y mariadb-server mariadb-devel
Install the mysqlclient package to work with MariaDB from a Python program.
(venv_app1) [vagrant@localhost django_apps]$ pip install mysqlclient
Start MariaDB
(venv_app1) [vagrant@localhost django_apps]$ sudo systemctl start mariadb
(venv_app1) [vagrant@localhost django_apps]$ sudo systemctl enable mariadb
Log in to MariaDB as the root user.
(venv_app1) [vagrant@localhost django_apps]$  mysql -u root

Welcome to the MariaDB monitor.  Commands end with ; or \g.
Your MariaDB connection id is 2
Server version: 5.5.44-MariaDB MariaDB Server

Copyright (c) 2000, 2015, Oracle, MariaDB Corporation Ab and others.

Type 'help;' or '\h' for help. Type '\c' to clear the current input statement.
Create a new database for the Web application created this time. Here, we will create a database named "app1_db".
MariaDB [(none)]> CREATE DATABASE app1_db CHARACTER SET utf8;

Query OK, 1 row affected (0.00 sec)
Create a user who can access the created database. Here we will create a user named "app1_user". The password is set to "app1_passwd".
MariaDB [(none)]> GRANT ALL PRIVILEGES ON app1_db.* TO app1_user@localhost IDENTIFIED BY 'app1_passwd';

Query OK, 0 rows affected (0.00 sec)
Exit the MySQL prompt once.
MariaDB [(none)]> exit
Bye
Log in as the new user to verify that the database and user were created successfully.
# -Be careful not to put a space after p
(venv_app1) [vagrant@localhost django_apps]$  mysql -u app1_user -papp1_passwd

MariaDB [(none)]> SHOW DATABASES;
+--------------------+
| Database           |
+--------------------+
| information_schema |
| app1_db            |
| test               |
+--------------------+
3 rows in set (0.00 sec)
I was able to confirm that app1_db was created successfully.
This completes the MariaDB initial setup. When using Django, you don't often hit MariaDB commands directly. When developing a web application, you can use Django's ORM (Object-Relational Mapping) function. The database will be dynamically reflected based on the contents written in the configuration file called Models.py.
install nginx
We will install nginx as a web server.
Add the nginx yum repository to the virtual machine.
(venv_app1) [vagrant@localhost django_apps]$ cd /etc/yum.repos.d/

(venv_app1) [vagrant@localhost django_apps]$ sudo vi nginx.repo

#Described below
##Here, it is described to install the latest version.
[nginx]
name=nginx repo
baseurl=http://nginx.org/packages/mainline/centos/$releasever/$basearch/
gpgcheck=0
enabled=1
Confirm that nginx.repo has been created.
(venv_app1) [vagrant@localhost yum.repos.d]$ ls -al
total 44
drwxr-xr-x.  2 root root 4096 Sep 18 09:58 .
drwxr-xr-x. 79 root root 8192 Sep 18 06:33 ..
-rw-r--r--.  1 root root 1664 Mar 31 22:27 CentOS-Base.repo
-rw-r--r--.  1 root root 1309 Mar 31 22:27 CentOS-CR.repo
-rw-r--r--.  1 root root  649 Mar 31 22:27 CentOS-Debuginfo.repo
-rw-r--r--.  1 root root 1331 Mar 31 22:27 CentOS-Sources.repo
-rw-r--r--.  1 root root 1002 Mar 31 22:27 CentOS-Vault.repo
-rw-r--r--.  1 root root  290 Mar 31 22:27 CentOS-fasttrack.repo
-rw-r--r--   1 root root  109 Sep 18 09:58 nginx.repo
Then install nginx with the yum command.
(venv_app1) [vagrant@localhost yum.repos.d]$ sudo yum install -y nginx
Use the nginx command to verify that the installation was successful.
(venv_app1) [vagrant@localhost yum.repos.d]$ nginx -v
nginx version: nginx/1.9.4
Start nginx.
(venv_app1) [vagrant@localhost yum.repos.d]$ sudo systemctl start nginx.service
(venv_app1) [vagrant@localhost yum.repos.d]$ sudo systemctl enable nginx.service
nginx is set in the following 2 files. By default, "index.html" under the "/ usr / share / nginx / html" directory is set to be accessible to the Web.
(venv_app1) [vagrant@localhost yum.repos.d]$ less /etc/nginx/nginx.conf

user  nginx;
worker_processes  1;

error_log  /var/log/nginx/error.log warn;
pid        /var/run/nginx.pid;


events {
    worker_connections  1024;
}


http {
    include       /etc/nginx/mime.types;
    default_type  application/octet-stream;

    log_format  main  '$remote_addr - $remote_user [$time_local] "$request" '
                      '$status $body_bytes_sent "$http_referer" '
                      '"$http_user_agent" "$http_x_forwarded_for"';

    access_log  /var/log/nginx/access.log  main;

    sendfile        on;
    #tcp_nopush     on;

    keepalive_timeout  65;

    #gzip  on;

    include /etc/nginx/conf.d/*.conf;
}
(venv_app1) [vagrant@localhost yum.repos.d]$ less /etc/nginx/conf.d/default.conf
server {
    listen       80;
    server_name  localhost;

    #charset koi8-r;
    #access_log  /var/log/nginx/log/host.access.log  main;

    location / {
        root   /usr/share/nginx/html;
        index  index.html index.htm;
    }

    #error_page  404              /404.html;

    # redirect server error pages to the static page /50x.html
    #
    error_page   500 502 503 504  /50x.html;
    location = /50x.html {
        root   /usr/share/nginx/html;
    }

    # proxy the PHP scripts to Apache listening on 127.0.0.1:80
    #
    #location ~ \.php$ {
    #    proxy_pass   http://127.0.0.1;
    #}

    # pass the PHP scripts to FastCGI server listening on 127.0.0.1:9000
    #
    #location ~ \.php$ {
    #    root           html;
    #    fastcgi_pass   127.0.0.1:9000;
    #    fastcgi_index  index.php;
    #    fastcgi_param  SCRIPT_FILENAME  /scripts$fastcgi_script_name;
    #    include        fastcgi_params;
    #}

    # deny access to .htaccess files, if Apache's document root
    # concurs with nginx's one
    #
    #location ~ /\.ht {
    #    deny  all;
    #}
}
Let's check if you can access index.html provided by default via HTTP.
Before checking first, put firewalld in a stopped state. (Because the filter function will stop completely, please be careful when implementing it in a production environment.)
(venv_app1) [vagrant@localhost yum.repos.d]$ sudo systemctl stop firewalld
(venv_app1) [vagrant@localhost yum.repos.d]$ sudo systemctl disable firawalld
Here, you can access it from the web browser of the host machine by using the IP address specified in the private_network business of the Vagrantfile.
http://192.168.33.15/
If successful, the following screen will be displayed in the web browser.

This completes the construction of nginx.
Install Django
Install the Django package using pip. By using pip, you can easily install it as follows.
(venv_app1) [vagrant@localhost django_apps]$ pip install django

(venv_app1) [vagrant@localhost django_apps]$ pip list
Django (1.8.4)
pip (7.1.2)
setuptools (12.0.5)
install uWSGI
As an interface (WSGI: called Web Server Gateway Interface) that links a Web application and a Web server developed with Django Use uWSGI.
Install the uWSGI package using pip.
(venv_app1) [vagrant@localhost django_apps]$ pip install uwsgi
(venv_app1) [vagrant@localhost django_apps]$ pip list
Django (1.8.4)
mysqlclient (1.3.6)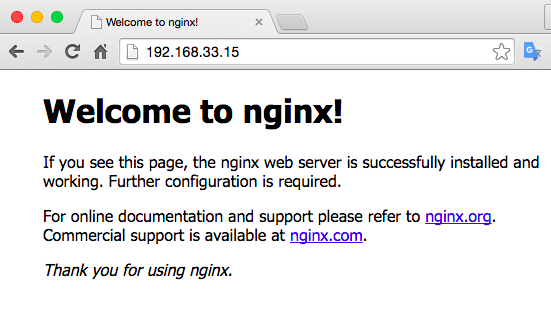
pip (7.1.2)
setuptools (12.0.5)
uWSGI (2.0.11.1)
It takes a little more configuration to actually link the Django application with the web server, I will explain the procedure when creating a web application with Django.
The environment construction is now complete. From the next time, I'll finally use Django to develop applications.
[Web application created with Python3.4 + Django (application development)] (http://qiita.com/taijijiji/items/343fb56ab94eee28c401)
Recommended Posts