Exécutez Django sur PythonAnywhere
Chaque version
- Python: 3.4.0
- Django: 1.8.2
Créer virtualenv pour python3
Terminal ouvert.

Créez une virtualenv sur le terminal.
08:20 ~ $ virtualenv --python="python3" env
Running virtualenv with interpreter /usr/bin/python3
Using base prefix '/usr'
New python executable in env/bin/python3
Also creating executable in env/bin/python
Installing setuptools, pip, wheel...done.
08:21 ~ $
Activez virtualenv.
08:21 ~ $ source env/bin/activate
(env)08:21 ~ $
installer django
Installez django avec pip install django.
(env)08:21 ~ $ pip install django
Collecting django
Installing collected packages: django
Successfully installed django-1.8.2
Faire un projet
Créez un projet avec python manage.py startproject PROJECTNAME.
(env)08:27 ~ $ django-admin startproject djexample
(env)08:27 ~ $
syncdb
Accédez au répertoire du projet que vous avez créé.
(env)08:34 ~ $ cd djexample/
Syncdb pour le moment.
(env)08:35 ~/djexample $ python manage.py syncdb
/home/TakesxiSximada/env/lib/python3.4/site-packages/django/core/management/commands/syncdb.py:24: RemovedInDjango19Warning: The sync
db command will be removed in Django 1.9
  warnings.warn("The syncdb command will be removed in Django 1.9", RemovedInDjango19Warning)
Operations to perform:
  Synchronize unmigrated apps: staticfiles, messages
  Apply all migrations: auth, admin, contenttypes, sessions
Synchronizing apps without migrations:
  Creating tables...
    Running deferred SQL...
  Installing custom SQL...
Running migrations:
  No migrations to apply.
You have installed Django's auth system, and don't have any superusers defined.
Would you like to create one now? (yes/no): yes
Username (leave blank to use 'takesxisximada'): ADMINISTORATOR_NAME
Email address: [email protected]
Password:
Password (again):
Superuser created successfully.
(env)08:35 ~/djexample $
Publier sur le Web
Paramètres de l'application
Définissez le nom de domaine. (Il ne peut pas être modifié s'il s'agit d'un plan gratuit.)

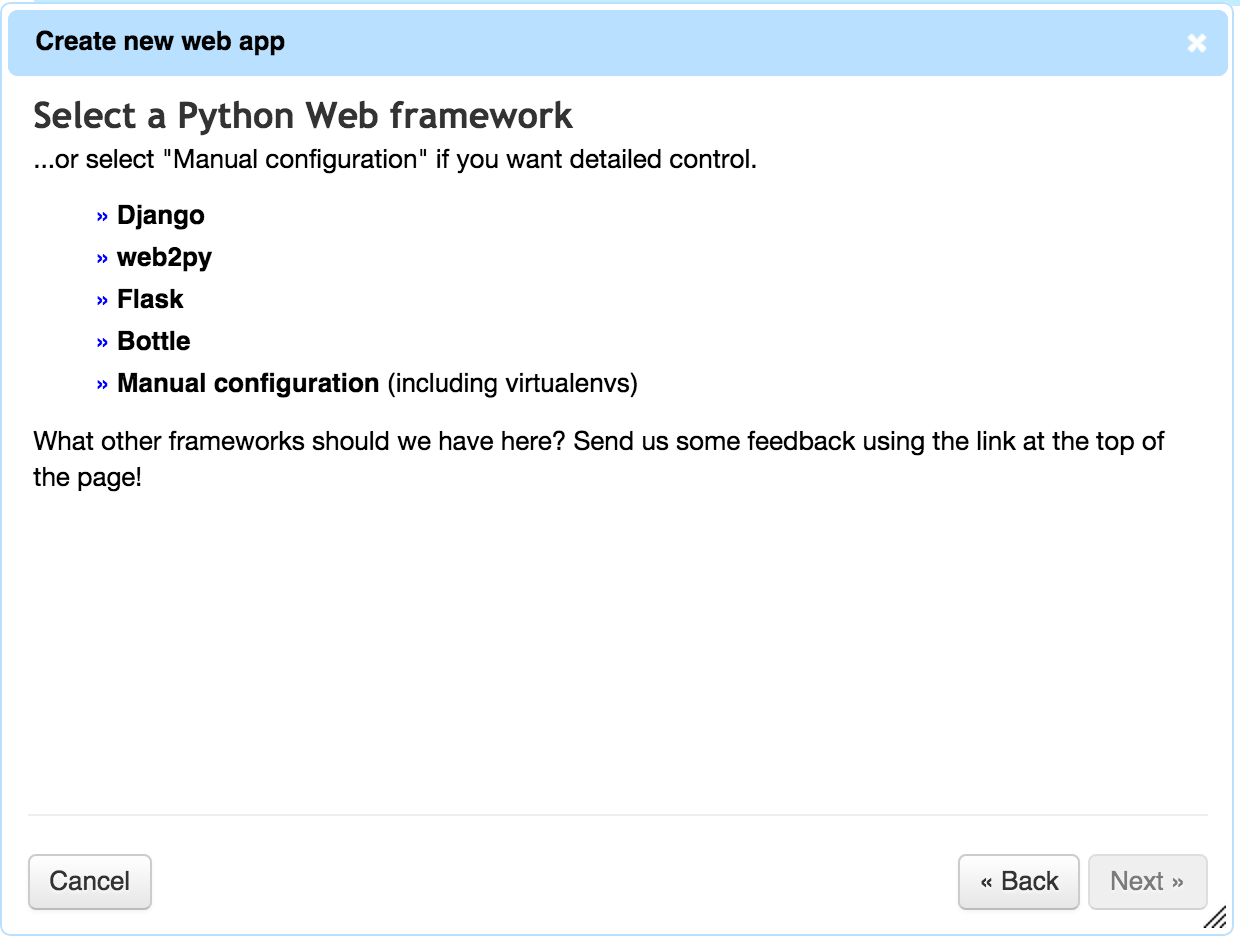
Sélectionnez le framework Web que vous souhaitez utiliser.
Il y a Django, mais si vous le sélectionnez, ce sera la série Python 2.7 et la série Django 1.6, alors sélectionnez Configuration manuelle.
Sélectionnez la version Python. Python 3.4 est une option.

Je vais appuyer sur Suivant pour le moment.

À ce stade, le nouvel exemple dj peut être géré par Python Anywhere.
paramètres de virtualenv
Vous pouvez configurer pour utiliser votre propre virtualenv en appuyant sur ʻEnter path to a virtualenv, if disired`.

Comme ça.

paramètres de fichier wsgi
Le fichier wsgi à lire semble être fixe, alors remplacez le fichier wsgi sous / var / www.
Sauvegardez les anciens fichiers pour le moment.
(env)08:55 ~/djexample $ cp /var/www/takesxisximada_pythonanywhere_com_wsgi.py /var/www/takesxisximada_pythonanywhere_com_wsgi.py.old
(env)08:55 ~/djexample $
Copiez wsgi.py de djexample avec le même nom que le fichier à l'origine sous / var / www.
(env)08:55 ~/djexample $ cp djexample/wsgi.py /var/www/takesxisximada_pythonanywhere_com_wsgi.py
(env)08:56 ~/djexample $
Puis réécrivez comme suit.
"""
WSGI config for djexample project.
It exposes the WSGI callable as a module-level variable named ``application``.
For more information on this file, see
https://docs.djangoproject.com/en/1.8/howto/deployment/wsgi/
"""
import os
import sys
from django.core.wsgi import get_wsgi_application
path = '/home/TakesxiSximada/djexample'
if path not in sys.path:
    sys.path.append(path)

os.environ['DJANGO_SETTINGS_MODULE'] = 'djexample.settings'
application = get_wsgi_application()
En fait ajouté ce qui suit.
path = '/home/TakesxiSximada/djexample'
if path not in sys.path:
    sys.path.append(path)

os.environ['DJANGO_SETTINGS_MODULE'] = 'djexample.settings'
Les fichiers WSGI peuvent également être réécrits à partir du WEB.

Ajouter des paramètres de fichier statique
Ajout de STATIC_ROOT à settings.py
(env)09:47 ~/djexample $ tail djexample/settings.py
USE_L10N = True

USE_TZ = True

# Static files (CSS, JavaScript, Images)
# https://docs.djangoproject.com/en/1.8/howto/static-files/
STATIC_URL = '/static/'
STATIC_ROOT = os.path.join(BASE_DIR, 'static')
Ajout de paramètres de fichier statique à urls.py
(env)09:48 ~/djexample $ cat djexample/urls.py
from django.conf.urls import include, url
from django.contrib import admin
from django.conf import settings
from django.conf.urls.static import static
urlpatterns = [
    url(r'^admin/', include(admin.site.urls)),
] + static(settings.STATIC_URL, document_root=settings.STATIC_ROOT)
recueillir statique
Collectez le fichier statique avec cllect static.
(env)09:50 ~/djexample $ python manage.py collectstatic
You have requested to collect static files at the destination
location as specified in your settings:
    /home/TakesxiSximada/djexample/static
This will overwrite existing files!
Are you sure you want to do this?
Type 'yes' to continue, or 'no' to cancel: yes
~réduction~
(env)09:50 ~/djexample $
Accéder à l'écran de gestion
Redémarrez l'application

Regarde
Accédez à http://takesxisximada.pythonanywhere.com/admin.

Yay.
Recommended Posts