[PYTHON] Use camera calibration file with OpenCvSharp4
Introduction
Good evening I calibrated the WEB camera using OpenCvSharp4, so I will leave it as a memorandum. I still don't understand the theory and theory of calibration itself, so the code just worked. .. ..
environment
WEB camera: FullHD 1080P (2 million pixel camera) Calibration file creation: python (python-opencv) Camera lens distortion calculation: C # (opencvsharp4.windows)
Creating a camera calibration yaml file with python
I really wanted to do calibration calculation with Opencv sharp. It is difficult to divert the 3 series samples, and replacing it with the 4 series did not seem to be competitive at my level, so I will calmly calculate with python with samples.
So, create and execute the following code by referring to here. Most of the core part is copy. .. .. No, I really appreciate it.
CalcCalibration.py
import os
import sys
import numpy as np
import cv2
from time import sleep
from datetime import datetime

FILE_NAME = "calib.yml"
#Number of reference images
REFERENCE_IMG = 40
#The size of one side of the square[cm]
SQUARE_SIZE = 2.0
#Number of intersection points
PATTERN_SIZE = (8, 13)


def main():
    """
Main function
    :return:
    """
    calc_camera()  #Calculate camera distortion


def calc_camera():
    """
Function to calculate camera distortion
    :return:
    """
    pattern_points = np.zeros((np.prod(PATTERN_SIZE), 3), np.float32)  #Chess board (X,Y,Z) Coordinate specification(Z=0)
    pattern_points[:, :2] = np.indices(PATTERN_SIZE).T.reshape(-1, 2)
    pattern_points *= SQUARE_SIZE
    obj_points = []
    img_points = []

    capture = cv2.VideoCapture(0)
    #Specify the resolution
    #Set the width of the camera image to 1920
    capture.set(cv2.CAP_PROP_FRAME_WIDTH, 1920)
    #Set the vertical width of the camera image to 1080
    capture.set(cv2.CAP_PROP_FRAME_HEIGHT, 1080)

    while len(obj_points) < REFERENCE_IMG:
        #Image acquisition
        ret, img = capture.read()
        height = img.shape[0]
        width = img.shape[1]

        gray = cv2.cvtColor(img, cv2.COLOR_BGR2GRAY)

        #Detects chess board corners
        ret, corner = cv2.findChessboardCorners(gray, PATTERN_SIZE)
        #If there is a corner
        if ret:
            print("detected coner!")
            print(str(len(obj_points) + 1) + "/" + str(REFERENCE_IMG))
            term = (cv2.TERM_CRITERIA_EPS + cv2.TERM_CRITERIA_COUNT, 30, 0.1)
            cv2.cornerSubPix(gray, corner, (5, 5), (-1, -1), term)
            img_points.append(corner.reshape(-1, 2))  #append method: append factor object to the end of the list
            obj_points.append(pattern_points)

        cv2.imshow('image', img)
        #Wait 200 ms because it is judged every time. It's here to be delayed
        if cv2.waitKey(200) & 0xFF == ord('q'):
            break

    print("calculating camera parameter...")
    #Calculate internal parameters
    rms, mtx, dist, rvecs, tvecs = cv2.calibrateCamera(obj_points, img_points, gray.shape[::-1], None, None)

    #Display calculation result
    print("RMS = ", rms)
    print("mtx = \n", mtx)
    print("dist = ", dist.ravel())

    #Save in yml
    f = cv2.FileStorage(FILE_NAME, flags=1)
    f.write('mtx', mtx)
    f.write('dist', dist)
    # f.write('translation', rvecs)
    # f.write('distortion', tvecs)
    f.release()


if __name__ == '__main__':
    main()
The number of reference images, the size of one side of the square, the number of intersection points, and the camera resolution settings Set according to the environment. This time, I created [here](https://drive.google.com/file/d/1A56mjyobKN3cLkFkPgokO8qCoDXUdXIC/view?usp=sharing), printed it in A4 size, and used it on a plastic board. Since one side of the square is 20 mm, it is 2.0 cm, and the intersection points are 8 in the horizontal direction and 13 in the vertical direction. Distortion calculation is performed while moving evenly as shown in ↓. 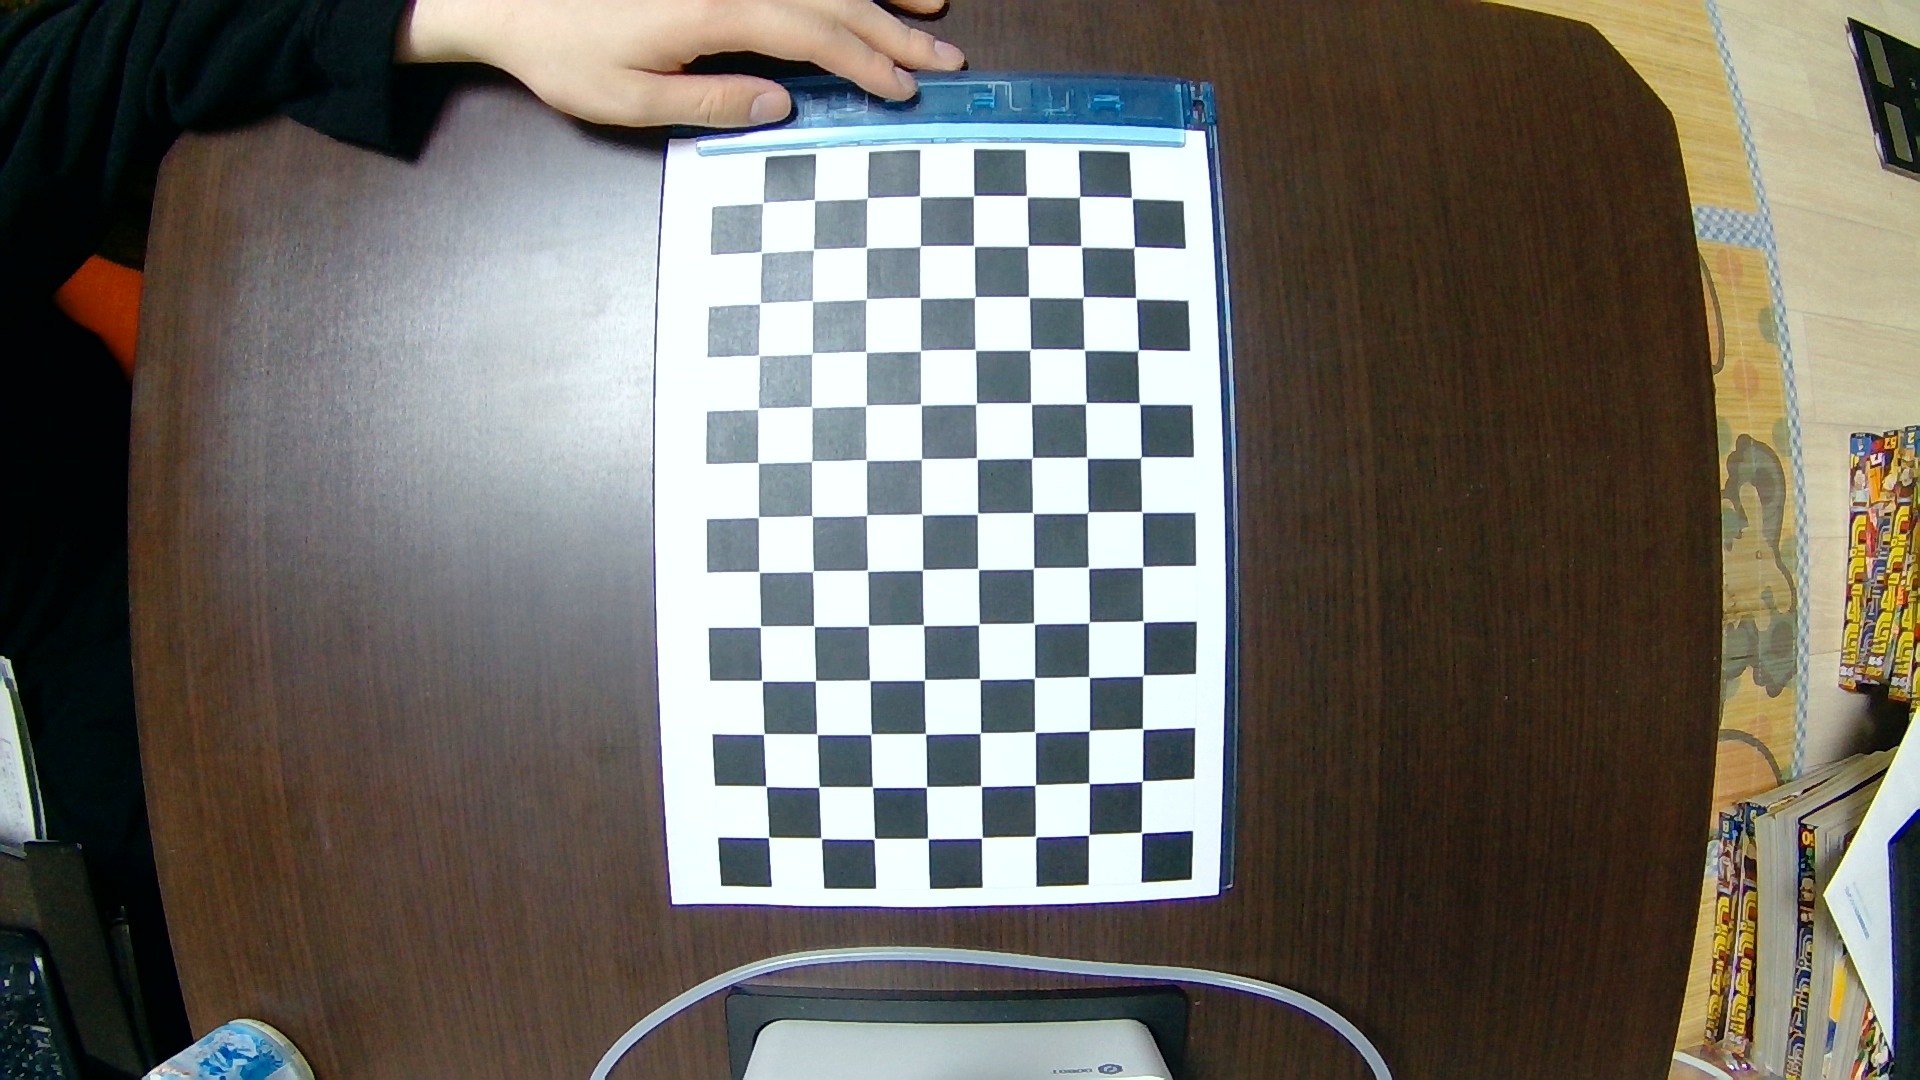  
If you can detect the corners of 40 chess boards, calculate the distortion.
You can check the result as shown below. At the same time, you can see that "calib.yml" is output.

calib.yml
%YAML:1.0
---
mtx: !!opencv-matrix
   rows: 3
   cols: 3
   dt: d
   data: [ 7.7958988893525259e+02, 0., 9.8266449367809537e+02, 0.,
       7.7847873908657630e+02, 5.7636196300911377e+02, 0., 0., 1. ]
dist: !!opencv-matrix
   rows: 1
   cols: 5
   dt: d
   data: [ -1.8378651673412880e-01, 4.1014929211162864e-02,
       -1.2046811513395908e-03, -4.8516056956278577e-04,
       -4.8595996923656995e-03 ]
Read yaml file with OpenCvSharp4 and perform distortion correction
First, install opencvsharp. For some reason, OpenCvSharp4 on the upper side caused a DLL loading error at runtime. Install OpenCvSharp4.Windows.
 After the installation is complete, prepare "calib.yml" and an image for verification.
Run the code below.
After the installation is complete, prepare "calib.yml" and an image for verification.
Run the code below.
Program.cs
using System;
using System.Collections.Generic;
using System.Linq;
using System.Text;
using System.Threading.Tasks;
using OpenCvSharp;

namespace CameraCalibrationSample
{
    class Program
    {
        static void Main(string[] args)
        {
            const string ImagePath = @"./img/";
            const string YamlFilePath = @"calib.yml";

            // (1)Calibration image(Before correction)Loading
            string[] imagePaths = System.IO.Directory.EnumerateFiles(ImagePath, "*", System.IO.SearchOption.AllDirectories).ToArray();
            int imageNum = imagePaths.Length;

            Mat[] srcImg = new Mat[imageNum];
            for (int i = 0; i < imageNum; i++)
            {
                srcImg[i] = Cv2.ImRead(imagePaths[i], ImreadModes.Color);
                Mat src = Cv2.ImRead(imagePaths[i], ImreadModes.Color);

                //Read yml file and get calculation parameters
                using (var fs = new FileStorage(YamlFilePath, FileStorage.Mode.Read))
                {
                    var mtx = fs["mtx"].ReadMat();
                    var dist = fs["dist"].ReadMat();

                    Mat calib = new Mat();
                    Cv2.Undistort(src, calib, mtx, dist);
                    Cv2.ImShow("src", srcImg[i]);
                    Cv2.ImShow("calib", calib);
                    OpenCvSharp.Cv2.WaitKey(0);
                }
            }

            Cv2.DestroyAllWindows();
        }
    }
}
If the distortion calculation works well, it will look like ↓.
・ Before correction

·After correction

You can see that it has been corrected properly. You did it! (^ O ^)
At the end
There are quite a few differences in the code between the 3rd and 4th series, and even if I tried to rewrite the old version sample with 4, the threshold was high. .. .. There are sample sources of C ++ and python on the official website of the original OpenCV, but it is quite difficult for me to replace them with C #. This time, I gave up writing the calculation part in C # and decided to write it in C # only where the correction parameters are used. Even so, it took a long time because the writing method of File Storage was quite different between 3 series and 4 series. If you look at Wiki properly, you can see it immediately, but it took a long time to notice because I was chasing only 3 series samples. I should have investigated it properly.
Reference / Source
Thanks for the URL above. https://qiita.com/ReoNagai/items/5da95dea149c66ddbbdd https://github.com/shimat/opencvsharp/wiki/FileStorage https://stackoverrun.com/ja/q/11850575 http://hima-tubusi.blogspot.com/2016/02/opencvsharp_3.html https://qiita.com/Kazuhito/items/cc6b8a0bd75cf9689bf9 https://www.learnopencv.com/camera-calibration-using-opencv/
Recommended Posts