Use XVim2 with Xcode 12.0.1
Overview
Install XVim2 to use Xcode with vim keybindings. https://github.com/XVimProject/XVim2
procedure
1. Creating a certificate
Follow the link "You can read the instructions for how to do this and ..." in the README INSTALL.1. https://github.com/XVimProject/XVim2/blob/master/SIGNING_Xcode.md
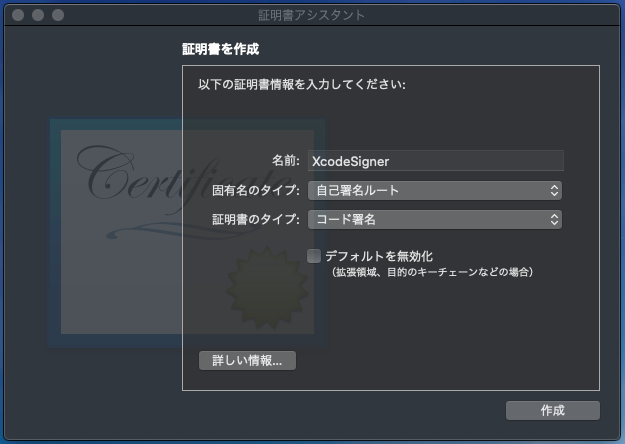
Open Keychain Access and select "Certificate Assistant> Create Certificate" from the menu bar.
 Enter as follows.
 Execute signature from the command line. (Leave it because it takes time. After that, you will be asked to enter the login password several times.)
sudo codesign -f -s XcodeSigner /Applications/Xcode.app
2. Xvim2 repository clone
git clone https://github.com/XVimProject/XVim2.git
3. Branch switching
Switch to a branch that matches your Xcode version. Below is a list of branches. https://github.com/XVimProject/XVim2#branches-and-releases
- As of October 24, 2020, the master branch supports Xcode12, so if you are using Xcode12, you do not need to switch.
Here, if the following result is empty, set according to the procedure of README. If the path is displayed like "/Applications/Xcode.app/Contents/Developer", there is no problem.
xcode-select -p
4. Run make
Execute make in the cloned XVim2 directory.
cd XVim2
make
5. Start Xcode
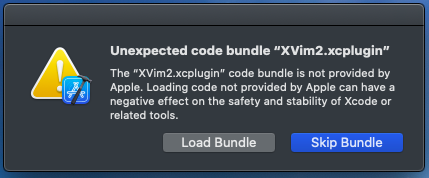
When you start Xcode, the following dialog will be displayed, so select "Load Bundle".

- If you select "Skip Bundle" by mistake, close Xcode and execute the following command. (Command for Xcode 12.0.1. Specify the last version according to Xcode.)
defaults delete com.apple.dt.Xcode DVTPlugInManagerNonApplePlugIns-Xcode-12.0.1
6. Restart Xcode
Close Xcode and restart it.
If successful, the cursor will become a block type as shown below, and you can operate it with Vim key bindings.

Recommended Posts