[PYTHON] [Blender] Summary of how to install / update / uninstall add-ons
Blender is a powerful 3DCG production software by itself, but by introducing add-ons (extensions, also called plug-ins), you can add functions that are not in Blender or make Blender easier to handle. .. However, when I searched for "Blender add-on" on Twitter, Google, etc., it seems that many people do not know how to install the add-on, so I decided to summarize it here. If you have been having trouble installing add-ons, we hope that this article will lower the threshold for introducing add-ons.
We will also show you how to update and uninstall add-ons that have already been installed, so please refer to this as well.
What you need to know before commentary
Before the explanation, I will explain what you should remember before reading the following explanations. It's a way to determine if an add-on consists of multiple source codes, but be sure to read it as problems with installing Blender add-ons are often caused by not understanding this. stay here.
How to determine if an add-on consists of multiple source codes
Whether or not an add-on consists of multiple source codes can basically be determined by whether or not it contains a file called __init__.py.
As an example, I will introduce the add-on that I actually created.
Example 1: Add-on consisting of multiple source codes
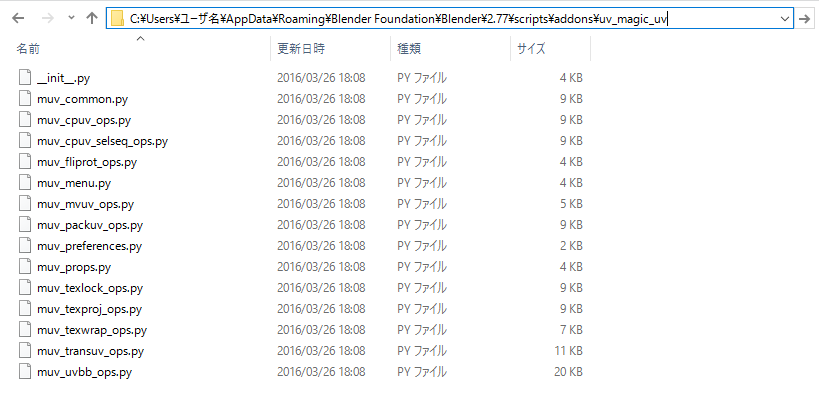
The source code body of the following add-ons is everything under the uv_magic_uv directory.
.Among multiple files with the extension py,__init__.There is a file called py.
https://github.com/nutti/Magic-UV/archive/develop.zip
### Example 2: Add-on consisting of a single source code
The source code body of the following add-ons is only ``` mouse_click_merge.py```.
#### **`__init__.The file py does not exist.`**
```The file py does not exist.
https://github.com/nutti/Mouse-Click-Merge/archive/master.zip
Thus, to determine if an add-on is composed of multiple source codes or a single source code, whether the add-on contains the source code ``` __init__.py```. You just have to remember that you can check with.
# Installation
## Method 1: Use Blender's installation function
How to install the add-on from the Blender Preferences window.
This is the standard way to install add-ons, but ** there is a fatal problem that add-ons consisting of multiple source codes cannot be installed this way **.
If you want to install an add-on that consists of multiple source codes, you need to install the add-on as described in Method 2.
The installation method of the add-on using the installation function of Blender is as follows.
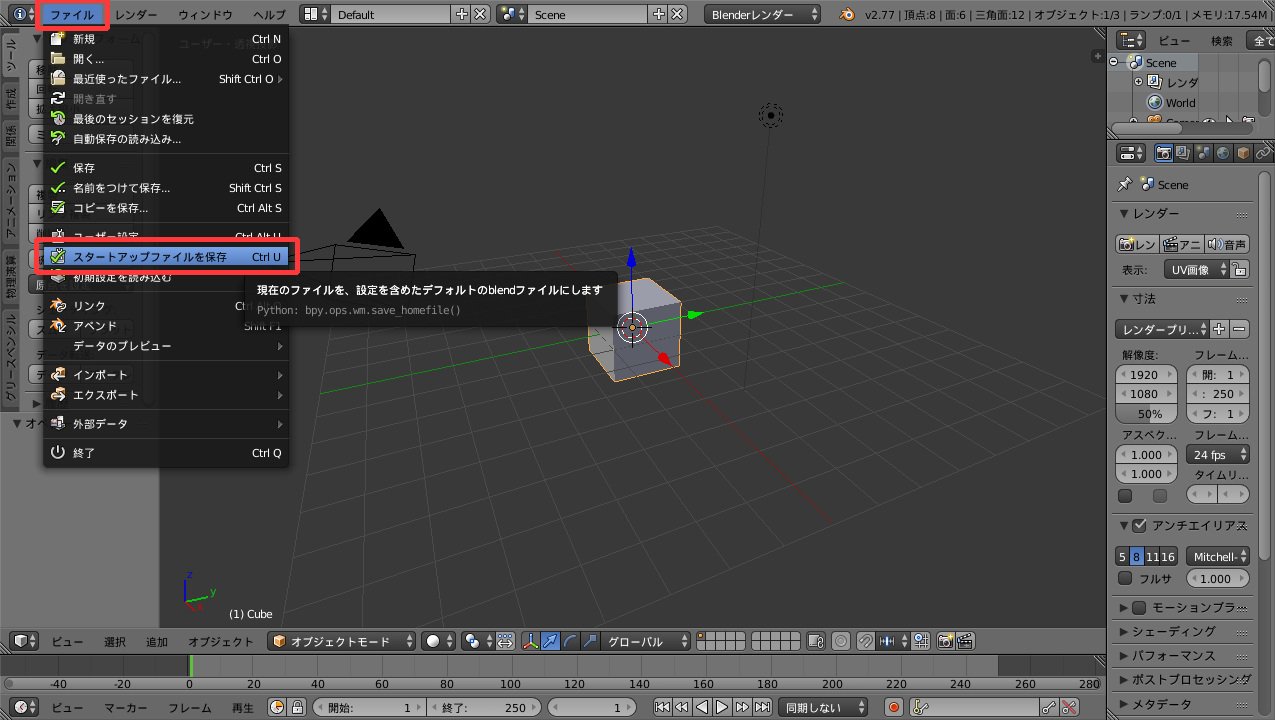
1. Execute "File> User Settings" in the information area ("Blender User Settings" window opens)
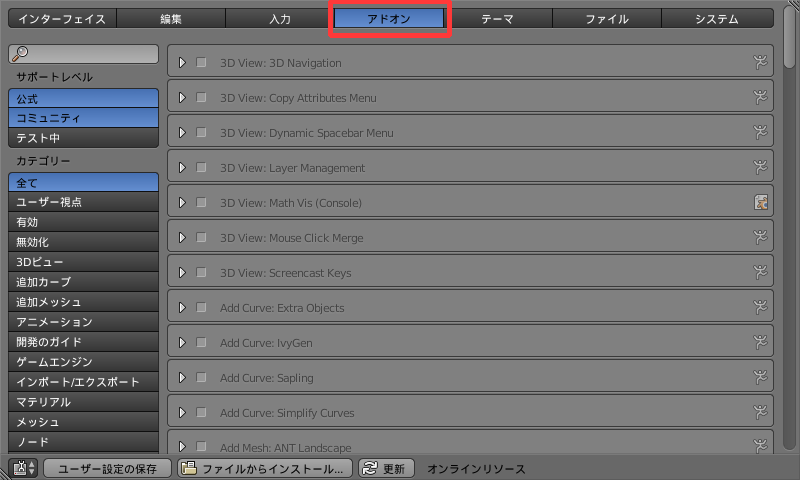
2. Click the tab "Add-ons"
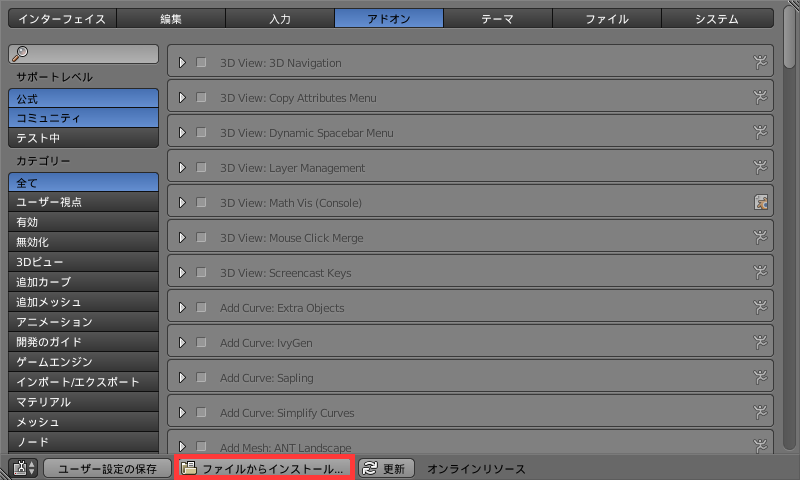
3. Click the "Install from file" button
4. Select the source code of the add-on to be installed on the file selection screen and click the "Install from file" button.
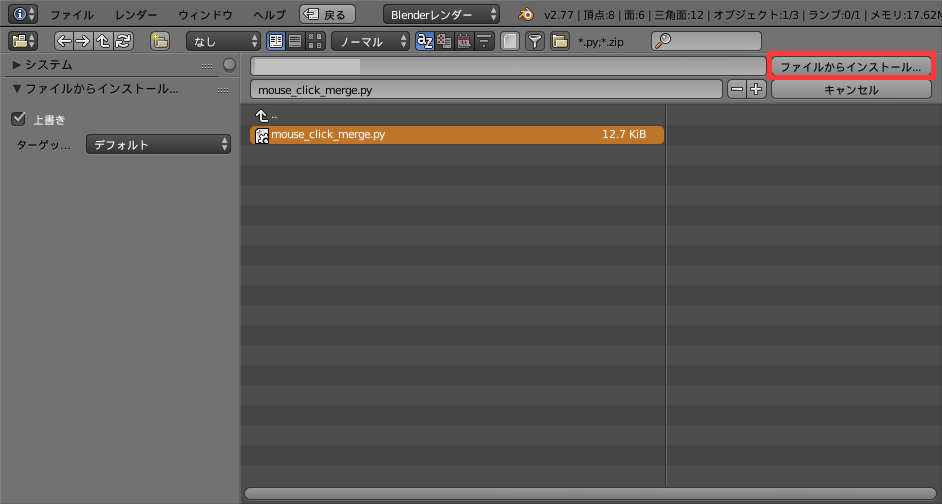
5. Installation complete

### Supplement
Even if the add-on consists of multiple source codes, if the directory where ``` __init__.py``` is located is compressed in zip format and exists as one file, it can be installed by this method. Is possible.
## Method 2: Place the add-on source code directly in the add-on directory
This is a method to place the add-on source code directly in the directory where the add-on is located.
** It can handle both when the add-on is composed of a single source code and when it is composed of multiple source codes **.
The procedure is as follows.
1. Place the source code or a set of directories containing the source code including ``` __ init__.py``` in the add-on directory.
* Add-on (Windows) consisting of a single source code

* Add-on (Windows) consisting of multiple source codes
2. Make Blender recognize the add-on placed in the add-on directory by one of the following methods.
* Restart Blender
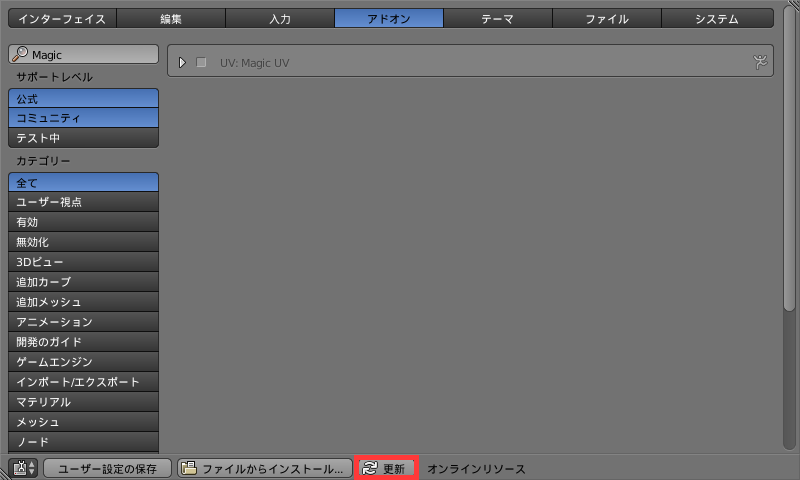
* Click the "Update" button on the "Add-ons" tab of the "Blender Customization" window of Method 1.
I wrote it as an add-on directory here, but the add-on directory differs depending on the OS and Blender version.
The add-on directory for each OS is shown below.
|OS|Add-on directory|
|---|---|
|Windows|```C:\Users\<User name>\AppData\Roaming\Blender Foundation\Blender\<Blender version>\scripts\addons```|
|Mac|```/Users/<User name>/Library/Application Support/Blender/<Blender version>/scripts/addons```|
|Linux|```/home/<User name>/.config/blender/<Blender version>/scripts/addons```|
# update
## Method 1: Use Blender's installation feature
You can update the add-on in the same way as install-on installation method 1.
Select the source code of the add-on you want to update on the file selection screen to complete the update.
As mentioned in the installation section, ** add-ons consisting of multiple source codes cannot be updated this way **. (*)
(*) Similar to installation, even if the add-on consists of multiple source codes, if the directory where ``` __init__.py``` is located is compressed in zip format and exists as one file. Can be installed by this method.
## Method 2: Place the add-on source code directly in the add-on directory and restart Blender
By placing the add-on source code directly in the directory where the add-on is located, ** it can handle both cases where the add-on is composed of a single source code and cases where it is composed of multiple source codes. Masu **.
1. Place the source code in the add-on directory
* If the add-on consists of multiple source codes, place a set of directories containing `` `__ init__.py```
2. Restart Blender and make Blender recognize the add-on placed in the add-on directory.
Please note that if you click the "Update" button on the "Add-ons" tab of the "Blender User Preferences Window", Blender will not be able to recognize that the add-on source code has been updated.
## Method 3: Use Blender's function "Reload Scripts"
Method 2 requires you to restart Blender every time you update an add-on that consists of multiple source codes.
The Blender function ** "Reload Scripts" ** introduced here solves the trouble of restarting.
By using the "Reload Scripts" function, you can update add-ons without restarting Blender.
The following shows how to update the add-on using the "Reload Scripts" function.
1. Place the source code in the add-on directory as in 1. of Method 2.
2. Press the "Space" key to display the search box
3. Search and execute "Reload Scripts" ("Reload Scripts" in Japanese)
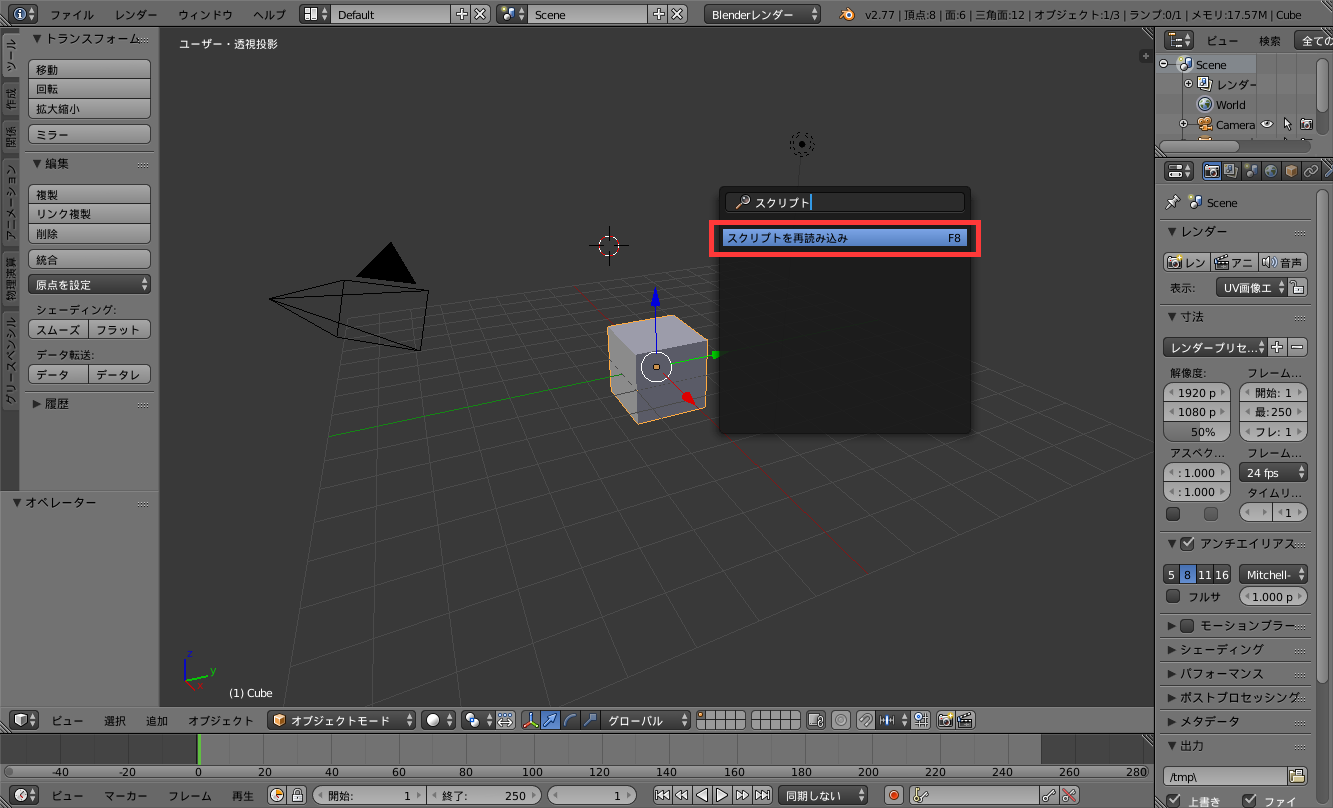
By default, the "Reload Scripts" function is assigned the "F8" shortcut key.
The Reload Scripts feature is a very useful feature for add-on developers who update their add-ons frequently, so it might be worth remembering.
### Supplement
Depending on the add-on, it may not be updated correctly even if you use the "Reload Scripts" function.
This is a problem caused by not loading the submodule imported by ``` __init__.py``` even when using the" Reload Scripts "feature.
If you want to load the submodule when using the "Reload Scripts" function, you need to add the module reloading process as follows.
#### **`reload_submodule.py`**
```python
if "bpy" in locals():
import imp
imp.reload(submod1)
imp.reload(submod2)
else:
from . import submod1
from . import submod2
(Reference: [Blender] Split Blender script into multiple files)
Uninstall
Method 1: Use Blender's uninstall function
How to remove an add-on from the Blender Preferences window. This is the standard way to uninstall an add-on, but ** add-ons that are included in the add-on itself from the beginning (add-ons whose support level is Release or Contrib) cannot be removed **.
Here's how to remove an add-on from the Blender Preferences window.
- Execute "File> User Settings" in the information area ("Blender User Settings" window opens)
- Click the tab "Add-ons"
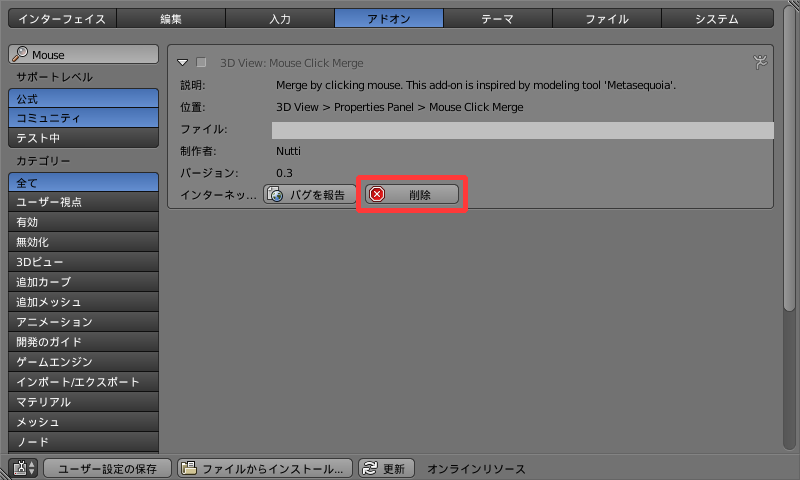
- Click the arrow to the left of the add-on you want to uninstall to see detailed information about the add-on

- Click the "Delete" button
Note that this method allows you to uninstall the add-on ** regardless of whether the source code consists of multiple files.
Method 2: Remove the add-on source code from the add-on directory
This is a method to remove the add-on source code from the add-on directory and uninstall it. Follow the steps below to remove the source code of the add-on you want to uninstall directly from the directory where the add-on is located.
- Execute "File> User Settings" in the information area ("Blender User Settings" window opens)
- Click the tab "Add-ons"
- Click the arrow to the left of the add-on you want to uninstall to see detailed information about the add-on
- Delete the source code of the file path shown in "File"
- If the add-on consists of multiple source codes, the File will show the file path of
__ init__.pyinstead of the directory, but ** to uninstall it completely. Must be deleted along with the directory where__init__.pyis located **.
With this method, you can also delete ** add-ons that are included in the add-on itself from the beginning **, which could not be deleted by method 1.
Recommended Posts