Try developing Spresense in Java (1)
About this article
On December 2, 2019, a press release was issued to support Java on the Spresense development board. → Spresense development board from Sony now also supports Java So, I will actually try it.
This time, I will summarize the construction of the development environment, which was unexpectedly troublesome and time-consuming when I tried it.
About Spresense Java development environment
To develop Java for Spresense, use the embedded Java development environment called MicroEJ.
The procedure for building the development environment is described at https://github.com/MicroEJ/Platform-Sony-Spresense, so proceed according to the procedure. However, this procedure is surprisingly unfriendly, or it is very difficult to understand because it is an explanation with only letters without any pictures. This time, I will summarize the procedure for building this development environment below.
Premise
Development on MicroEJ seems to work only on Windows 10. Mac / Linux users should give up at this point. Windows 7 users are almost out of support, so let's take this opportunity to move to Windows 10.
Install the required modules in advance
Download and install gcc-arm-none-eabi v7.3.1. → https://developer.arm.com/tools-and-software/open-source-software/developer-tools/gnu-toolchain/gnu-rm/downloads
Download the MicroEJ file
Download the following files. (The link destination of the file is the information as of 12/12/2019. For details, refer to https://github.com/MicroEJ/Platform-Sony-Spresense)
- Download MicroEJ architecture 7.11
https://repository.microej.com/architectures/com/microej/architecture/CM4/CM4hardfp_GCC48/flopi4G25/7.11.0/flopi4G25-7.11.0-eval.xpf - Download Pack FS 5.0
https://repository.microej.com/architectures/com/microej/architecture/generic/fs/fs-pack/5.0.0/fs-5.0.0.xpfp - Download Pack UI 12.0
https://repository.microej.com/architectures/com/microej/architecture/CM4/CM4hardfp_GCC48/flopi4G25-ui-pack/12.0.0/flopi4G25UI-12.0.0.xpfp - Download Pack HAL 2.0.1
https://repository.microej.com/architectures/com/microej/architecture/generic/hal/hal-pack/2.0.1/hal-2.0.1.xpfp
Install the Spresense SDK
Basically, it is OK if you proceed according to Using Spresense SDK on Windows 10 (WSL), but there are some caveats.
--The Spresense SDK must use v1.3.1 instead of the latest version (v1.4.2 as of 12/12/2019). Therefore, when you get the Spresense SDK from github, specify the version as follows.
$ git clone https://github.com/sonydevworld/spresense.git
$ cd spresense/
$ git submodule update --init --recursive
$ git checkout --recurse-submodules v1.3.1
--After getting the Spresense SDK, get the MicroEJ file as well. In the directory where you got the Spresense SDK, get MicroEJ as follows.
$ git submodule add https://github.com/MicroEJ/Platform-Sony-Spresense.git MicroEJ
Set up MicroEJ development tools
Install the MicroEJ SDK
Download and install the MicroEJ SDK installer from https://developer.microej.com/packages/SDK/19.05/.
Launch the SDK
If you start the SDK and close unnecessary screens, you will see a screen like this.

Install Architecture packs
Select Window → Preference from the menu.
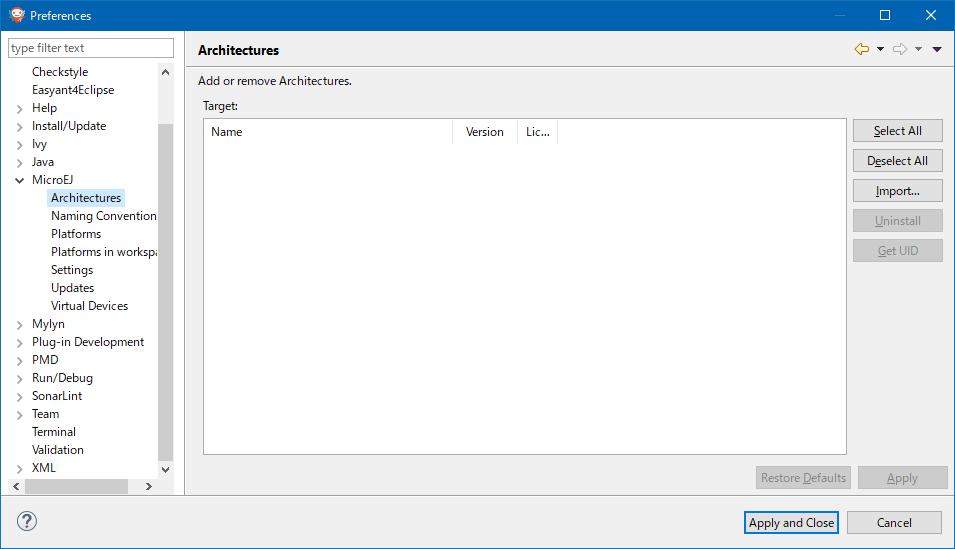
In the dialog that opens, select MicroEJ → ʻArchitectures.  Press the ʻImport button, then press the Browse ... button from the Select directory part of the dialog that appears.
Downloaded in advance flopi4G25-7.11.0-eval.xpf`` fs-5.0.0.xpfp flopi4G25UI-12.0.0.xpfp`` hal-2.0.1.xpfp (* File described The name is as of 12/12/2019) Select the directory where each file is saved.

When you select a file, it will be displayed in the Target area like this. Check the check box of ʻI agree ~at the bottom of the dialog and press theFinish` button.
Register the license
Get the UID
You should have imported the Architecture packs above, but the License display is crossed.
 Here, if you select the displayed ʻARM Cortex-M4 GCC EVAL
, the Get UID button on the screen will be enabled, so press the button.  ʻUID will be displayed like this, so copy it somewhere.
Get a license file
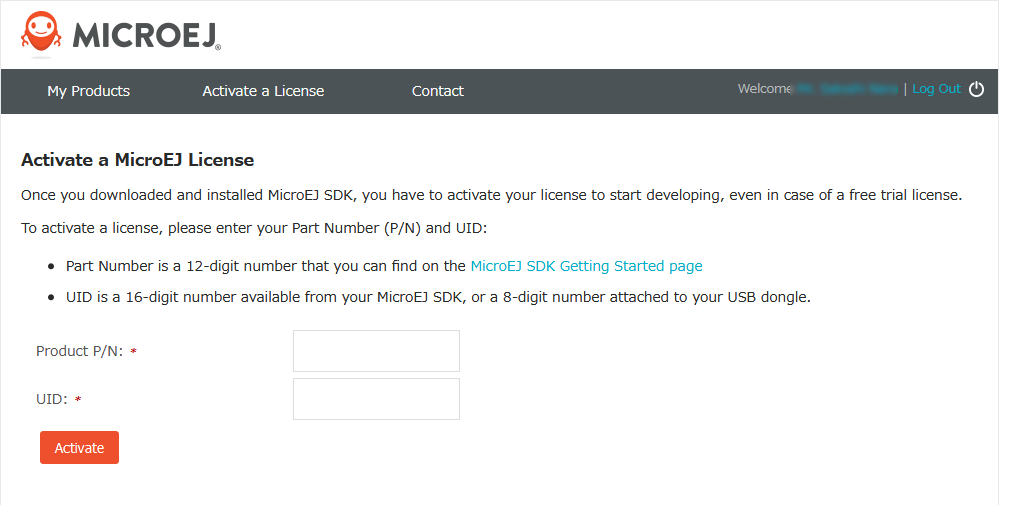
Go to http://license.microej.com/ to get the license file. Create an account and log in.
If you click ʻActivate Licenseon the screen after logging in, the following will be displayed.  In theP / Nfield, enter the P / N listed at https://developer.microej.com/getting-started-sdk-40.html. (If you search the linked screen withP / N for a character string, it will be written there.) Enter the UID you noted earlier in the ʻUID field.
If you press the ʻActivate` button, you will be able to download the zip file containing the license information, so download it.
Import license
Go back to the SDK again.
Select Window → Preference from the menu.
In the dialog that opens, select MicroEJ.
Click the ʻAdd button in the Licensessection, select the zip file of the license file you downloaded earlier from theSelect an activation key archive, and press ʻOK to activate the license.

You are now happy to use the MicroEJ SDK.
Import the files needed for Spresense development
Select File → ʻImport ...from the menu. From the dialog that opens, selectGeneral → ʻExisting Projects into Workspace and press the Next button.

The file selection dialog will be displayed. Select the MicroEJ directory under the Spresense SDK as shown below.
 Three items will be displayed in the
 Projects field, so import all of them.
 It has been imported.
 Open the top-level
 Sony-Spresense-CM4hardfp_GCC48-configuration and double-click the Spresense.platform file that appears.

The Overview screen will be displayed, so click the Build Platform link.
 It is OK if
 BUILD SUCCESSFUL is displayed.
Now, the SDK is ready.
Next time preview
It's been long, so I'll break it here. Next time, while setting up the Spresense SDK, I will actually create an Spresense app in Java, compile it, and run it on Spresense.
Recommended Posts