[PYTHON] Raspberry Pi 4B initial setting
1.First of all
I bought Raspberry 4B a while ago, so I will leave it as a memorandum of settings. In addition, writing of OS image etc. is not described this time. Because the OS is included in the SD card of the kit, and the installation work has been greatly simplified compared to before, so I thought that there was no need to write it. Also, opencv is 4.5.1 (latest version as of 2021.1.3) (for no particular reason). I couldn't install it with pip3 install opencv-python because I often get an error when displaying an image as a window and it is difficult to deal with it. (The cause is unknown)
Purchased: LABISTS Raspberry Pi 4 4B (4GB memory)
2. Raspberry Pi initial settings
Describe the initial setting method. Describes library update, function activation, Japanese setting, and default user deletion.
2-1. Library update
Execute the following command to update the library. You will be asked if you want to run it halfway, so type y (yes).
$ sudo apt update
$ sudo apt upgrade
2-2. Enabling the function
Enable the function for camera and remote control (remote control settings are not described this time). First, execute the following command to enable the function.
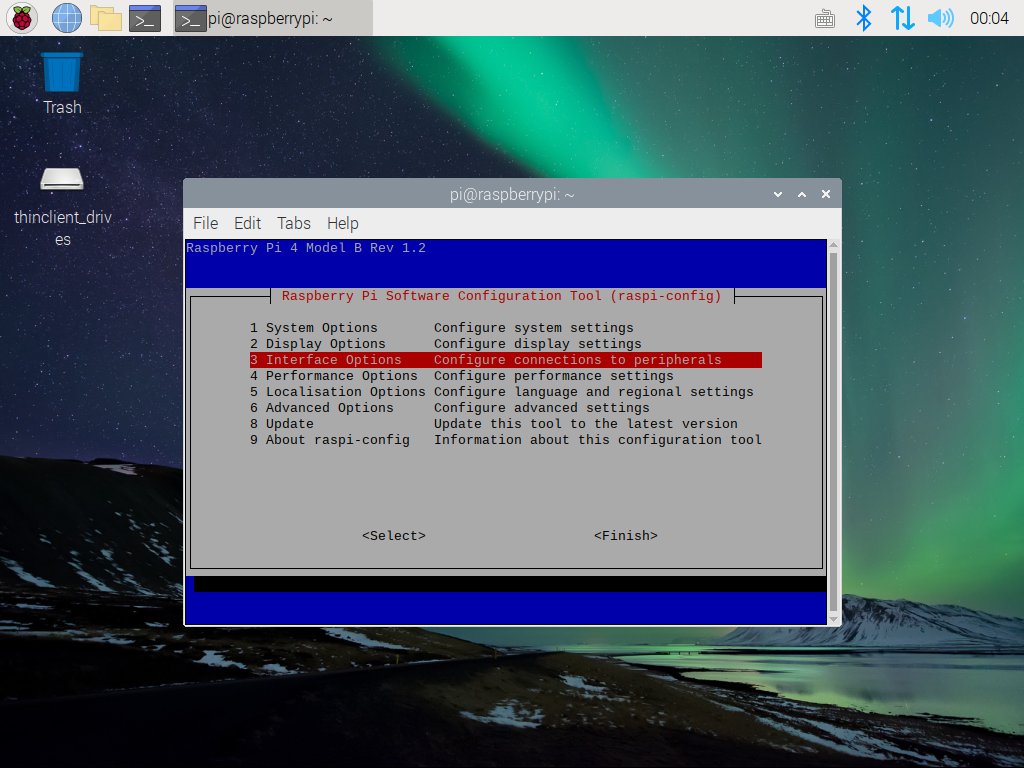
$ sudo raspi-config
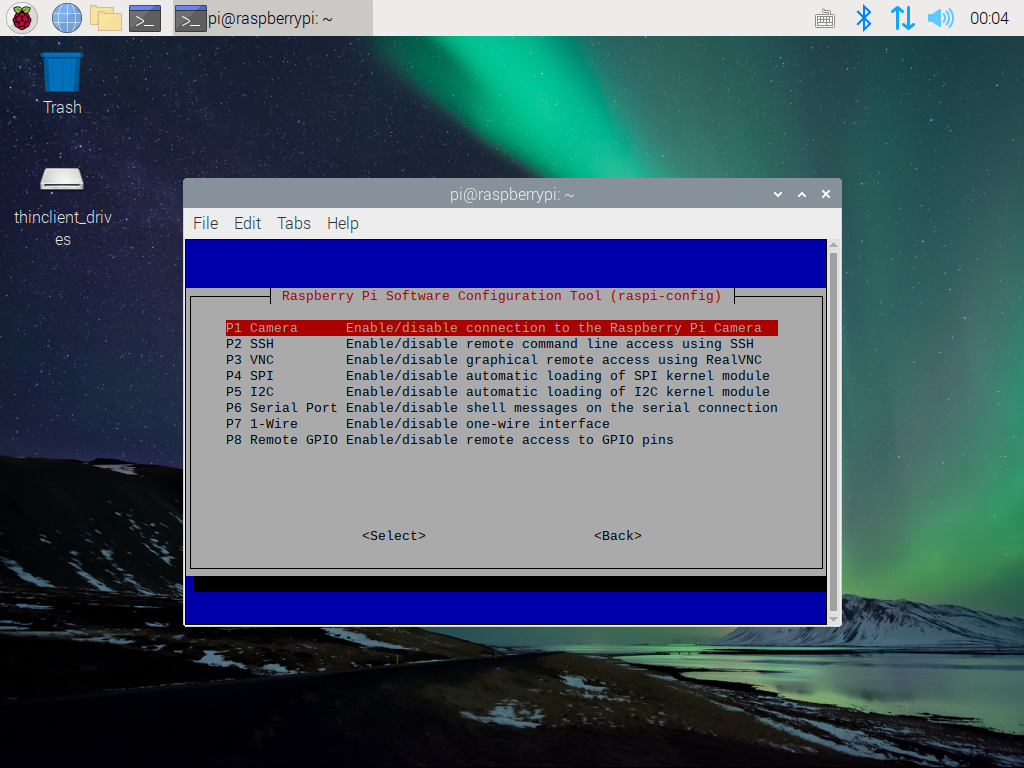
The following screen will appear. Enable 3 Interface Option → P1 camera. If you do remote desktop, enable P2 and P3. (Do you need P2?)
2-3. Japanese support
Japanese uses fcitx-mozc. (According to the environment of the main PC)
$ sudo apt-get install fcitx-mozc
$ im-config -n fcitx
$ sudo shutdown -r now
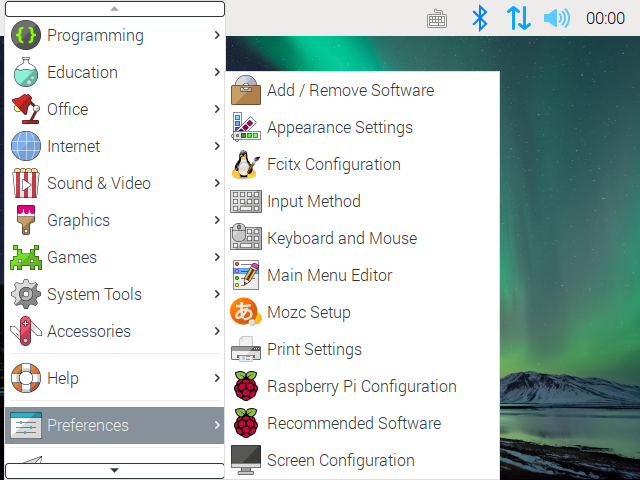
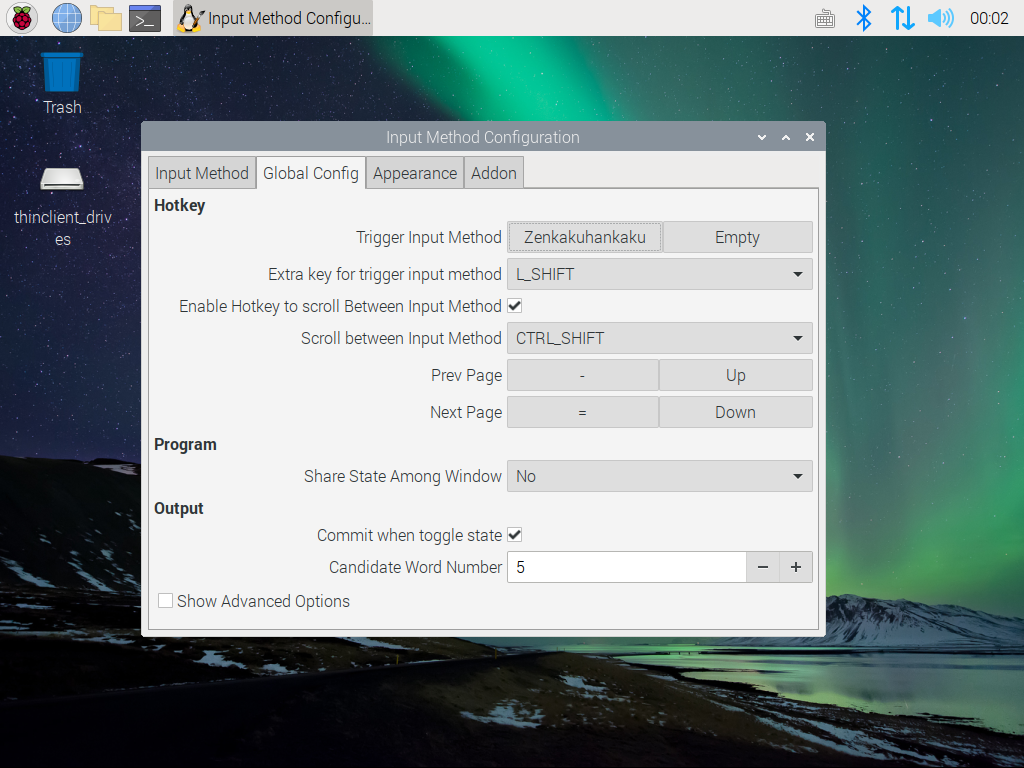
After rebooting, launch Fcitx Configuration from Preferences.
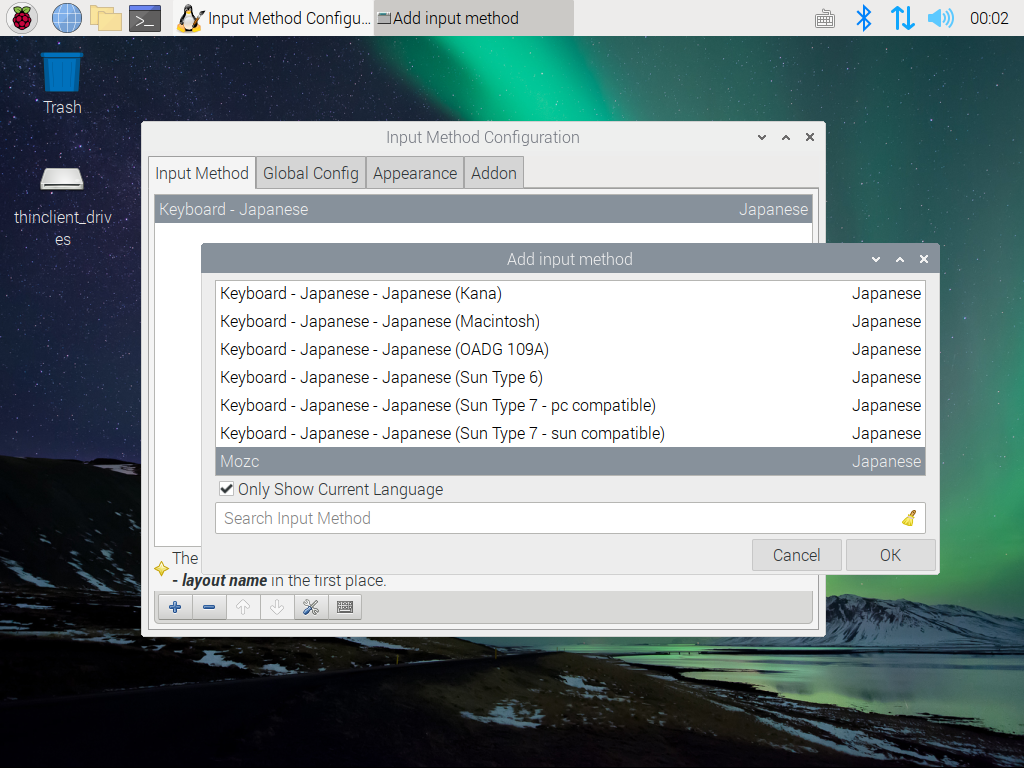
In the Input Method tab, there is a + button at the bottom, so select this and select mozc from the windows that appear.
Switch the tab to Global Config, select [Trigger Input Method], and press [Half-width/Full-width key] in the window that appears to set the trigger key. (With this setting, the on/off setting for Japanese input will work)
2-4. Delete existing user pi
If you are using an initial user due to security issues, it seems that you can use it as a stepping stone to break in. There is also a story that data was extracted by NASA in the past ( There is also a source like this ). It seems that there is no particular problem for personal use, but I will do something that can be easily done just in case. The official describes the method, so proceed as it is. The user name to be created is XXX. (Please read as appropriate)
2-4-1. Creating a new user
$ sudo adduser XXX
$ sudo usermod -a -G adm,dialout,cdrom,sudo,audio,video,plugdev,games,users,input,netdev,gpio,i2c,spi XXX
2-4-2. Eliminate pi auto-login processing
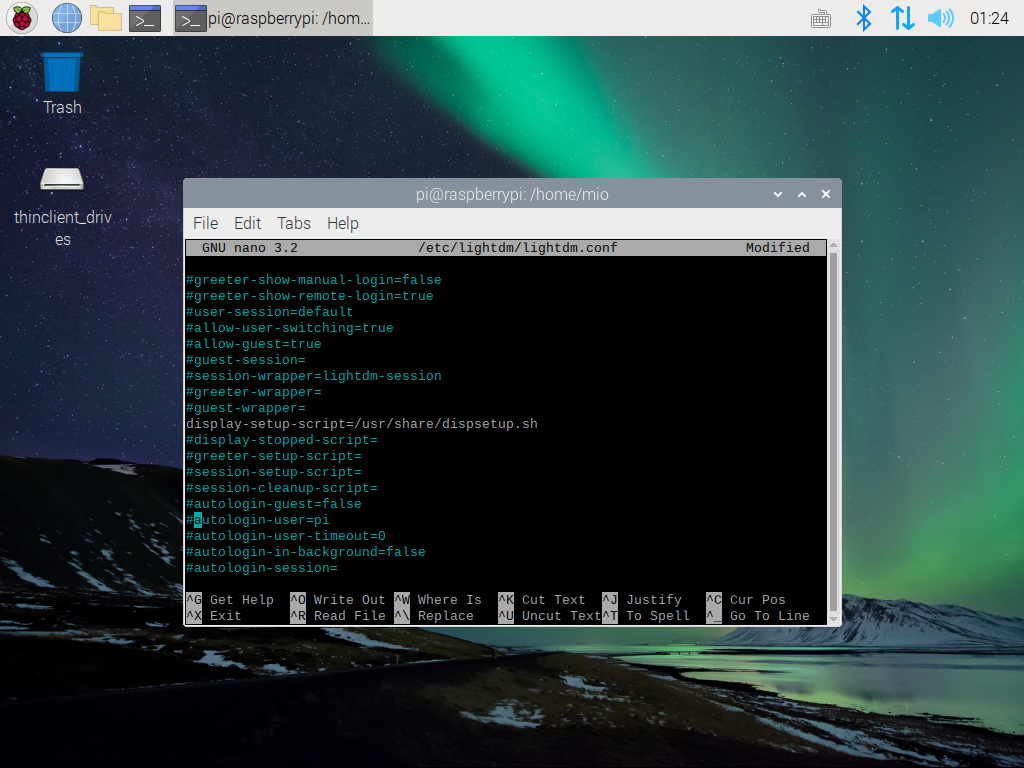
The process to change lightdm.conf and autologin.conf this time is not officially described, but it is done because an error occurs at the time of deluser. The error is that deluser can't because the process tty1 is always up. There was a person who had a similar event in Forum , and described how to deal with it. (I couldn't just process lightdm.conf, but maybe I could just change autologin.conf.)
$sudo nano /etc/lightdm/lightdm.conf
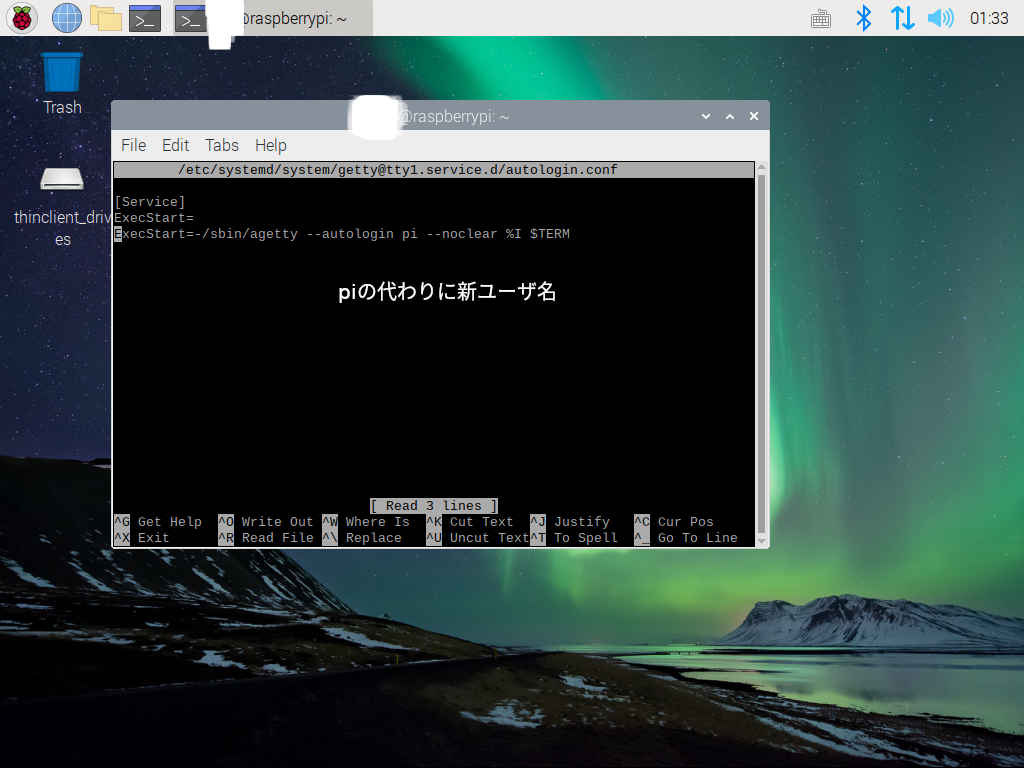
$ sudo nano /etc/systemd/system/[email protected]/autologin.conf
$ sudo systemctl daemon-reload
$ sudo systemctl restart [email protected]
$ sudo pkill -u pi
After this, log in as the new user XXX.
$ sudo deluser -remove-home pi
The initial setting is completed by the above operation.
3. OpenCV installation
Since I have a Raspberry Pi, I want to suppress image relations. Therefore, we will introduce OpenCV, which is a major library.
3-1. Preparation
Refer to OpenCV official . There was a statement that it was necessary to officially prepare a related library. Therefore, install the following library.
$ sudo apt install build-essential
$ sudo apt install cmake git libgtk2.0-dev pkg-config libavcodec-dev libavformat-dev libswscale-dev
$ sudo apt install python-dev python-numpy libtbb2 libtbb-dev libjpeg-dev libpng-dev libtiff-dev libjasper-dev libdc1394-22-dev
After preparing the library, drop the source file from github. I will drop it in my home directory and work on it.
$ cd
$ git clone https://github.com/opencv/opencv.git
$ git clone https://github.com/opencv/opencv_contrib.git
3-2. Build
Build using the file you dropped earlier. First, create a build directory inside the opencv directory and work in it.
$ mkdir opencv/build
$ cd opencv/build
Create a makefile. Use what you need after -D. Also, if you are concerned about the license in a company etc., it may be better to set OPENCV_ENABLE_NONFREE = OFF .
$ cmake -D CMAKE_BUILD_TYPE=RELEASE \
    -D CMAKE_INSTALL_PREFIX=/usr/local \
    -D OPENCV_EXTRA_MODULES_PATH=~/opencv_contrib/modules \
    -D ENABLE_NEON=ON \
    -D ENABLE_VFPV3=ON \
    -D BUILD_TESTS=OFF \
    -D INSTALL_PYTHON_EXAMPLES=OFF \
    -D OPENCV_ENABLE_NONFREE=ON \
    -D CMAKE_SHARED_LINKER_FLAGS=-latomic \
    -D BUILD_EXAMPLES=OFF ..
$ make -j4
$ sudo make install
The execution time for the [make -j4] part took about 95 minutes. (Starts at 20:22 and ends at 21:56)
This completes the installation of OpenCV.
test
$ python3
> import cv2
If there is no error here, the installation is successful. Now you can easily perform video processing and face detection using cv2.VideoCapture. Since it was a big deal, I performed face detection.
import cv2

#Store webcam video in variables
cap = cv2.VideoCapture(0)

#Path of face detection model included in OpenCV
path = '/usr/local/share/opencv4/haarcascades/haarcascade_frontalface_default.xml'
#Create an instance of a face detection classifier
face_model = cv2.CascadeClassifier(path)

#It is shown as a movie by outputting the images one by one to the screen by loop processing.
while 1:
    #Get video information as an image from variables. Substitute the image for frame.
    ret, frame = cap.read()
    #Convert to gray image and detect face with face detection classifier
    gray_img = cv2.cvtColor(frame, cv2.COLOR_BGR2GRAY)
    faces = face_model.detectMultiScale(gray_img)

    #Face detection results are stored in faces. The information contained in one detection result is x,y coordinate and detection area(Rectangle)Width and height of.
    for (x,y,w,h) in faces:
        #Draw a rectangle on the image from the detection result information. green(0,200,50), Line width 2pixel
        cv2.rectangle(frame, (x,y), (x+w, y+h), (0,200,50),2)

    #Output processing to window
    cv2.imshow('cap',frame)
    #End processing. Press q to exit
    if cv2.waitKey(1) & 0xFF==ord('q'):
        break

cap.release()
cv2.destroyAllWindows()
It was detected without any problem. It is also possible to detect multiple faces.
Reference site
Change default user name
- https://www.raspberrypi.org/documentation/configuration/security.md
OpenCV
- https://docs.opencv.org/4.5.1/d7/d9f/tutorial_linux_install.html
- https://pimylifeup.com/raspberry-pi-opencv/
- http://labs.eecs.tottori-u.ac.jp/sd/Member/oyamada/OpenCV/html/py_tutorials/py_objdetect/py_face_detection/py_face_detection.html
Recommended Posts