Etude de base d'OpenCV avec Python
Outline
- Créer un environnement --Génération d'images --Charger l'image
- Valeur moyenne de la couleur de l'image
- Faiblesse des pixels --Garniture
- Redimensionner --Une addition
- Conversion d'Affin
- inversé
- Conversion d'échelle de gris --Utilisez la fonction de dessin Circle.
- Extraction de couleur
- Remplacement du canal de couleur
- opération du canal alpha * En route
Créer un environnement
Oui bien. Je dois étudier correctement le traitement d'image. .. !! Ce serait openCV! Où je pensais Il est difficile de créer un environnement pour jouer avec openCV. Des gens ordinaires. Je vais jouer avec python pour le moment. La composition est
- pyenv-virtualenv
- anaconda
- opencv
(Mac OSX Yosemite 10.10.5,Python 2.7.11,opencv 2.4.12)
est. Je regrette que ce ne soit pas cette fois. .. Comme il y a beaucoup d'informations écrites dans opencv2 en python2.7, cela peut suffire à étudier pour le moment. Dans mon cas, pyenv-virtualenv a été utilisé dans les homebrew il y a longtemps. Je suis désolé si vous n'avez pas besoin de gestion de version. Créer un environnement pyenv-virtualenv avec Homebrew sur Mac Peut-être que vous pouvez le faire si vous faites référence à cela.
Une fois l'environnement pyenv créé Accédez au répertoire que vous souhaitez étudier
cd ~/study/st_opencv/

pyenv install anaconda-2.1.0
pyenv local anaconda-2.1.0
pyenv rehash

~~Après l'installation
conda install -c https://conda.binstar.org/jjhelmus opencv
Dorya. Vous pouvez maintenant jouer avec opencv. Trop facile Merci ici La façon la plus simple d'utiliser OpenCV avec python
Génération d'images
import numpy as np
import cv2

r = 0
g = 0
b = 255

width = 480
height = 360
pixel = np.array([b,g,r],np.uint8)
wGrid = np.array([pixel]*width,np.uint8)
newImg = np.array([wGrid]*height,np.uint8)

cv2.imshow('generate img',newImg)
cv2.imwrite('createimg.png',newImg)
cv2.waitKey(0)

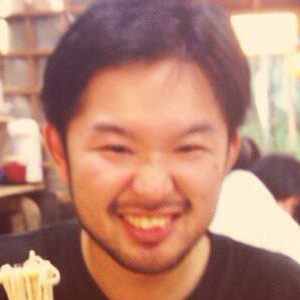
Chargement d'image
# -*- coding: utf-8 -*-
import cv2, matplotlib
import numpy as np
import matplotlib.pyplot as plt

img = cv2.imread('sample.png')

cv2.imshow('result',img)
cv2.waitKey(0)

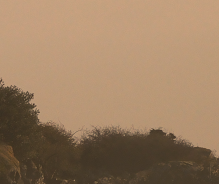
Obtenez la couleur moyenne de l'image
# -*- coding: utf-8 -*-
import cv2, matplotlib
import numpy as np
import matplotlib.pyplot as plt

img = cv2.imread('sample.png')

average_color_per_row = np.average(img, axis=0)
average_color = np.average(average_color_per_row, axis=0)
average_color = np.uint8(average_color)
average_color_img = np.array([[average_color]*500]*500, np.uint8)


cv2.imshow('average',average_color_img)
cv2.imwrite('avarage.png',average_color_img)
cv2.waitKey(0)

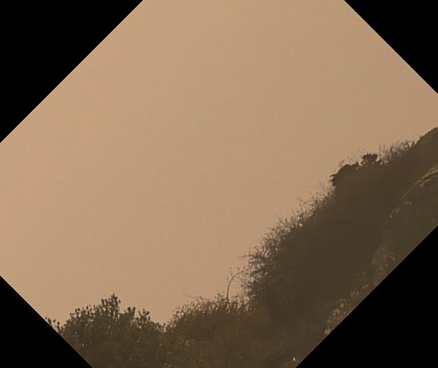
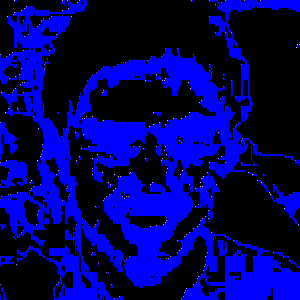
Ajustez les pixels
# -*- coding: utf-8 -*-
import cv2, matplotlib
import numpy as np
import matplotlib.pyplot as plt

###
#Accès aux pixels
###

cols = 640
rows = 480

#Génération d'images
image = cv2.imread('sample.png')

# print image
print image[0,1]

width = image.shape[0]
height = image.shape[1]
amount = 2.0

#Jouez avec chaque pixel.
for x in xrange(0,width):
  for y in xrange(0,height):
    pixel = image[x,y]
    b = pixel[0]
    g = pixel[1]
    r = pixel[2]

    if x < width/2 and y < height/2:
      color = np.array([b,g,r*amount],np.uint8)
    elif x > width/2 and y < height/2:
      color = np.array([b,g*amount,r],np.uint8)
    elif x < width/2 and y > height/2:
      color = np.array([b*amount,g,r],np.uint8)
    else:
      color = np.array([b*amount,g*amount,r*amount],np.uint8)

    image[x,y] = color
    # image[x,y] = color
# image[0:150,0:110] = [0, 255, 128]
cv2.imshow('image',image)
cv2.imwrite('access_pixel.png',image)

cv2.waitKey(0)
![]()
garniture
# -*- coding: utf-8 -*-
import cv2, matplotlib
import numpy as np
import matplotlib.pyplot as plt

###
#Accès aux pixels
###

#Génération d'images
image = cv2.imread('sample.png')

x = 200
y = 180
width = 150
height = 120

dstImg = image[y:y+height,x:x+width]

cv2.imshow('image',image)
cv2.imshow('dst',dstImg)

cv2.imwrite('trimming.png',dstImg)
cv2.waitKey(0)

redimensionner
# -*- coding: utf-8 -*-
import cv2, matplotlib
import numpy as np
import matplotlib.pyplot as plt

###
#Accès aux pixels
###

#Génération d'images
image = cv2.imread('sample.png')

width = image.shape[0]
height = image.shape[1]
resizeImg = cv2.resize(image,(height/2,width/2))
cv2.imshow('original',image )
cv2.imshow('resize',resizeImg)
cv2.imwrite('resize.png',resizeImg)
cv2.waitKey(0)
Ajouter
# -*- coding: utf-8 -*-
import cv2, matplotlib
import numpy as np
import matplotlib.pyplot as plt

###
#Accès aux pixels
###

#Génération d'images
sample1 = cv2.imread('addsample1.png')
sample2 = cv2.imread('addsample2.png')

width = 300
height = 300

addImg = np.zeros((height,width,3),np.uint8)

for x in xrange(0,width):
  for y in xrange(0,height):
    addpixel = sample1[x,y] + sample2[x,y]
    addImg[x,y] = addpixel


cv2.imshow('add',addImg)
cv2.imwrite('add.png',addImg)
cv2.waitKey(0)
Conversion d'affine
# -*- coding: utf-8 -*-
import cv2
import numpy as np

img = cv2.imread('sample.png')

# cv2.imshow('image',img)

width = img.shape[1]
height = img.shape[0]
center = tuple(np.array([width/2, height/2]))
size = tuple(np.array([width,height]))

#Une amende qui ne précise pas l'axe de rotation
#L'angle que vous souhaitez faire pivoter
rad = 45*np.pi/180
movX = 10
movY = 10

matrix = [
  [np.cos(rad),-1*np.sin(rad),movX],
  [np.sin(rad),np.cos(rad),movY]
]

afMat = np.float32(matrix)

#Une amende qui spécifie l'axe de rotation
angle = 45
scale = 1.0
rotMat = cv2.getRotationMatrix2D(center,angle,scale)

# afnImg = cv2.warpAffine(img,afMat,size,flags=cv2.INTER_LINEAR)
afnImg = cv2.warpAffine(img,rotMat,size,flags=cv2.INTER_CUBIC)
cv2.imshow('affine image',afnImg)
cv2.imwrite('affine.png',afnImg)
cv2.waitKey(0)
cv2.destroyAllWindows()
Inverser
# -*- coding: utf-8 -*-
import cv2
import numpy as np

img = cv2.imread('sample.png')
rimg = img.copy()
fimg = img.copy()
rimg = cv2.flip(img,1)
fimg = cv2.flip(img,0)

cv2.imshow('Original',img)
cv2.imshow('Vertical',rimg)
cv2.imshow('Horizontal',fimg)

cv2.imwrite('flip-vertical.png',rimg)
cv2.imwrite('flip-horizontal.png',fimg)


cv2.waitKey(0)
cv2.destroyAllWindows()
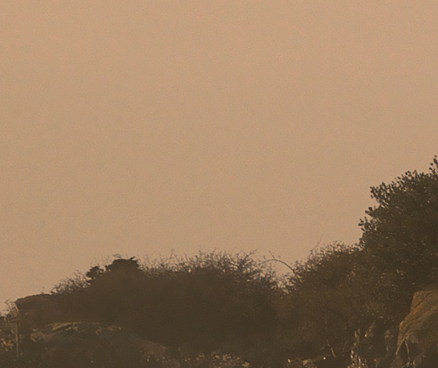
Retourner à l'envers

Retourner à gauche et à droite
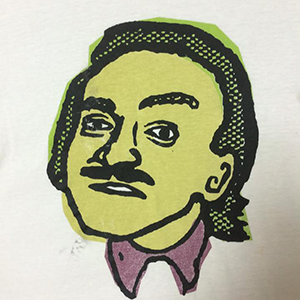
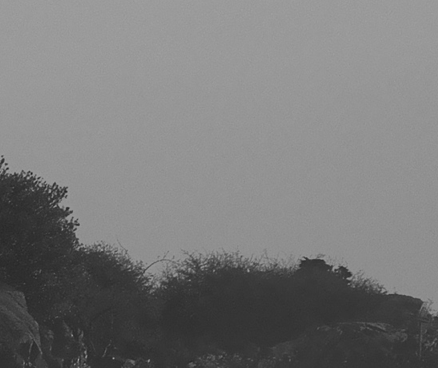
Conversion de l'échelle de gris
# -*- coding: utf-8 -*-
import cv2, matplotlib
import numpy as np
import matplotlib.pyplot as plt

img = cv2.imread('sample.png')

gray = cv2.cvtColor(img,cv2.COLOR_RGB2GRAY)
cv2.imshow('result',gray)
cv2.imwrite('grey.png',gray)
cv2.waitKey(0)
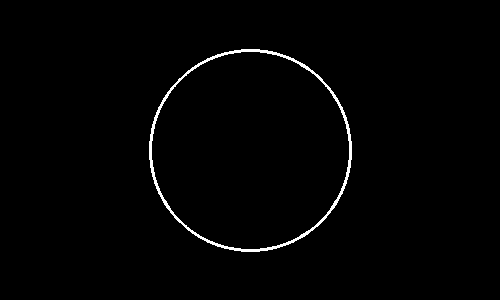
Utilisez la fonction de dessin Circle.
import cv2
import numpy as np

img = cv2.imread('sample.png')
w = 400
h = 300

plane = np.zeros([300,500],np.uint8)
center = tuple([plane.shape[1]/2,plane.shape[0]/2])
radius = 100
color = tuple([255,0,0])
thickness = 2
cv2.circle(plane,center,radius,color,thickness)
cv2.imshow('plane',plane)
cv2.imwrite('circle.png',plane)
cv2.waitKey(0)
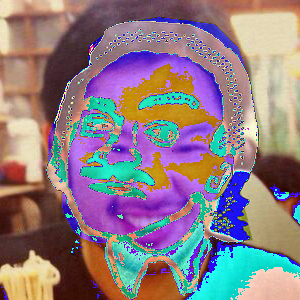
Extraction de couleur
# -*- coding: utf-8 -*-
import cv2
import numpy as np
original = cv2.imread('sample.png', 1)
img = original.copy()
dst = np.zeros(img.shape,np.uint8)

hsv = cv2.cvtColor(img,cv2.COLOR_BGR2HSV)

colorRange = [0,10]
thanSaturate = 0
thanValue = 0

for x in xrange(0,img.shape[1]):
  for y in xrange(0,img.shape[0]):
    # HSV
    if hsv[y,x][0] >= colorRange[0] and hsv[y,x][0] < colorRange[1] and hsv[y,x][1] > thanSaturate and hsv[y,x][2] > thanValue:
      radius = 1
      color = tuple([255,0,0])
      thicness = 1
      cv2.circle(img,tuple([x,y]),radius,color,thicness)

      dst[y,x] = img[y,x]

cv2.imshow('Original',original)
cv2.imshow('Add',img)
cv2.imshow('Diff',dst)
cv2.imwrite('add.png',img)
cv2.imwrite('diff.png',dst)
cv2.waitKey(0)
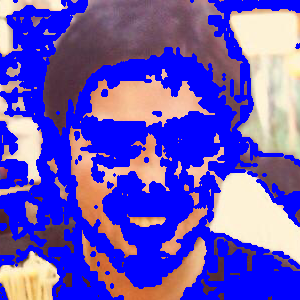
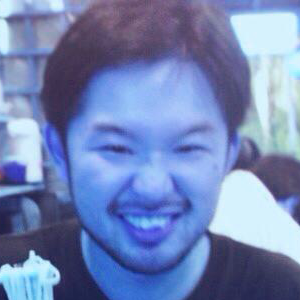
Original

Extraction
Add
Remplacement du canal de couleur
import cv2
import numpy as np
import matplotlib
import matplotlib.pyplot as plt

img = cv2.imread('sample.png')
bgr = cv2.split(img)

blue = bgr[0]
green = bgr[1]
red = bgr[2]

# plt.add(blue)
# plt.show(blue)

changeChannel = cv2.merge([red,green,blue])

cv2.imshow('changeChannel',changeChannel)
cv2.imwrite('changeChannel.png',changeChannel)
cv2.waitKey(0)
Cliquez ici pour la source github Il y a probablement une suite parce qu'étudier est sans fin. Je fais également référence à divers sites. Merci tout le monde.
Recommended Posts