[PYTHON] Get started with machine learning with SageMaker
Introduction
Build and deploy a machine learning model by following the AWS official How to get started with Amazon SageMaker procedure. I decided to practice the flow up to.
I will post this article as my own hands-on learning memo.
table of contents
-[What is machine learning](#What is machine learning) -[Overview of SageMaker](#Overview of SageMaker) -Tutorial -Conclusion
What is machine learning?
Omitted here. See below for an overview.
Machine learning starting from scratch (overview of machine learning)
Overview of SageMaker
For more information, see the official AWS Amazon SageMaker Documentation.
Amazon SageMaker is a fully managed machine learning service. Amazon SageMaker allows data scientists and developers to quickly and easily build and train machine learning models and deploy directly to a ready-to-go hosted environment. Easily access data sources for research and analysis from an integrated Jupyter authoring notebook instance, eliminating the need to manage servers. You can also use common machine learning algorithms. Such algorithms are optimized to run efficiently even on very large amounts of data in distributed environments. With native support for your own algorithms and frameworks, Amazon SageMaker also offers flexible, distributed training that you can tailor to your own workflow. Deploy your model in a secure and scalable environment with a single click launch from Amazon SageMaker Studio or the Amazon SageMaker console. Training and hosting are billed on a minute-by-minute basis. There is no minimum charge or prepayment obligation.
(Quoted from https://docs.aws.amazon.com/ja_jp/sagemaker/latest/dg/whatis.html)
As you can see from the SageMaker illustration, there are several instances, but what are their roles? → Materials published by AWS official was easy to understand, so it is described below.

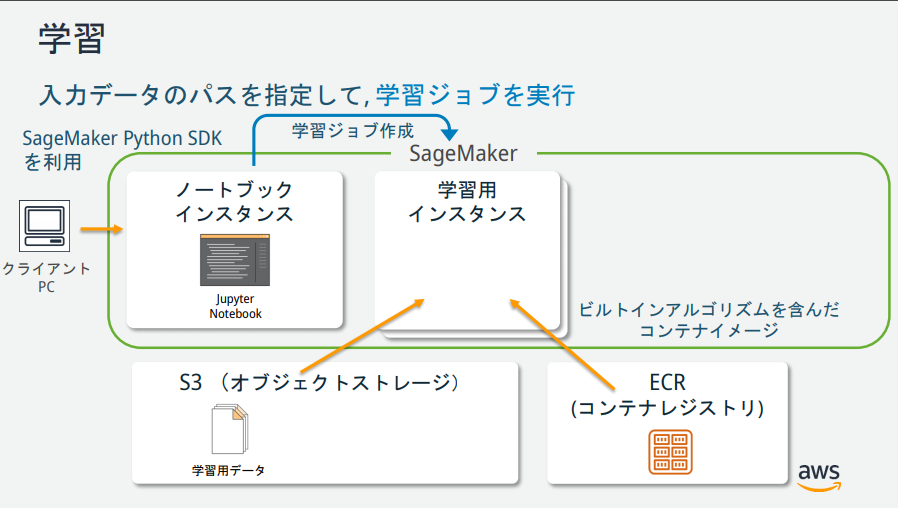

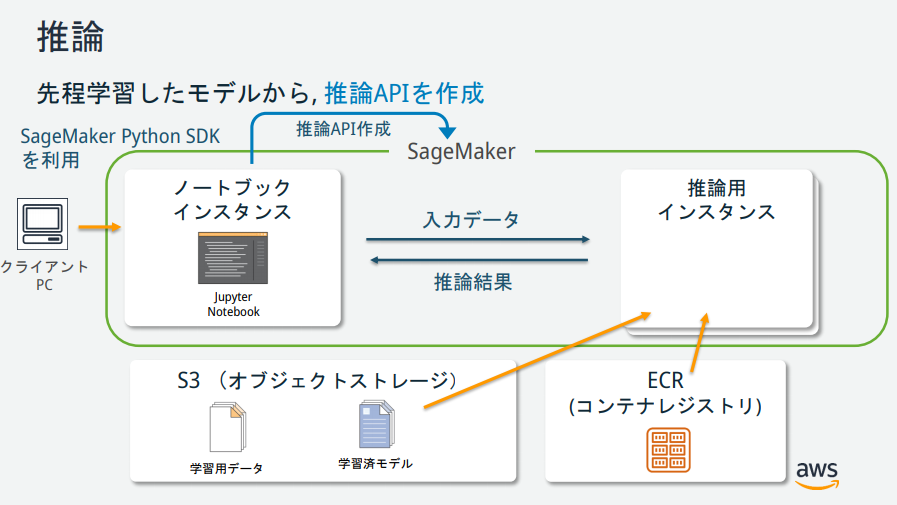
(Quoted from https://pages.awscloud.com/event_JAPAN_hands-on-ml_ondemand_confirmation.html)
tutorial
AWS official Tutorial is implemented.
Create an Amazon S3 bucket
Create a place (bucket) to store the data used for machine learning and the learning result (model).
Creating an Amazon SageMaker Notebook Instance
An Amazon SageMaker notebook instance is a fully managed machine learning EC2 computing instance with Jupyter Notebook installed.
Create a Jupyter notebook
What is a Jupyter notebook?
An open source tool that aims to centrally manage program creation, execution results, graphs, work memos and related documents in a file format called a notebook. This is especially useful when you want to interactively execute a program and perform the next work while referring to the result, or when you want to save the output result and keep it as a work record with a memo, such as in data analysis work. Is.
(Quoted from https://www.seplus.jp/dokushuzemi/blog/2020/04/tech_words_jupyter_notebook.html)
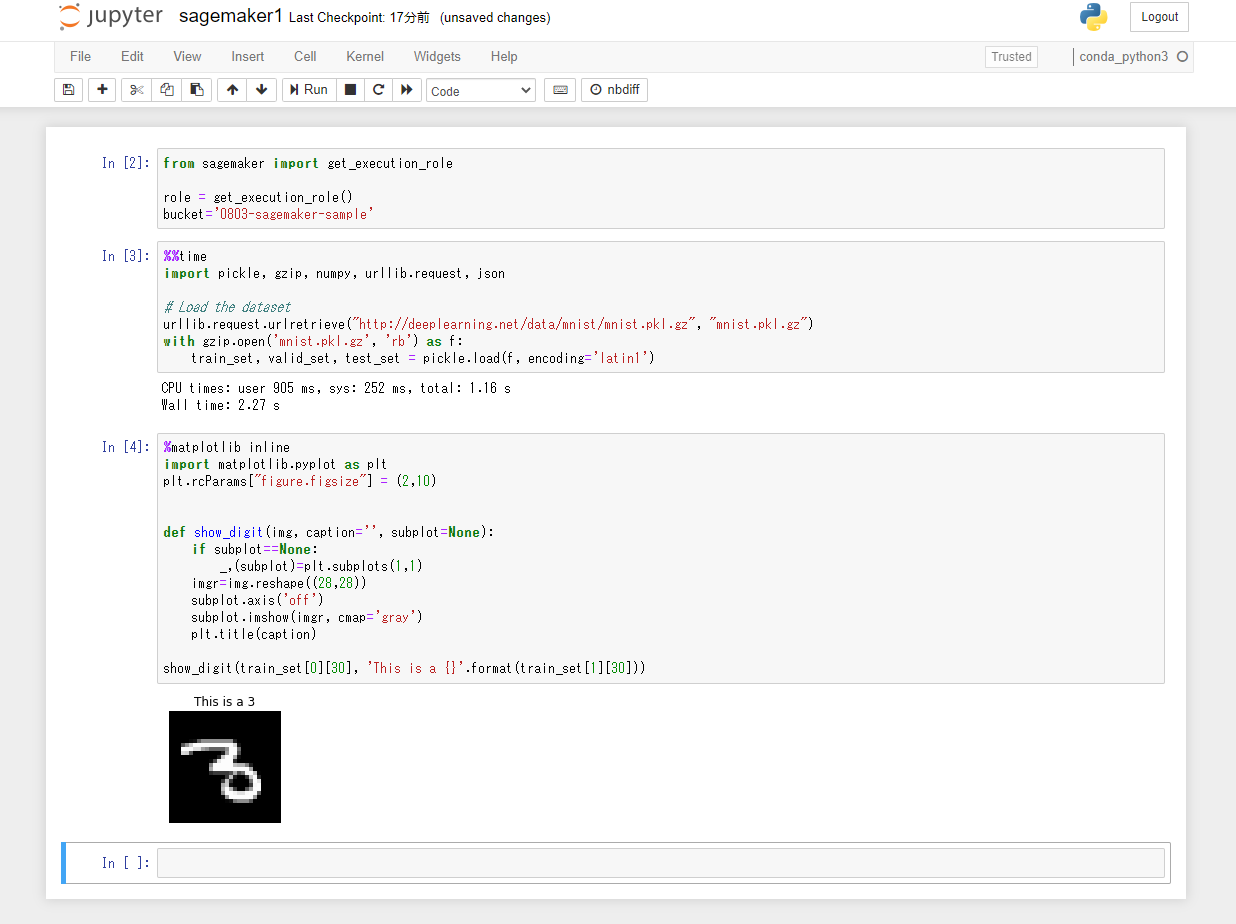
Select "conda_python3" from "New". A new notebook is created.

Write code to specify S3 and roles.
from sagemaker import get_execution_role

role = get_execution_role()
bucket='0803-sagemaker-sample'
Download, investigate, and convert data
Download the MNIST dataset
What is MNIST data?
MNIST (Mixed National Institute of Standards and Technology database) is an image data set that collects 60,000 handwritten digit images and 10,000 test images. In addition, it is also a dataset in which the correct label is given to the handwritten numbers "0-9", which is a popular dataset for image classification problems.
(Quoted from https://udemy.benesse.co.jp/ai/mnist.html)
Write the code to download the MNIST dataset.
%%time
import pickle, gzip, numpy, urllib.request, json

# Load the dataset
urllib.request.urlretrieve("http://deeplearning.net/data/mnist/mnist.pkl.gz", "mnist.pkl.gz")
with gzip.open('mnist.pkl.gz', 'rb') as f:
    train_set, valid_set, test_set = pickle.load(f, encoding='latin1')
Examine the training dataset
Paste the following Python code into the third cell and click the "Run" button. The 31st image data of the MNIST dataset is displayed along with the contents of the label.
%matplotlib inline
import matplotlib.pyplot as plt
plt.rcParams["figure.figsize"] = (2,10)


def show_digit(img, caption='', subplot=None):
    if subplot==None:
        _,(subplot)=plt.subplots(1,1)
    imgr=img.reshape((28,28))
    subplot.axis('off')
    subplot.imshow(imgr, cmap='gray')
    plt.title(caption)

show_digit(train_set[0][30], 'This is a {}'.format(train_set[1][30]))
Train the model
Choose a training algorithm
Machine learning usually requires an evaluation process to find a suitable algorithm for the model. This time we decided to use k-means, one of SageMaker's built-in algorithms, so we'll skip the evaluation process.
What is k-means?
The K-means method is one of the standard algorithms for clustering. Details are omitted here.
Creating a training job
Paste the following Python code into the 4th cell and click the "Run" button.
from sagemaker import KMeans

data_location = 's3://{}/kmeans_highlevel_example/data'.format(bucket)
output_location = 's3://{}/kmeans_example/output'.format(bucket)

print('training data will be uploaded to: {}'.format(data_location))
print('training artifacts will be uploaded to: {}'.format(output_location))

kmeans = KMeans(role=role,
                train_instance_count=2,
                train_instance_type='ml.c4.8xlarge',
                output_path=output_location,
                k=10,
                data_location=data_location)
Training
Perform model training. Paste the following Python code into the 5th cell and click the "Run" button. The training takes about 10 minutes.
%%time

kmeans.fit(kmeans.record_set(train_set[0]))
If you check S3 after training the model, you will find the training data for the model and the model artifacts generated during the training of the model.

Deploy your model to Amazon SageMaker
In order to deploy the model to SageMaker, you need to perform the following three steps.
--Create a model on SageMaker --Creating endpoint settings --Create endpoint
You can do these things with just one method called deploy. Paste the following Python code into the 6th cell and click the "Run" button.
%%time

kmeans_predictor = kmeans.deploy(initial_instance_count=1,
                                 instance_type='ml.m4.xlarge')
Validate the model
Since the model has been deployed, verify it. Paste the following Python code into the 7th cell and click the "Run" button.
result = kmeans_predictor.predict(valid_set[0][28:29])
print(result)
The inference result for the 30th image of the valid_set dataset is obtained. It can be seen that the 28th data of valid_set belongs to cluster 6.
[label {
  key: "closest_cluster"
  value {
    float32_tensor {
      values: 6.0
    }
  }
}
label {
  key: "distance_to_cluster"
  value {
    float32_tensor {
      values: 6.878328800201416
    }
  }
}
]
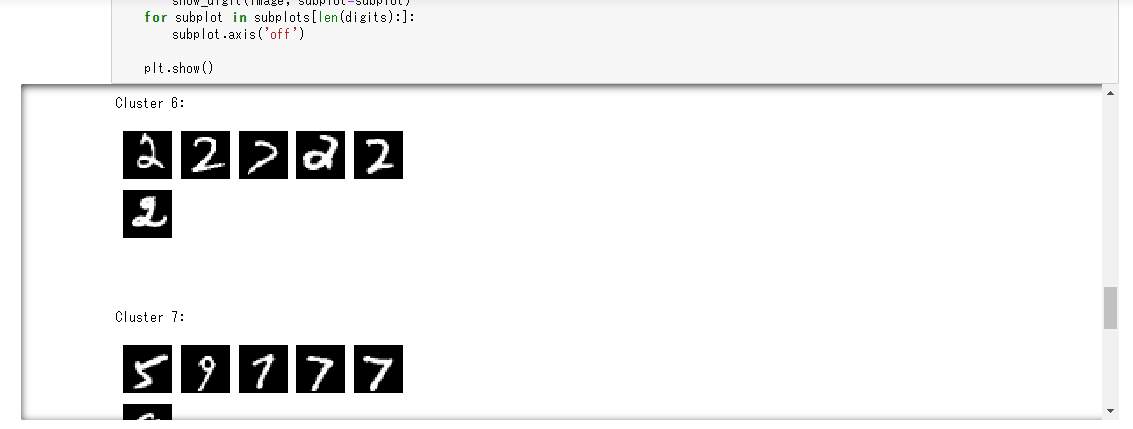
Then, the inference results for 100 pieces from the beginning of the valid_set data set are acquired. Paste the following Python code into the 8th and 9th cells and click the "Run" button in order.
%%time

result = kmeans_predictor.predict(valid_set[0][0:100])
clusters = [r.label['closest_cluster'].float32_tensor.values[0] for r in result]
for cluster in range(10):
    print('\n\n\nCluster {}:'.format(int(cluster)))
    digits = [ img for l, img in zip(clusters, valid_set[0]) if int(l) == cluster ]
    height = ((len(digits)-1)//5) + 1
    width = 5
    plt.rcParams["figure.figsize"] = (width,height)
    _, subplots = plt.subplots(height, width)
    subplots = numpy.ndarray.flatten(subplots)
    for subplot, image in zip(subplots, digits):
        show_digit(image, subplot=subplot)
    for subplot in subplots[len(digits):]:
        subplot.axis('off')

    plt.show()
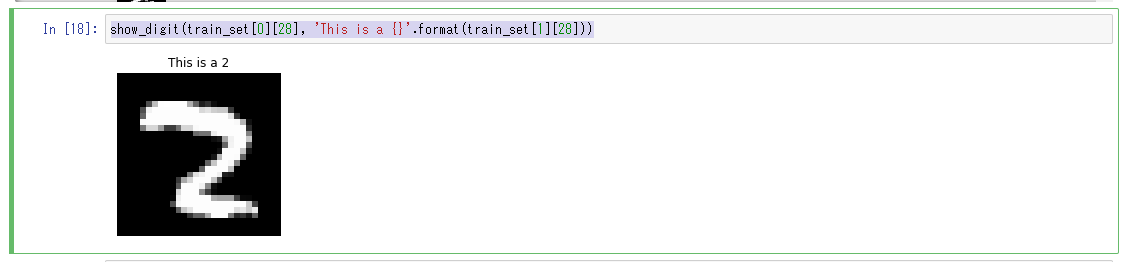
Display the 28th of the valid_set dataset using the show_digit method used in "Investigating the training dataset". You can see that it is an image contained in cluster 4.
show_digit(train_set[0][28], 'This is a {}'.format(train_set[1][28]))
Completed because the model was deployed and it was verified that it was working.
Delete the AWS resource you created
Deleted quietly. There is nothing special to mention.
in conclusion
This time, I used SagrMaker to try machine learning for the first time. Machine learning had an image of high barriers, but it was easier to use than I had imagined.
Looking at the recent announcements of each public cloud, I get the impression that they are trying to lower the threshold for machine learning. (I think that the skill of a specialized machine learning engineer is required for high-level analysis.) For a certain level of machine learning, even non-engineers who specialize in machine learning can use managed services to have a sense of speed. I think that the skills to build will be required, so I would like to continue learning about machine learning.
Reference material
How to get started with Amazon SageMaker [For beginners] Machine learning starting with Amazon SageMaker #SageMaker Amazon SageMaker Experience Hands-on for Machine Learning Engineers
Recommended Posts