[PYTHON] Easy Machine Learning with AutoAI (Part 4) Jupyter Notebook Edition
Introduction
With AutoAI, which we have introduced before, the function to export the created model to Jupyter Notebook has finally been released. In this article, we will try out this function as the 4th installment of the "Easy Machine Learning with AutoAI" series.
For past articles, please refer to the links below.
Easy Machine Learning with AutoAI (Part 1) Preparation Easy Machine Learning with AutoAI (Part 2) Model Construction Easy Machine Learning with AutoAI (Part 3) Web Services
Premise
In the following procedure, it is assumed that you have completed "Easy Machine Learning with AutoAI (Part 2) Model Construction" in the above series. (Part 3) is not mandatory.
Export Notebook
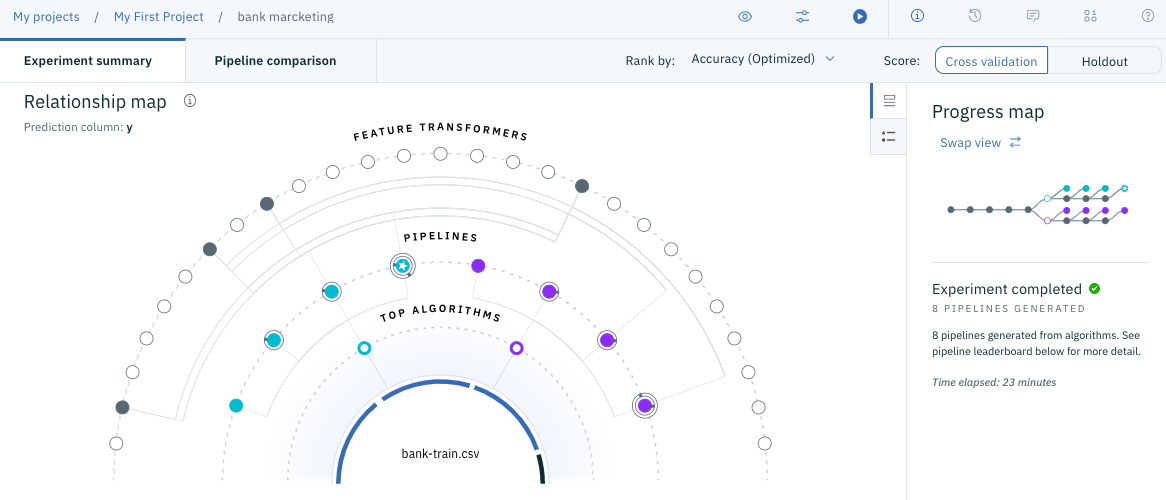
When the model construction is completed in (Part 2), the screen as shown in the figure below will be displayed. (The screen has changed from before due to the version upgrade)
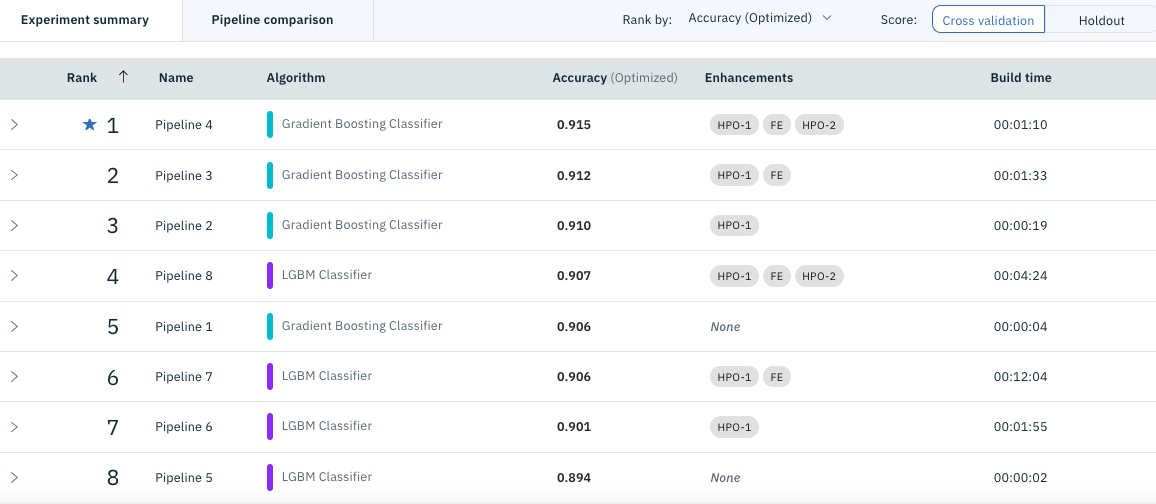
Scroll down the screen to see a list of created models as shown below.
Here, if you move the mouse pointer to the right of the model you want to export (usually at the top), the menu "** Save as **" will be displayed, so click it and it will look like the figure below. I will.
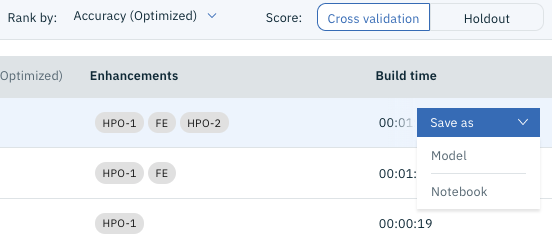
Here, select "Notebook" below. You should see a screen like the one below.
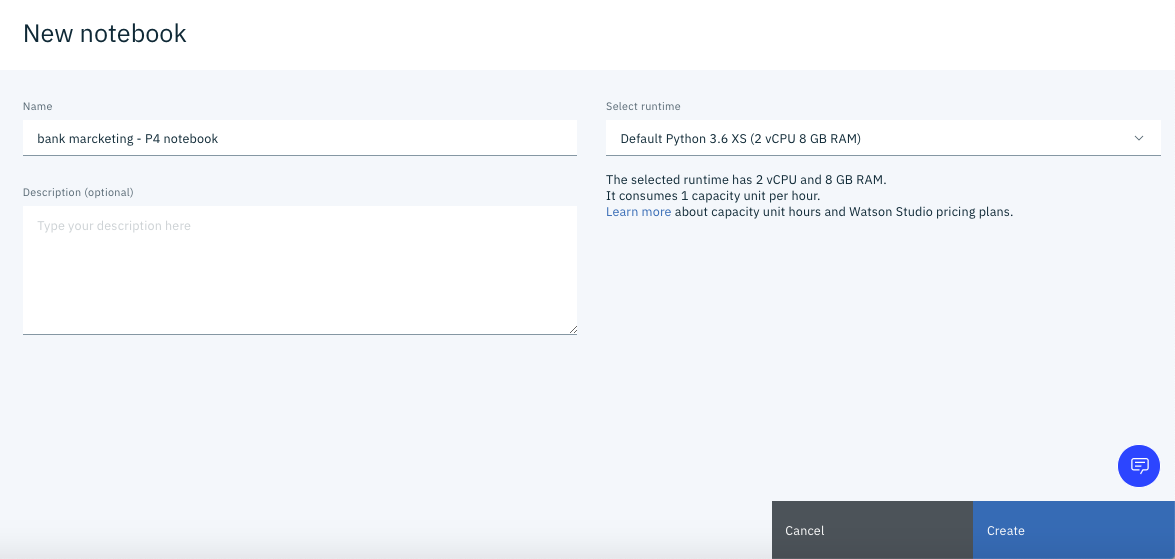
Click "** Create **" at the bottom right of the screen.
Wait for a while, and if the screen below appears, you have successfully exported. (Note: As of 2020-04-03, it still seems to be unstable and may fail on the way. In that case, please try again.)
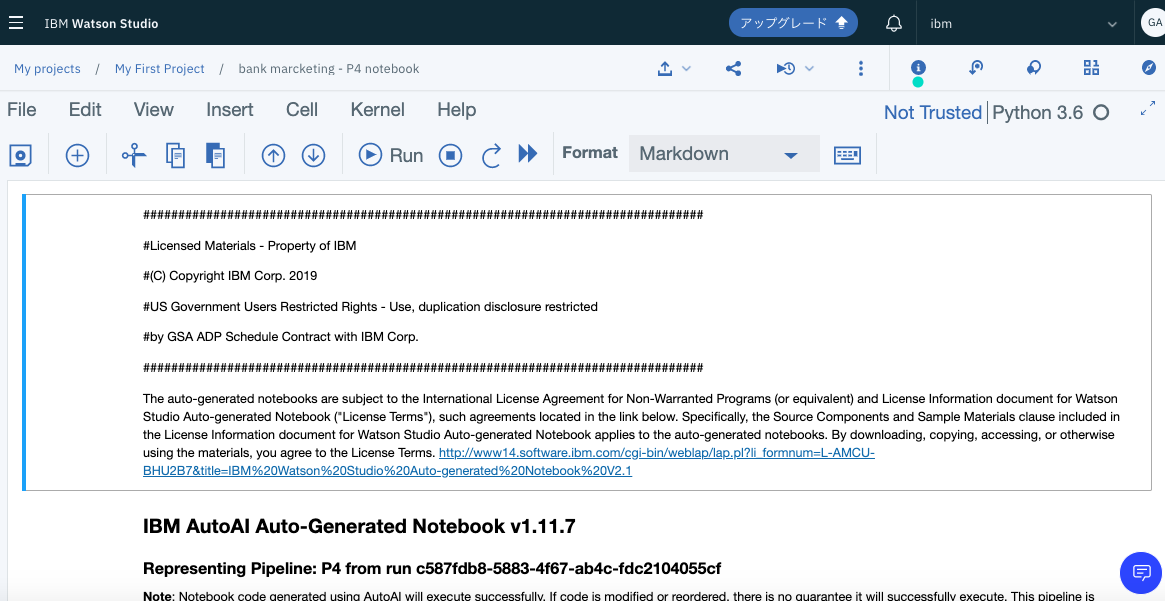
At this point, the Notebook is ready to work as the code for the Jupyter Notebook on Watson Studio. However, that's not very interesting, so I'd like to run it externally (Jupyter Notebook on a Mac PC). For that, click the ** download icon ** enclosed in the red frame in the figure below. The download should start automatically.

For reference, the sample of the exported notebook is uploaded below. Notebook link
Jupyter notebook Environment side preparation
Next, prepare the environment on the PC side. In my case, I have installed and used anacoda (4.8.1) a while ago on my Mac PC. I have not confirmed it in other environments, but I think that it works in almost the same procedure. The AutoAI model is based on the premise that there is a library for AutoAI at runtime, but the point is that ** this library is open to the public on the net and can be installed normally with the pip command **. Specifically, execute the following command.
$ pip install autoai-libs -U
(This library seems to be updated daily, so even if you have already installed it, you should update it when using notebook. I got stuck with this.)
Besides this, in the default anaconda environment
$ pip install lightgbm
$ pip install xgboost
I think I also needed it. (Memory is a little vague) There may be other libraries that are missing at runtime, but the important thing is that ** only the libraries posted on the net can cover all the libraries needed to build the AutoAI model **.
Running a model on Jupyter Notebook
Now, let's run the exported model in the Jupyter environment on the PC.
Now, when I look at the code in Notebook, if the above three libraries are missing in the first cell, they are automatically installed. Alternatively, the steps above may not be necessary.
Notebook pre-modification
If you want to run it on your local Jupyter, please modify the following two parts of the automatically generated notebook.
COS access part
The cells below are for downloading CSV files stored in COS (Cloud Object Storage) and are not required for local use. I'm not careful, so I'll delete it.

Add local file definition
Set the learning CSV file in the readable variable in the cell below. Copy the CSV file to the same directory as Notebook.

Run
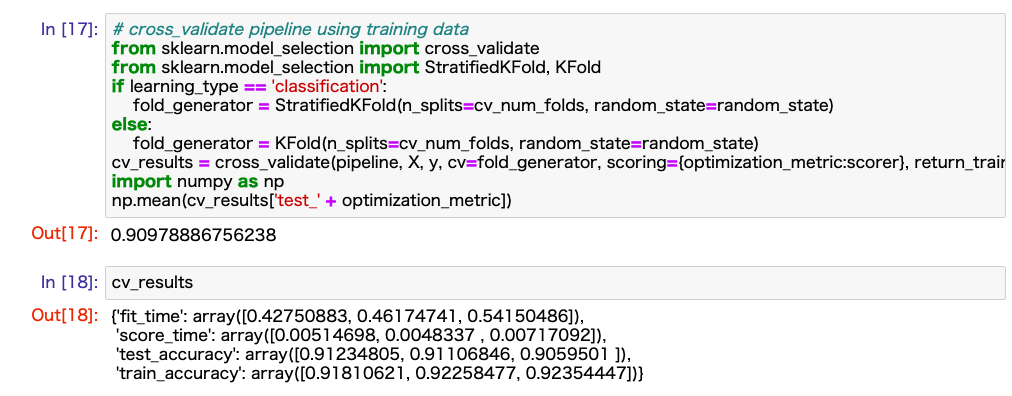
After completing the above two preparations, you should be able to build and evaluate the model by executing the cells in order from the top. I have attached a sample image of the result.
bonus
Test execution with verification data
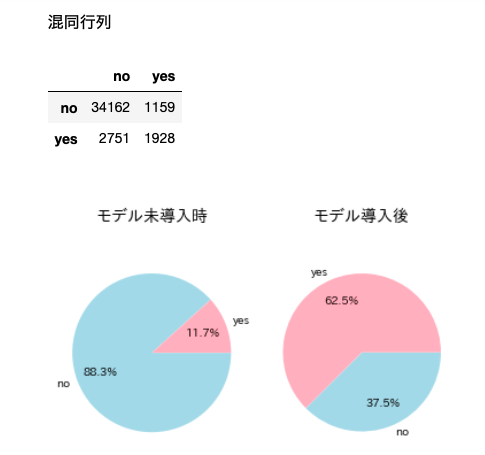
Copy the code below into the bottom cell of the Notebook above. With the same 40,000 verification data used in (3), you can call the model and check the result of accuracy evaluation. Note that the model (Pipeline) input data should use the preprocessed result.
The final result sample is attached below.
The code below has also been uploaded to github. Notebook addition code
#Accuracy verification with 40,000 verification data prepared in advance

%matplotlib inline
#Introduction of required libraries
!pip install japanize-matplotlib | tail -n 1

#Import of required libraries
import matplotlib.pyplot as plt

#Japanese localization
import japanize_matplotlib #Japanese matplotlib

#Load into dataframe
csv_url = 'https://raw.githubusercontent.com/makaishi2/sample-data/master/data/bank-test.csv'
df_bank_test = pd.read_csv(csv_url)

#Check the result
print('')
print('CSV data for verification')
display(df_bank_test.head())

#Extraction of correct data correct
correct = df_bank_test.y.values

#Creating an input data array

df_sub = df_bank_test.copy()

#Delete objective variable column
df_sub = df_sub.drop('y', axis=1)

#Check the result
print('')
print('Model input data')
display(df_sub.head())

#Forecast implementation
X_prep = preprocessing_pipeline.transform(df_sub.values)
predict = pipeline.predict(X_prep)

#Check the result
print('')
print('Prediction result')
display(predict[:10])

#Calculation of confusion matrix
from sklearn.metrics import confusion_matrix
matrix = confusion_matrix(correct, predict)
df_matrix = pd.DataFrame(matrix, columns=['no', 'yes'], index=['no', 'yes'])

###Confusion matrix display
print()
print('Confusion matrix')
display(df_matrix)

#Calculation of the number of yes and no in the correct data
y_count = np.count_nonzero(correct == 'yes')
n_count = np.count_nonzero(correct == 'no')

#Number of yes and no in the correct answer data among those whose predicted value was yes
yy_count = df_matrix.yes.yes
yn_count = df_matrix.yes.no

#Comparison of closing rates with and without the model
print()
plt.subplot(1, 2, 1)
label = ['yes', 'no']
colors = ["lightpink", "lightblue"]
x = np.array([y_count, n_count])
plt.pie(x, labels=label, colors=colors,
       autopct="%1.1f%%", pctdistance=0.7)
plt.title('When the model is not introduced', fontsize=14)
plt.axis('equal')

plt.subplot(1, 2, 2)
label = ['yes', 'no']
colors = ["lightpink", "lightblue"]
x = np.array([yy_count, yn_count])
plt.pie(x, labels=label, colors=colors,
       autopct="%1.1f%%", pctdistance=0.7)
plt.title('After model introduction', fontsize=14)
plt.axis('equal')

plt.show()
Recommended Posts