Create an app with Spring Boot
Currently creating a Spring Boot app. For the time being, I built the environment and was able to go to the place where the application started, so make a note. Output for personal notes.
Download STS
-Install a dedicated editor to proceed with Spring Boot development. See below for the procedure. https://qiita.com/andna0410/items/e9cc07c9e2e34a542245 ~~ ・ Install Lombok as an option. See below for the procedure. https://qiita.com/t-iguchi/items/a0c88df01b6a601afbed~~
Project creation
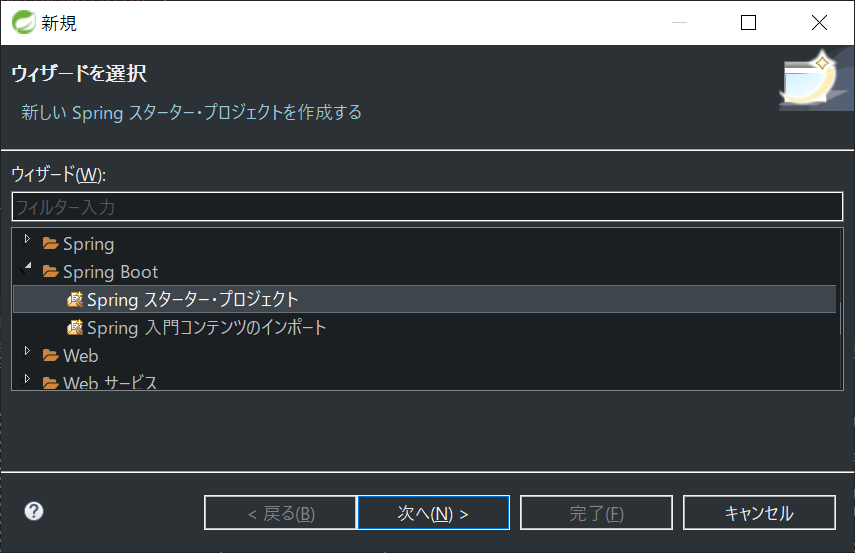
● "File"-> "New"-> "Other"-> "Spring Boot"-> "Spring Starter Project"
● Project name setting
-"Name": SpringApp1 </ font> → The name of the app.
・ "Group": com.ex1 </ font> → Domain-like feeling? (Like xxx.com), don't overlap with other groups.
-"Delivery": SpringApp1 </ font> → This is also the name of the app. Basically, when you enter the "name", it will be entered automatically.
-"Package": com.ex1 </ font> → Package name as it is. I think it's the same as "group".
・ If it looks like the image below, click "Next".
 ● Dependency settings
・ Enter a keyword in the place of "Available:" and select what to use.
-"Spring Boot Dev Tools"-> After editing the code, the server will be restarted automatically.
~~ ・ "Lombok" → Getters and setters are automatically generated. ~~
-"JDBC API"-> database driver.
・ "H2 Database" → Database (not used in production)
-"Thymeleaf" → is an HTML template engine used in the SpringBoot standard.
・ "Spring Web" → Spring MVC and Spring Boot can be used.
・ If you see the image below, press "Finish".
● Dependency settings
・ Enter a keyword in the place of "Available:" and select what to use.
-"Spring Boot Dev Tools"-> After editing the code, the server will be restarted automatically.
~~ ・ "Lombok" → Getters and setters are automatically generated. ~~
-"JDBC API"-> database driver.
・ "H2 Database" → Database (not used in production)
-"Thymeleaf" → is an HTML template engine used in the SpringBoot standard.
・ "Spring Web" → Spring MVC and Spring Boot can be used.
・ If you see the image below, press "Finish".
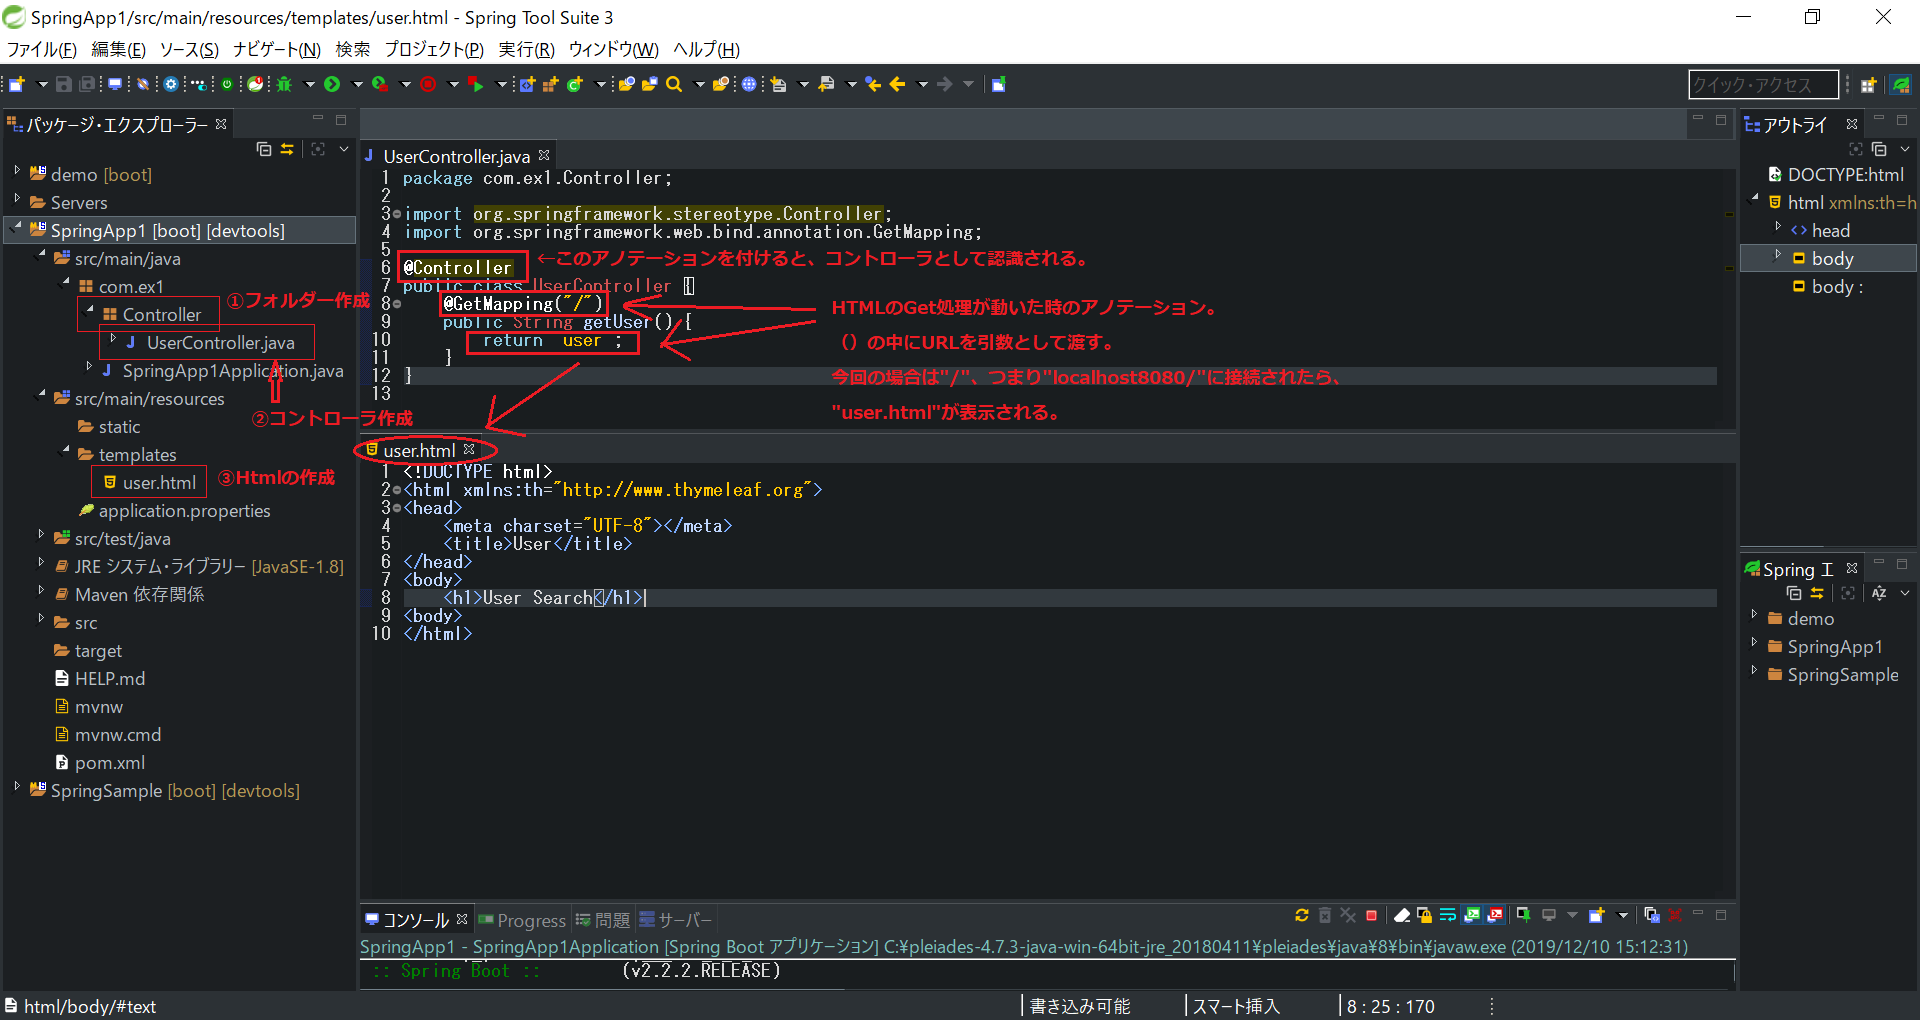
 ● Create controllers and views
-Since "com.ex1" is created in "src / main / java </ font>" ** Create a "Controller" folder under it. ** **
-Create "UserController.java" under it. ** **
-Create "user.html" under ** "templates" of "src / main / resources </ font>". ** **
● Create controllers and views
-Since "com.ex1" is created in "src / main / java </ font>" ** Create a "Controller" folder under it. ** **
-Create "UserController.java" under it. ** **
-Create "user.html" under ** "templates" of "src / main / resources </ font>". ** **
● Edit the contents of the created file.
user.html
<!DOCTYPE html>
<html xmlns:th="http://www.thymeleaf.org">
<head>
    <meta charset="UTF-8"></meta>
    <title>User</title>
</head>
<body>
    <h1>User Search</h1>
<body>
</html>
UserController.java
package com.ex1.Controller;

import org.springframework.stereotype.Controller;
import org.springframework.web.bind.annotation.GetMapping;

@Controller
public class UserController {
	@GetMapping("/")
    public String getUser() {
        return "user";
    }
}
・ If it looks like the image below, it's OK.
● Execute the project and check the startup of the application.
-"Right-click on the project"-> "Run"-> "Spring Boot application"
 -Then, the following display is output on the console screen.
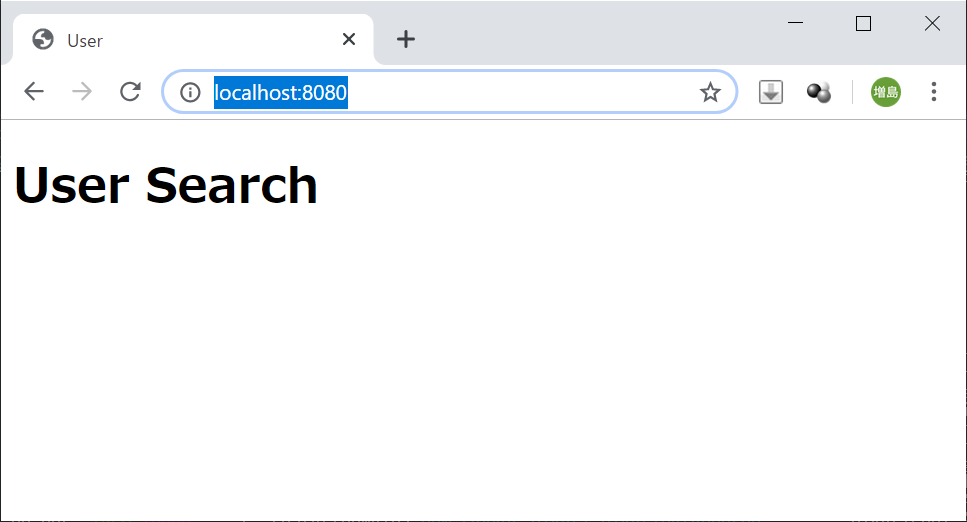
 ・ If you access "http: // localhost: 8080 /" and the following screen appears, you are successful.
Once here. Next, we will do the Post method and the point of fetching data from the DB.
Recommended Posts