[PYTHON] Build a machine learning environment using PyCharm on Ubuntu environment (TensorFlow will also be introduced!)
Machine learning is popular these days, but I felt that it was difficult to build an environment in many situations, so I would like to make an article as a memorandum and provide one piece of information.
environment Ubuntu 16.04.1 LTS on Windows 10 (using VirtualBox)
Purpose of the article
This article is about enabling machine learning and deep learning with PyCharm on the newly installed guest operating system Ubuntu. Specifically, make it possible to use TensorFlow, NumPy, etc.
- This time, we will create a CPU-only TensorFlow environment.
- I would be grateful if you could point out any mistakes or other good methods.
procedure
- Install Anaconda3 (this will prepare the basic Python environment)
- Building a Python 3.5 environment
- Install and configure PyCharm
- Install TensorFlow
- Confirmation
- The code that appears throughout the article is a Linux command or Python. Unless otherwise stated above the code, it is a Linux command. Also, all Linux commands are executed as general users (not administrators) (the notation such as $ is omitted).
Installation of Anaconda3
From here, check the OS bit, Python version, etc., and install the appropriate one. I downloaded the Python 3.6 installer for Linux. For more information [here [4]](http://pythondatascience.plavox.info/python%E3%81%AE%E3%82%A4%E3%83%B3%E3%82%B9%E3%83%88 See% E3% 83% BC% E3% 83% AB / anaconda-ubuntu-linux /).

After the installation is complete, the sh file will be created under the ~ / Downloads directory. Type the following command. Refer to the site of [4] and proceed (if you are asked yes / no, yes otherwise, you can press Enter).
bash ~/Downloads/Anaconda3-4.3.0-Linux-x86_64.sh
echo 'export PATH=/home/user/anaconda3/bin:$PATH' >> ~/.bashrc
source ~/.bashrc```

 * (The above version of Anaconda seems to be installed at the moment. Please check the version before executing the command)
 It is OK if you can display the version of conda with the following command.


#### **`conda -V #conda 4.3.8`**
Also check the Python version.
python --version #Python 3.6.0 :: Anaconda 4.3.0 (64-bit)
 The version of python seems to be 3.6.0.
 It should be noted here that TensorFlow seems to support up to 3.5 for Python 3 series at the moment. Therefore, we are going to build an environment for TensorFlow with anaconda.


## Create an environment for Python 3.5
 Execute the following command. Create a Python 3.5 version environment with the name tf.


#### **`conda create -n tf python=3.5 anaconda`**
```5 anaconda


 Now you can enter the python3.5 environment with source arctivate tf. Let's execute the command.
 (Source deactivate if deactivated)
source arctivate tf
## Install TensorFlow
 Install TensorFlow. Execute the following command.
export TF_BINARY_URL=https://storage.googleapis.com/tensorflow/linux/cpu/tensorflow-0.11.0-cp35-cp35m-linux_x86_64.whl pip install --upgrade $TF_BINARY_URL
## Install PyCharm
 Download PyCharm from [here](http://www.jetbrains.com/pycharm/download/#section=linux). This time we will use the community edition.

 Go to the directory where the downloaded file is located. If you don't know the directory, in Firefox you can see the download list by clicking the down arrow button in the upper right corner. Click the folder button to the right of the file you want to see the directory to jump to the directory where the file is located.

 In the directory, this time unzip the "pycharm-community-2016.3.2.tar.gz" file. You can use the command, but this time, right-click the file and select "Extract to" to extract it while specifying the extraction destination. The decompression destination is the user's home directory.

 PyCharm is executed by the following command.
bash pycharm-community-2016.3.2/bin/pycharm.sh
Create a new project with Create New Project.
Then specify Interpreter. In my environment, I specified ~ / anaconda3 / envs / tf / bin / python. If you don't know which one to specify, just keep the defaults and proceed. The project will be created (it may take some time).

To select Interpreter, select File-> settings-> Project: Project Name-> Project Interpreter on the toolbar.
* It seems that settings may be referred to as preference.
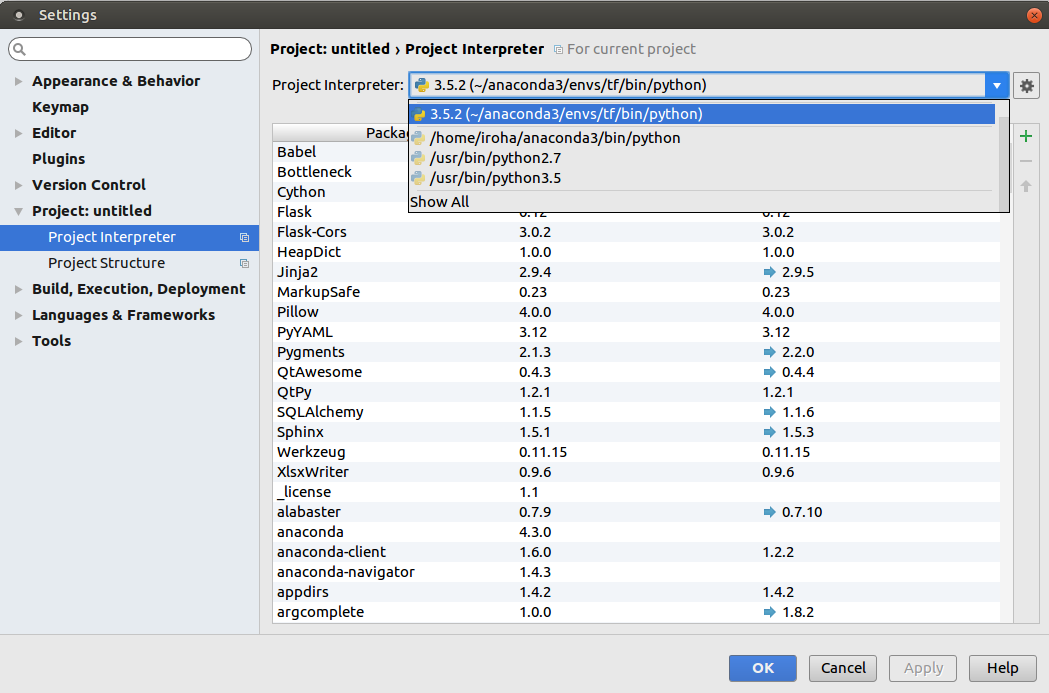
You can select Interpreter from the pull-down menu. Also, you can see what kind of package is included, so select the one that contains the necessary items. This time, I judged whether tensorflow, matplotlib, and numpy are included.
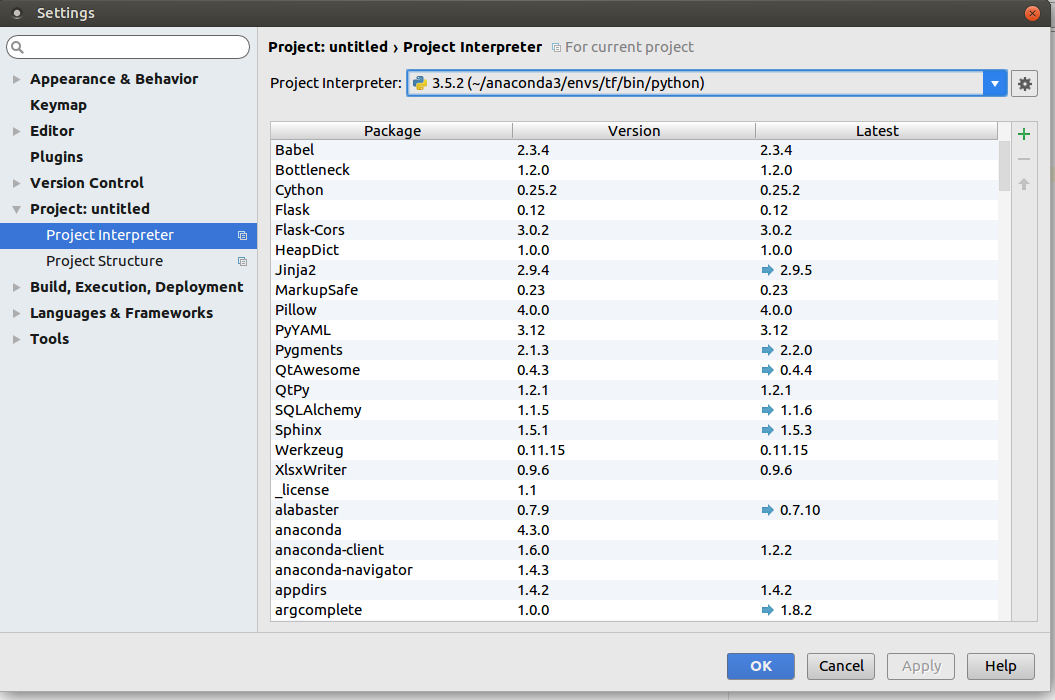
* You can check the package and version
## Verification
Now, let's check if TensorFlow etc. actually works properly.
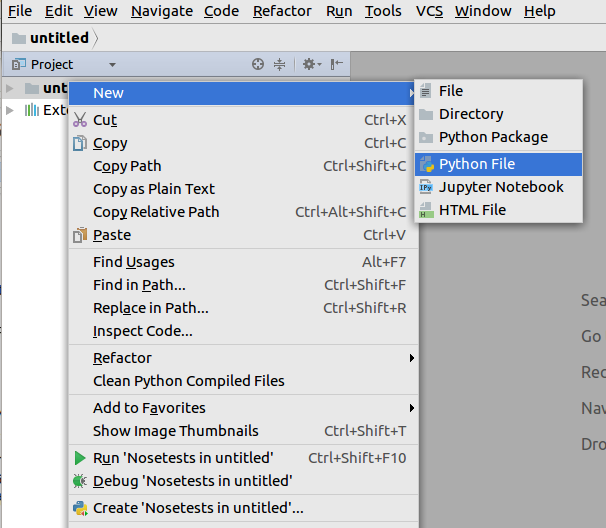
Create a Python file. This time it was main.py.
Type in the following Python code and execute it (you can execute it with ctrl + shift + F10). I referred to [here](http://dev.classmethod.jp/machine-learning/tensorflow-hello-world/) (However, since it was written in Python2 series, it has been rewritten to Python3 series).
#### **`main.py`**
```python
import tensorflow as tf
import multiprocessing as mp
core_num = mp.cpu_count()
config = tf.ConfigProto(
inter_op_parallelism_threads=core_num,
intra_op_parallelism_threads=core_num)
sess = tf.Session(config=config)
hello = tf.constant('hello, tensorflow!')
print(sess.run(hello))
a = tf.constant(10)
b = tf.constant(32)
print(sess.run(a + b))
If you get the following result, you are successful.

また、MatplotlibとNumPyについても見てます。コードを上書きしてください。こちらを参考にしました。
main.py
import numpy as np
import matplotlib.pyplot as plt

X = np.linspace(-np.pi, np.pi, 256, endpoint=True)
C, S = np.cos(X), np.sin(X)

plt.plot(X, C)
plt.plot(X, S)

plt.show()
If it becomes as follows, it is successful.

That is all. Thank you for your hard work! Again, if you find something wrong or something you need to improve, please comment. happy. We are also grateful to those who share useful information, including the linked articles. Finally, have a fun machine learning life!