Build a Python environment on your Mac with Anaconda and PyCharm
Introduction
Nice to meet you, I'm Masanari (@log_masa). I'm a sophomore in college who is mainly studying the web system. I decided to write python in a university class, so I tried to build a python environment. I hope it will be helpful for people in similar circumstances.
environment
MacOS Catalina 10.15.1
Why Anaconda
Of course, Python 2.X is already installed in the Mac environment from the beginning. But Python 2.X So let's use Python 3.X. https://www.python.org/downloads/ It's good to install Python 3 from here, but it's a hassle to collect the libraries later, so use Anaconda, which installs the libraries all at once. We will build the environment of Python 3. Let's do it
We will build the environment
Installation of Anaconda
First, install Anaconda from here https://www.anaconda.com/
Launch the downloaded package and install it according to the instructions. I think it will take 10 to 20 minutes (long ...)
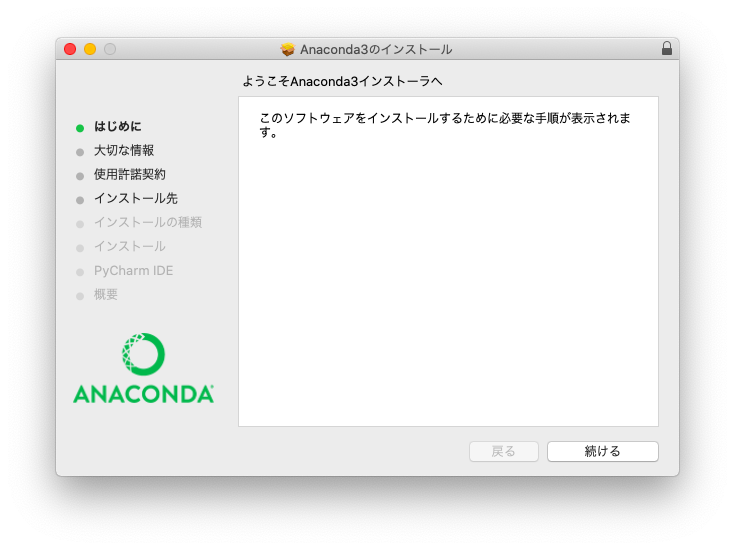
You have now installed python 3.
Confirmation of python 3
Let's start Terminal.
(base) macmac:~ hogehoge$
macmac is the name of your Mac. hogehoge is the name of the logged-in user. What is (base)? This is the name of the virtual environment created by Anaconda. Hmmm, if you're a fan, read this article.
python
Type in python and run it
Python 3.7.4 (default, Aug 13 2019, 15:17:50)
[Clang 4.0.1 (tags/RELEASE_401/final)] :: Anaconda, Inc. on darwin
Yes. I was able to confirm python 3 of Anaconda, Inc. Since the interactive shell is running, exit.
>>> exit()
I missed it. Next, check the location of python.
which python
Now you can see the location of python.
/Users/hogehoge/opt/anaconda3/bin/python
Like this. Anaconda has now installed python 3.
Install PyCharm
PyCharm is an IDE (Integrated Development Environment) provided by JetBrains. There are Professional (paid) and Community (free). Professional is available in a $ 199 / year subscription format. It seems that you can use it for free for the first 30 days, but it seems that it is quite troublesome to move from Professional to Community. People need to be careful when using Professional only during the free period.
This time, we will use the free community.
First, install PyCharm from here https://www.jetbrains.com/pycharm/download
When you download and start it,
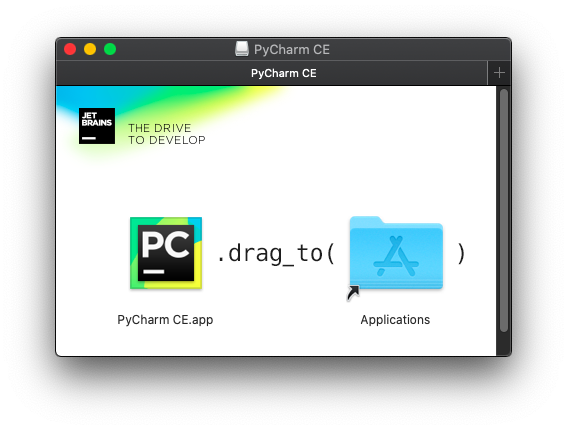
There is an instruction like this. Let's obey.
Now you can use PyCharm. However, there is still a problem with this. When I run python from PyCharm, it runs the python that comes with the Mac environment from the beginning. So, I will set it so that python installed by Anaconda can be executed.
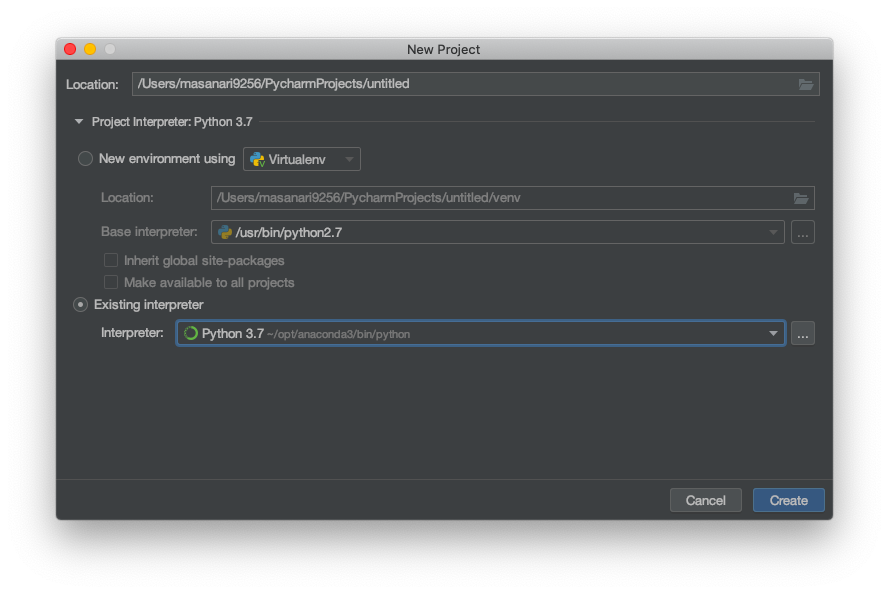 In this way, let's specify the python path confirmed earlier to the Existing interpreter.
Specify a working folder for Location and press Create ... Yes, now you have an environment where you can write python.
Do Hello World!
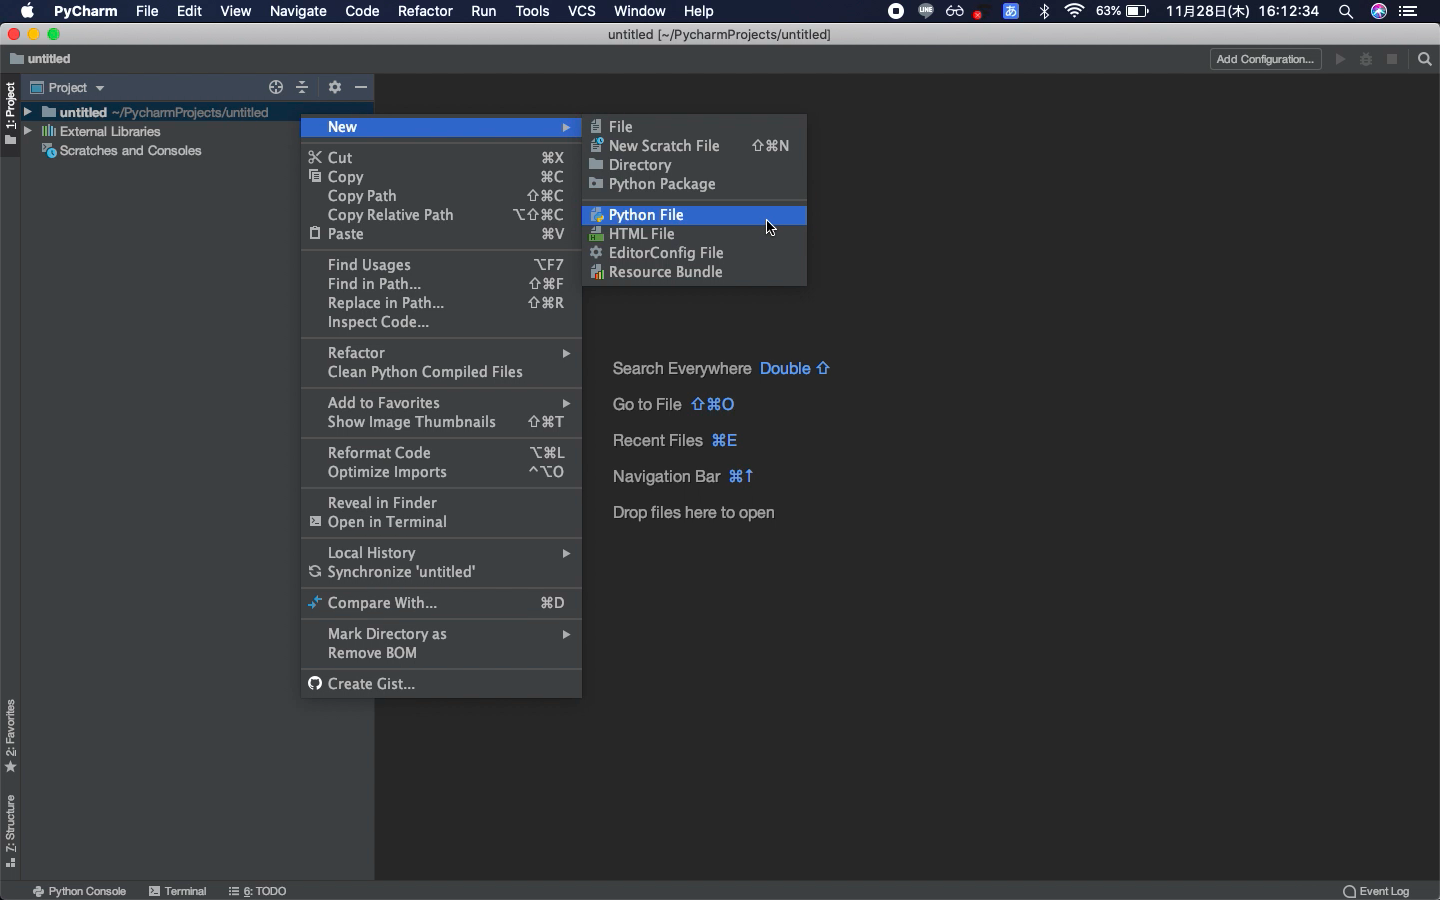
Create a python file in the specified folder and
hello.py
print('Hello World!')
PyCharm will save it for you. It's the best. Execution is performed from Add Configuration on the upper right.
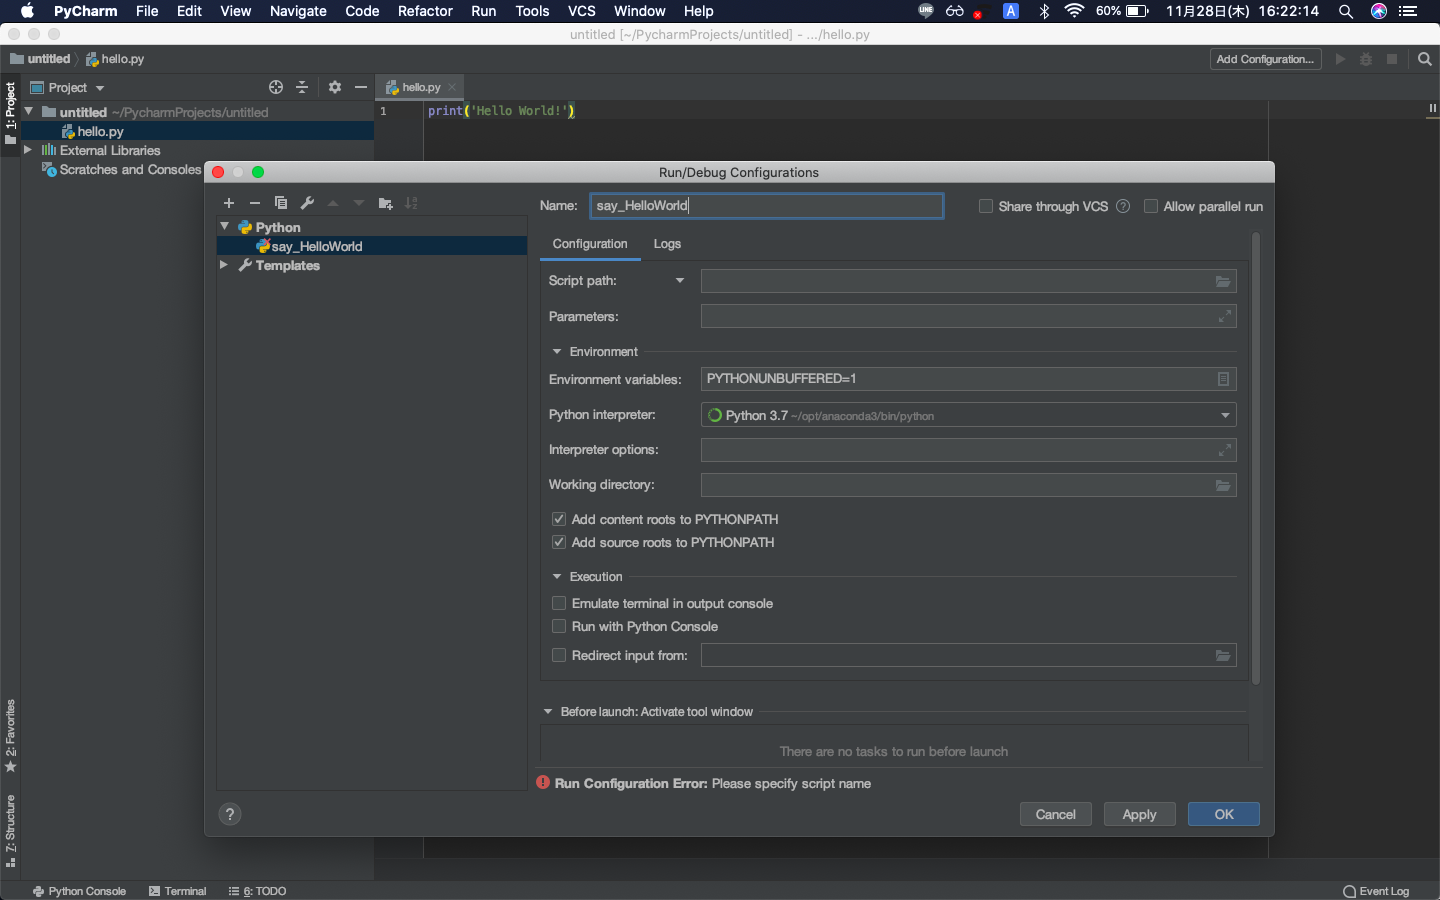
Give it a name and OK For Script Path, specify the file you want to execute. (Here, hello.py) Execute with Ctrl-R! !! !! !!
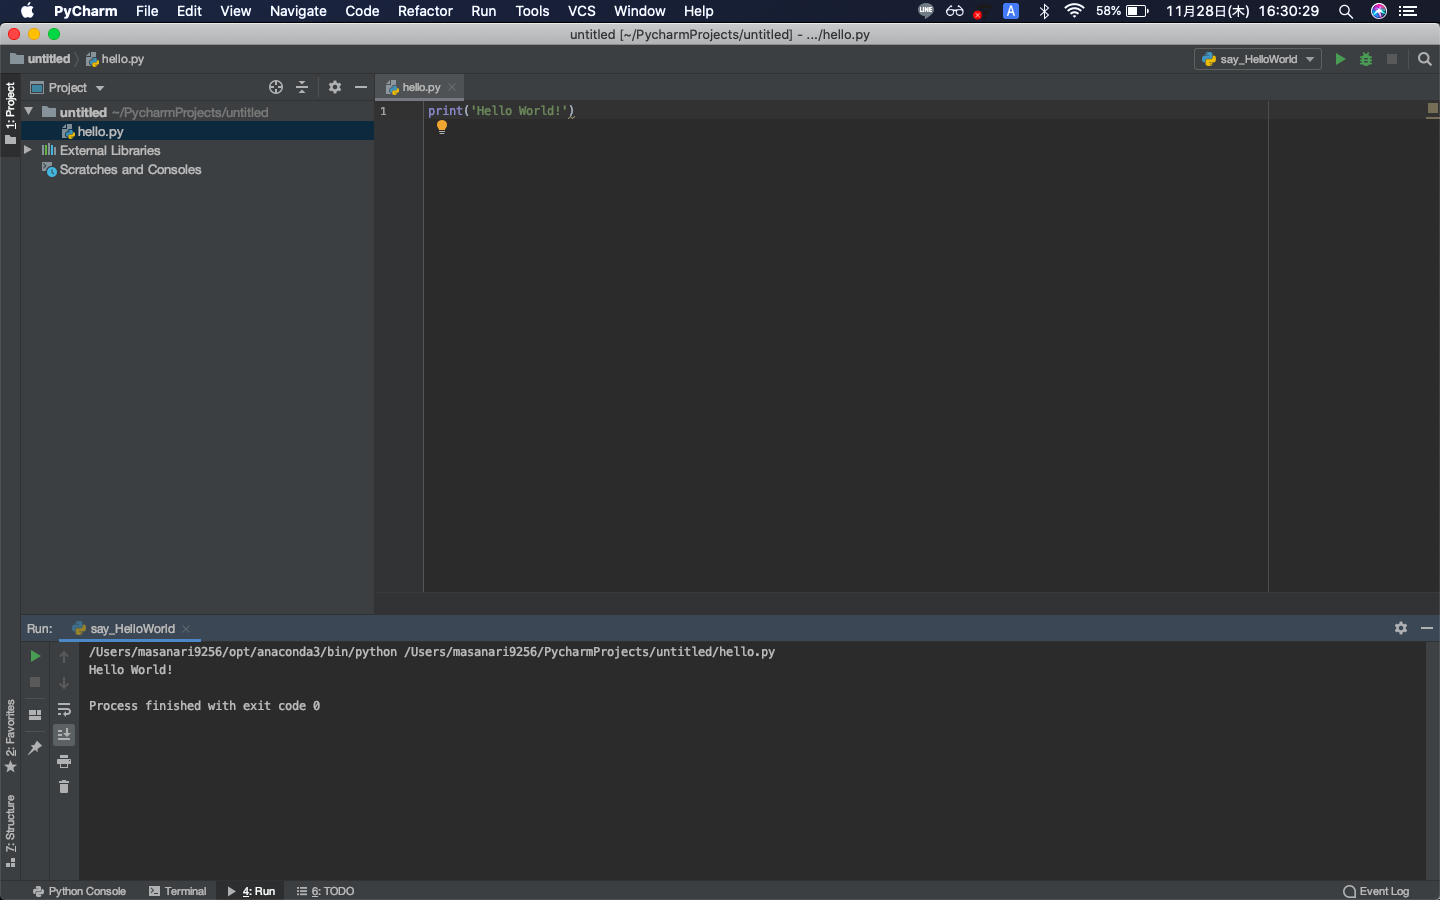
You've successfully completed Hello World!
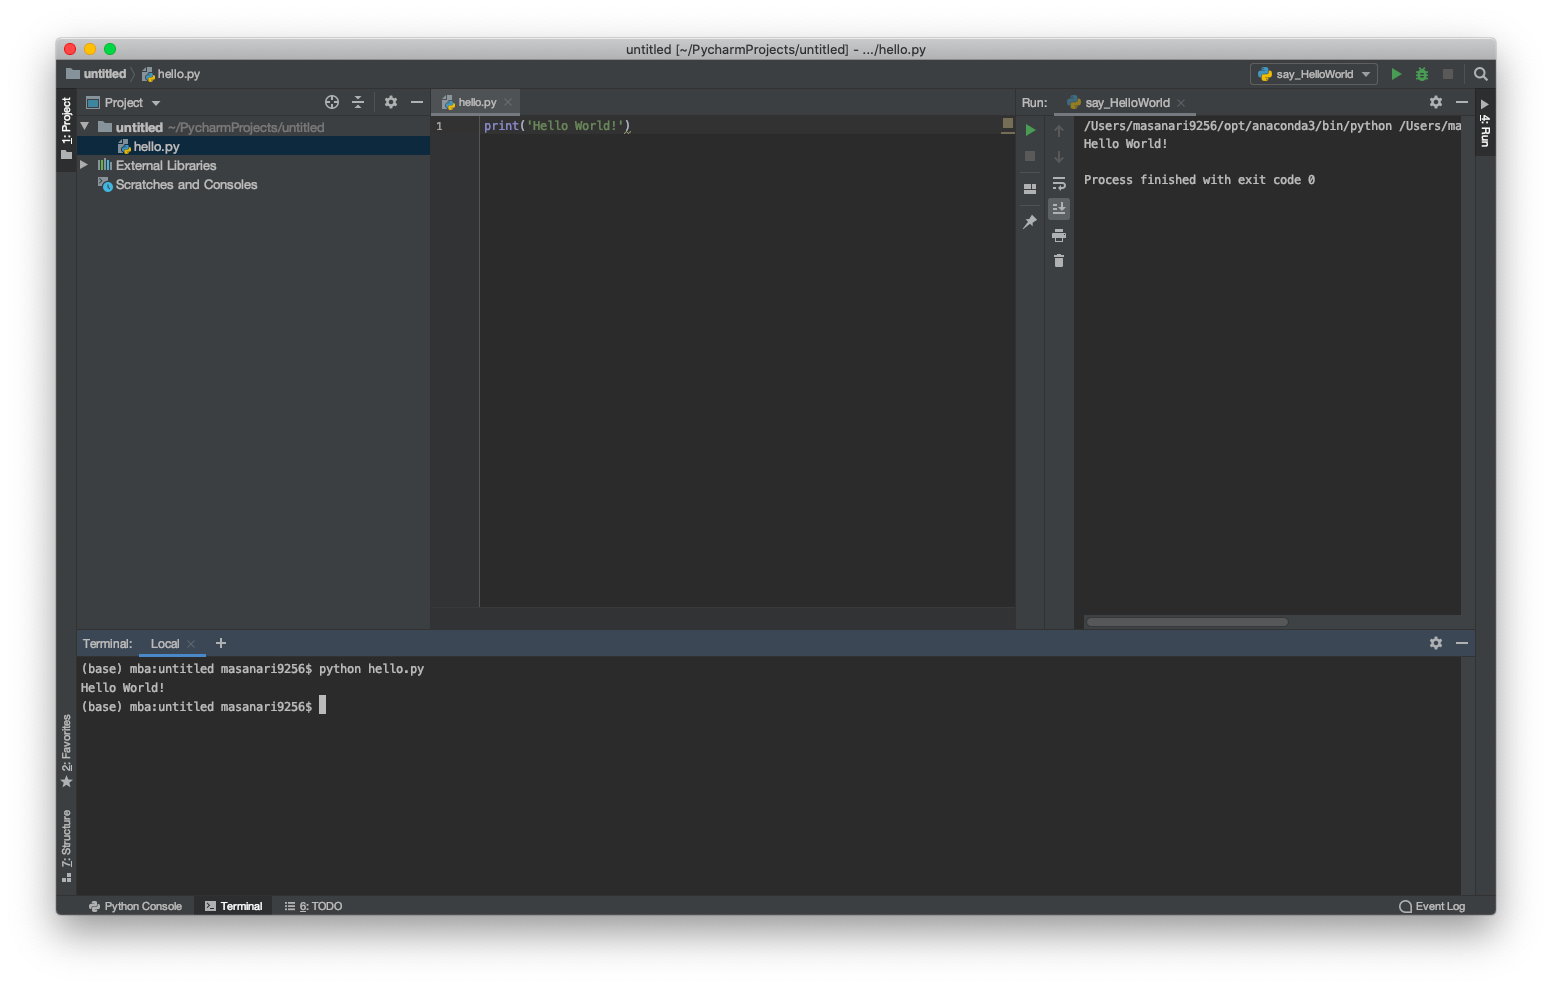
You can also move the execution screen like this and start Terminal. Cool! !! !! !!
This completes the python environment construction using Anaconda and PyCharm. Thank you for your hard work.
in conclusion
Thank you for reading this far. I wrote an article for the first time, but it's something that can be written quickly with momentum. If you find something difficult or wrong, please let us know in the comments. We are also waiting for your impressions and requests.
I will continue to write articles that are easy for beginners to understand, as well as my own output. Thank you for following Qiita and Twitter.
Recommended Posts