[PYTHON] GPU-enabled build of LibTorch (PyTorch C ++) app on Windows without CMake (only the first time)
wrap up
--Prepare sample source code and output * .sln and * .vcxproj with CMake.
--Create a property sheet from * .vcxproj.
--From now on, if you apply the property sheet to "Empty project (etc.)" in Visual Studio, you can easily build EXE with GPU enabled.
at first
In order to link with other libraries, I wanted to create a LibTorch app only with Visual Studio, preferably without CMake. (I think you can do it with CMake depending on the settings) You can use the CPU version of LibTorch by setting the include path and dependent files in Visual Studio alone, but even if you knead various places, the GPU was not enabled. It's easy (so-so) to build a GPU-enabled app with CMake, but I didn't find an article to enable GPU with Visual Studio alone, so I'll write it here.
Also, I'm not familiar with CMake, C ++, or Visual Studio, so please let me know if you have any better information.
Execution environment
OS: Windows 10 Enterprise CPU: Core i7-8700K GPU: RTX 2080 SUPER RAM: 8.0x2 GB
Visual Studio 2019 Community CUDA 10.1 cuDNN 7.5.1 LibTorch 1.6.0 C++17 CMake 3.18.0
Preparation
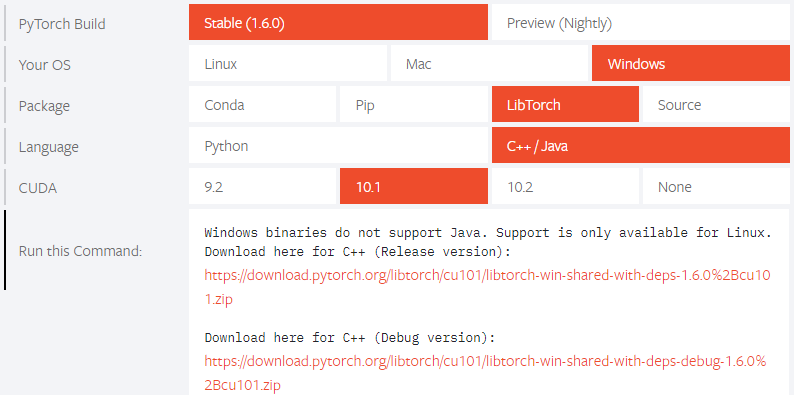
First, download LibTorch from PyTorch official website.
Download both Debug and Release versions.
Unzip the downloaded library and move it directly under C.
Rename the Debug version to "Debug" and the Release version to "Release", and make the folder hierarchy as follows.
C: \ libtorch \ 1_6_0 \ (Debug, Release) \ (bin, include, lib, etc.) \ .....
Next, download and install CUDA 10.1 from the Official Site. Be sure to add it to the environment variable PATH.
Then download cuDNN 7.5.1 from Official Site and
C:\Program Files\NVIDIA GPU Computing Toolkit\CUDA\v10.1
Copy bin, include, lib to.
You need to create an account to download.
Output build system with CMake and create property sheet
Create a solution with CMake
Use CMake to output the build system (Visual Studio solution and project file).
Here, it is operated by commands, but VS Code is recommended because you can operate CMake intuitively.
Create a folder in an appropriate location (here, create a cmake_sample folder directly under D), and create sample.cpp and CMakeLists.txt.
Edit the two files as follows. Also, this time we will target C ++ 17.
sample.cpp
 #include <iostream>
 #include <torch/torch.h>
 int main()
 {
     torch::DeviceType device_type;
     if (torch::cuda::is_available())
     {
         std::cout << "CUDA available!\n";
         device_type = torch::kCUDA;
     }
     else
     {
         std::cout << "CPU only.\n";
         device_type = torch::kCPU;
     }
     torch::Device device(device_type);
     auto tensor = torch::randn({2, 3});
     tensor = tensor.to(device);
     std::cout << tensor << std::endl;
 }
CMakeLists.txt
 cmake_minimum_required(VERSION 3.0 FATAL_ERROR)
 project(cmake_sample)
 set(CMAKE_CXX_STANDARD 17) #add

 find_package(Torch REQUIRED)
 set(CMAKE_CXX_FLAGS "${CMAKE_CXX_FLAGS} ${TORCH_CXX_FLAGS}")
 add_executable(sample sample.cpp)
 target_link_libraries(sample "${TORCH_LIBRARIES}")
 # set_property(TARGET example-app PROPERTY CXX_STANDARD 14)

 # The following code block is suggested to be used on Windows.
 # According to https://github.com/pytorch/pytorch/issues/25457,
 # the DLLs need to be copied to avoid memory errors.
 if (MSVC)
   file(GLOB TORCH_DLLS "${TORCH_INSTALL_PREFIX}/lib/*.dll")
   add_custom_command(TARGET sample
                      POST_BUILD
                      COMMAND ${CMAKE_COMMAND} -E copy_if_different
                      ${TORCH_DLLS}
                      $<TARGET_FILE_DIR:sample>)
 endif (MSVC)
Open x64_x86 Cross Tools Command Prompt for VS 2019 with administrator privileges and execute the following command.
$ D:
$ cd cmake_sample
$ mkdir build
$ cd build
$ cmake .. -G "Visual Studio 16 2019" -DCMAKE_PREFIX_PATH=C:\libtorch\1_6_0\Debug
Execution result

Property sheet creation (Debug configuration)
There is a Visual Studio solution named cmake_sample.sln in the build folder, so open it.
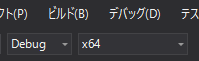
 Change the configuration to
 Debug | x64 and build (Ctrl + Shift + B).
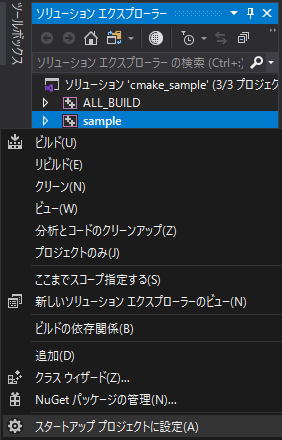
 Change project
 sample to startup and F5.
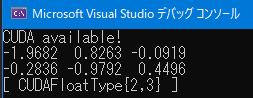
 If you see the
 CUDA available! And CUDAFloatType tensors, you have successfully built.
If it becomes CPU, review the file layout, environment variables, and commands.
After confirming that the execution was successful, create an "empty project" in Visual Studio and open the Property Manager.
Right-click on Debug | x64, add a new project property sheet, and create a property sheet libtorch_1_6_0.prop.
 Open the property sheet with a text editor and delete the line
 <ItemDefinitionGroup />.

Open the sample.vcxproj file in a text editor.
Of sample.vcxproj,
<ItemDefinitionGroup Condition="'$(Configuration)|$(Platform)'=='Debug|x64'">
 From
From
</ItemDefinitionGroup>
 And paste it into the
 <Project> tag in libtorch_1_6_0.prop.
At this time, all the parts that depend on sample.cpp are deleted.
Save and close both.
Property sheet creation (Release configuration)
(Since it is almost the same as before, some are omitted.)
Delete CMakeCache.txt in the build folder. (important)
Then in the build folder the following command
$ cmake .. -G "Visual Studio 16 2019" -DCMAKE_PREFIX_PATH=C:\libtorch\1_6_0\Release
To open the Visual Studio solution in the build folder.
Change the configuration to Release | x64, build and run.
If you see the CUDA available! And CUDAFloatType tensors, you have successfully built.
After confirming that the execution was successful, open the property sheet libtorch_1_6_0.prop again with a text editor.
Reopen the sample.vcxproj file in a text editor.
Of sample.vcxproj,
<ItemDefinitionGroup Condition="'$(Configuration)|$(Platform)'=='Release|x64'">
From
</ItemDefinitionGroup>
And paste it into the <Project> tag range in libtorch_1_6_0.prop.
Save and close both.
Operation check
Create a suitable "empty project" in Visual Studio.
Property managerDebug|x64WhenRelease|x64Whatlibtorch_1_6_0.propTo add.

Add the source file and write the same contents as the previous sample.cpp.

Change the configuration to Debug | x64 and F5.

Also, change the configuration to Release | x64 and F5.

The first time, * .dll is copied, so it takes time to execute.
If the CUDA available! And CUDA Float Type tensors are displayed on both sides, the settings are correct.
You can hit a breakpoint and see if the debug run works.
From now on, you can quickly create a GPU-compatible program by reusing this property sheet.
Conclusion
Is there a better way to do it?