Think about the analysis environment (Part 3: Install pyenv + Anaconda [Python, R] + jupyter + Rstudio)
Preface
-Continued from Thinking about analysis environment (Part 2: Building a virtual environment with VirtualBox + vagrant) --Description on the premise of installation using vagrant in VirtualBox environment
Flow of analysis environment construction
――We will build a virtual environment according to the following flow
| No. | Contents |
|---|---|
| 1 | Overall picture |
| 2 | Build a virtual environment with VirtualBox + vagrant |
| 3 | pyenv+Anaconda[Python、R]+ jupyter + Rstudio installation |
| 4 | postgreSQL+Install Pgadmin 4 |
environment
--Host OS: Windows7 (64bit) --Guest OS: Ubuntu14.04 (64bit)
Install software
Target software
- pyenv1.0.6
- Anaconda4.2.0
- Python2.7.12
- Python3.5.2
- R3.3.2
- Rstudio Server1.0.136(64bit)
Installation method
--Provision with Vagrant
Precautions when writing SHELL for provisioning with Vagrant * I was messed up
When provisioned with Vagrant, it is running as root by default
--Can be turned off with "privileged: false" --Of course, if you turn on root execution, your home directory will be "/ root".
"Source" command cannot be executed in "#! / Bin / sh" of Ubuntu
--The actual state of the Ubuntu shell is a shell called Dash, and Dash does not have a "source" command. --Use "." Instead of "source" * Reference: Ubuntu wiki --If you specify the interprinter as "#! / Bin / bash", you can use the "source" command.
"Source ~ / .bashrc" is not possible
--Vagrant-shell running on Vagrant is non-interactive and you can't reread bashrc while the shell is running
- There were some ways to make it possible on the net, but I couldn't. --Use this because ".profile" can be read again
Provisioning script
Initial setting command when installing the OS
--Search on the net and install what you think you need
provision_libs.sh
#!/bin/bash

#Update package list
apt-get update

#Update installed packages
apt-get upgrade

#install vim
apt-get install -y vim

#install git
apt-get install -y git

#Install development tools such as gcc
apt-get install -y build-essential

#openssl install
apt-get install libcurl4-openssl-dev

#jupyter autostart settings(Use Upstart)
echo -e '
start on runlevel [2345]
stop on runlevel [!2345]
expect fork
respawn
# run the server
exec `su vagrant -c "/home/vagrant/.pyenv/versions/anaconda3-4.2.0/bin/jupyter-notebook"`
' > /etc/init/jupyter-notebook.conf

#pgadmin4 automatic start setting
sed -i -e '13s/^/\nsu - vagrant -c \"python \/home\/vagrant\/.pyenv\/versions\/anaconda3-4.2.0\/lib\/python3.5\/site-packages\/pgadmin4\/pgAdmin4.py\"\n/g' /etc/rc.local
Installation of Anaconda
--Install Python and R using Anaconda --Use pyenv to install Anaconda --Use conda for package management and virtual environment management --jupyter-notebook is set to start automatically when the guest OS starts using Upstart
- Code is described in provision_libs.sh --Set virtual environment to be reflected in jupyter --I considered installing R other than conda, but I stumbled on it in cooperation with jupyter, so I installed it with conda (I have a hard time installing packages on the net, but I was able to install without problems with the commands summarized in the table below) --The installation of R specifies a package called "r-essentials", which contains more than 80 packages commonly used in data science (installation here takes time).
conda command memo
| Description | command |
|---|---|
| Check version | conda --version |
| update | conda update conda |
| Virtual environment list | conda info -e |
| Enter the virtual environment | source activate [env name] |
| Leave the virtual environment | source deactivate [env name] |
| Delete virtual environment | conda remove [env name] |
| Create a virtual environment | conda create -n [env name] [program name] |
| Create a virtual environment(Version specification) | conda create -n [env name] python=x.x [program name] |
| Install package | conda install -n [env name] [pkg name1] [pkg name2] |
| Make a clone | conda create -n [env newname] --clone [env name] |
| Create an R environment(global) | conda install -c r [program name] |
| Create an R environment(Virtual) | conda install -n [env name] -c r [program name] |
| Install R package("R" in the prefix of the usual R package name-」) | conda create -c r [pkg name] |
| Find a package | conda search [pkg name] |
provision_anaconda.sh
#!/bin/bash

# =====================
#pyenv installation
# =====================
git clone https://github.com/yyuu/pyenv.git /home/vagrant/.pyenv
echo 'export PYENV_ROOT="/home/vagrant/.pyenv"' >> /home/vagrant/.profile
echo 'export PATH="$PYENV_ROOT/bin:$PATH"' >> /home/vagrant/.profile
echo 'eval "$(pyenv init -)"' >> /home/vagrant/.profile
source /home/vagrant/.profile

#Check the version of Anaconda
# pyenv install -l | grep anaconda2
# pyenv install -l | grep anaconda3

# =====================
#Install Anaconda
# =====================
#Installation
pyenv install anaconda3-4.2.0
pyenv rehash
pyenv global anaconda3-4.2.0

#Anaconda pass settings
echo 'export PATH="$PYENV_ROOT/versions/anaconda3-4.2.0/bin/:$PATH"' >> /home/vagrant/.profile
source /home/vagrant/.profile

# =====================
#Create a python virtual environment with conda
# =====================
conda create -n py27 python=2.7 anaconda

#Setting the python path for the virtual environment
#For python2
echo 'alias py2="source $PYENV_ROOT/versions/anaconda3-4.2.0/bin/activate py27"' >> /home/vagrant/.profile
#For returning to python3
echo 'alias py3="source $PYENV_ROOT/versions/anaconda3-4.2.0/bin/deactivate"' >> /home/vagrant/.profile
source /home/vagrant/.profile

# =====================
#jupyter settings
# =====================
#Create jupyter config file
jupyter notebook --generate-config

#Create working directory
mkdir /home/vagrant/jupyter

#Package that reflects virtual environment in jupyter
pip install environment_kernels

#Change configuration file
echo "c = get_config()" >> /home/vagrant/.jupyter/jupyter_notebook_config.py
echo "c.NotebookApp.ip = '*'" >> /home/vagrant/.jupyter/jupyter_notebook_config.py
echo "c.NotebookApp.open_browser = False" >> /home/vagrant/.jupyter/jupyter_notebook_config.py
echo "c.NotebookApp.notebook_dir = '/home/vagrant/jupyter'" >> /home/vagrant/.jupyter/jupyter_notebook_config.py
echo "c.NotebookApp.kernel_spec_manager_class = 'environment_kernels.EnvironmentKernelSpecManager'" >> /home/vagrant/.jupyter/jupyter_notebook_config.py
echo "c.EnvironmentKernelSpecManager.env_dirs=['/home/vagrant/.pyenv/versions/anaconda3-4.2.0/envs/']" >> /home/vagrant/.jupyter/jupyter_notebook_config.py

# =====================
#Create an R environment with conda
# =====================
#Install R (minimum library)
#conda install -c r r
#Install R (library required for data science)
conda install -c r r-essentials

#Create working folder
mkdir /home/vagrant/R

#Change the initial setting of the working directory ("."R profile" is a file that is read when R starts up)
echo "setwd('/home/vagrant/R')" >> /home/vagrant/.Rprofile

# download.file.Change method to wget * If you do not do this, you will not be able to access the Internet on Rstudio(install.packages etc.)
echo "options('download.file.method'='wget')" >> /home/vagrant/.Rprofile

#Required to display plotly using R in jupyter
conda install -y nbconvert
sudo apt-get install -y pandoc

#R path setting
sudo ln -s $(which R) /usr/bin/R
Rstudio Server installation
-In the case of Rstudio official, "gdebi" is used, but since it could not be executed well with Vagrant-shell, "dpkg" was used. use --Rstudio Server is automatically started when the guest OS starts with the default settings.
provision_rstudioserver.sh
#!/bin/bash

# rstudio-server installation
wget https://download2.rstudio.org/rstudio-server-1.0.136-amd64.deb
sudo dpkg -i rstudio-server-1.0.136-amd64.deb
rm rstudio-server-1.0.136-amd64.deb
Check connection
** * You need to be able to restart the guest OS to connect **
juypter --Enter the address below to display the screen URL:http://192.168.33.10:8888/

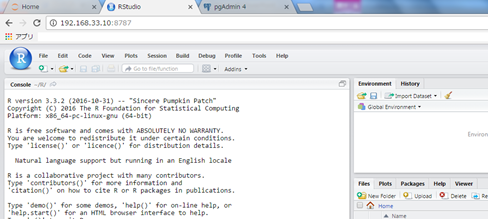
Rstudio server --Enter the address below to display the screen URL:http://192.168.33.10:8787/
--Enter the following account to log in
| Username | Password |
|---|---|
| vagrant | vagrant |
reference
- https://www.continuum.io/blog/developer/jupyter-and-conda-r
- http://qiita.com/ozawan/items/160728f7c6b10c73b97e
- http://qiita.com/y__sama/items/5b62d31cb7e6ed50f02c
- http://qiita.com/masato/items/dce7bac5b0c51489c93b
- https://www.rstudio.com/products/rstudio/download-server/
- https://support.rstudio.com/hc/en-us/articles/200486138-Using-Different-Versions-of-R
Recommended Posts