[PYTHON] Easily convert Jupyter Notebooks to blogs with fastpages
A blogging tool called fastpages has been released by fastai, which is famous for free online courses of deep learning, so I tried using it immediately.
Some people may find the initial settings a little troublesome, so I have summarized the procedure in Japanese. If you're happy with the English explanation, see the official readme.
Target audience
--People who want to know an easy way to convert jupyter notebook to blog --People who can publish their blog on github pages
Caution
The content of the article is as of February 29, 2020.
In the future, the fastpages installation procedure may become easier. In the comment section, @peaceiris pointed out.
When you try the contents of this article, please check the text of the pull request just in case.
Features of fastpages
fastpages is a tool for automatically generating blogs published on github pages from Jupyter notebook. Github actions are used for automatic generation, which saves you the trouble of building a website from your notebook on your own PC.
According to the Official description, it has the following features:
--When you push the article changes to the master branch of github, a blog is automatically generated. --You can post Jupyter Notebook as an article as it is. --You can show / hide cells in Jupyter Notebook. -Embed images, Twitter cards, youtube videos
Initial settings for using fastpages
First, copy the template from the official repository and use it. Once you've set up your ssh key and merged the pull requests from your bot, your blog is complete. After that, every time I post or edit an article, I will push it to the master branch.
Create a new repository from a template
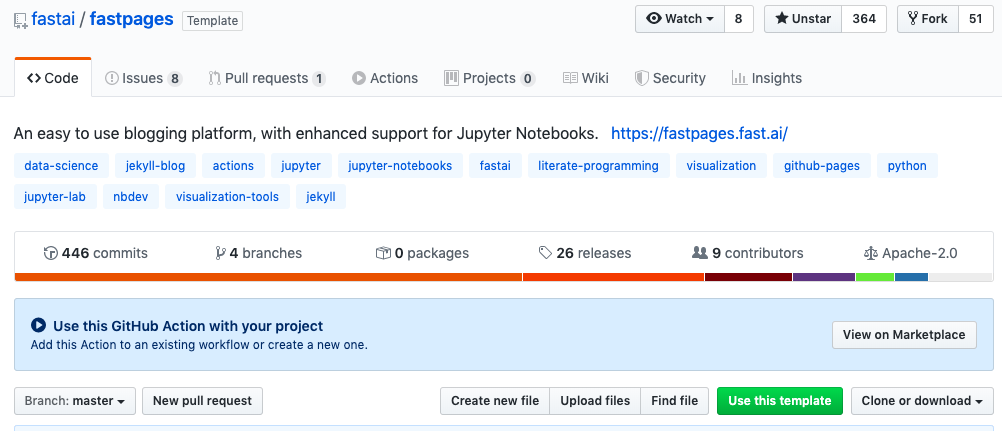
First, create a new repository using the fastpages repository template. In the fastpages repository, click "Use this template".
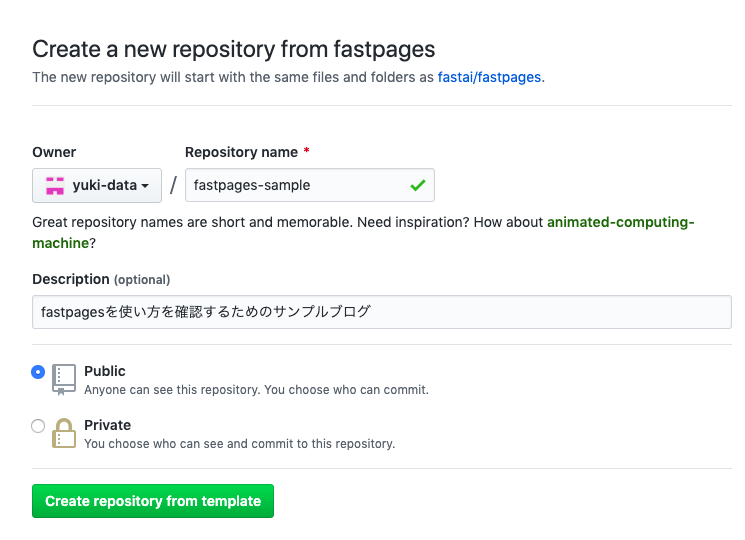
Create a repository with a suitable name.
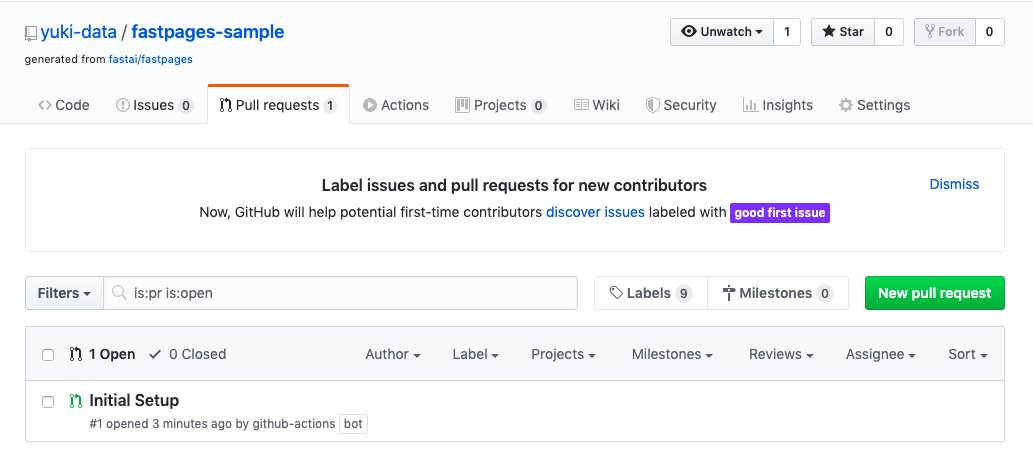
If you wait about 1 minute after creating the repository, you will automatically receive a pull request to the repository. Follow the instructions in this pull request to proceed with the settings.
Register private key and public key
The instructions for the pull request are as follows.
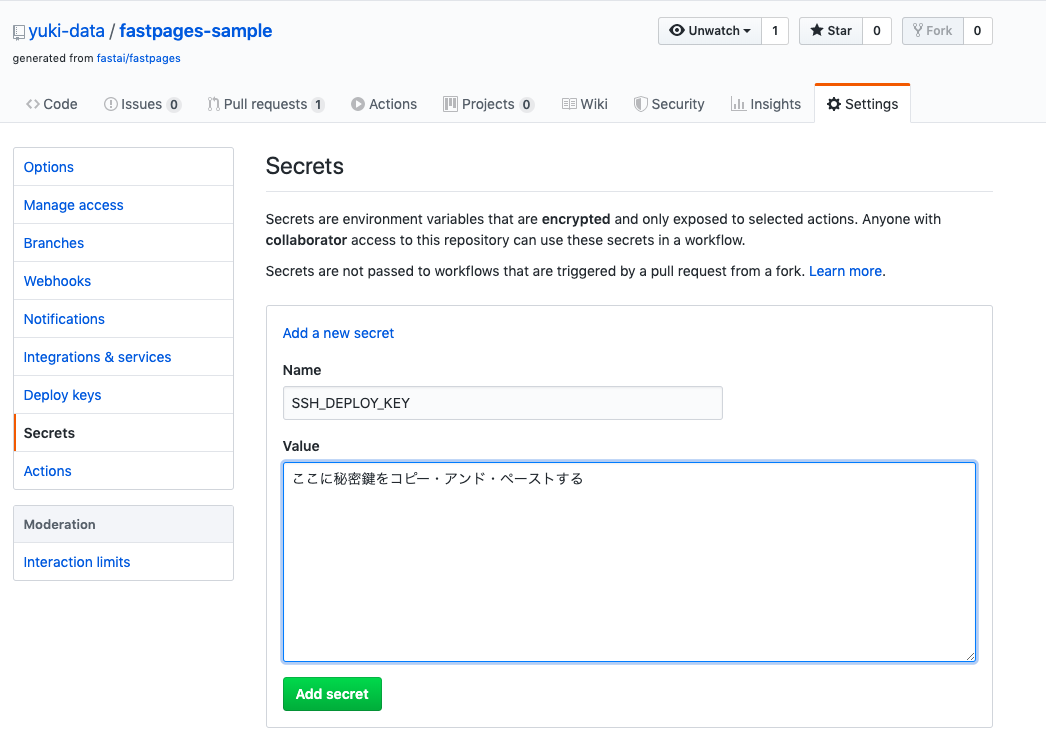
--Create ssh key-pair. Register the public key and private key generated here in the next step. --Register the private key with the name SSH_DEPLOY_KEY in the setting item called Secrets of the repository. --Register the public key in the setting item called Deploy keys in the repository.
Once you've done this, every time you push your changes to the master branch, your website will be built.
Specifically, do the following:
According to the instructions given in the pull request, I'm advised to use a tool called 8gwifi, but it's okay to create it yourself. 8gwifi is an ssh-key pair generation tool that can be used online for free.
Since it says Select: RSA and 4096 and leave Passphrase blank,
ssh-keygen -t rsa -b 4096
Generate a private key and a public key with.
$ ls /Users/your_name/.ssh/ | grep id_rsa
id_rsa
id_rsa.pub
Copy and paste the private key (id_rsa) and public key (id_rsa.pub) in the setting items of github, respectively.
Enter the NAME SSH_DEPLOY_KEY exactly as it is.
You may decide the title of the public key appropriately. Check ** Allow write access **.
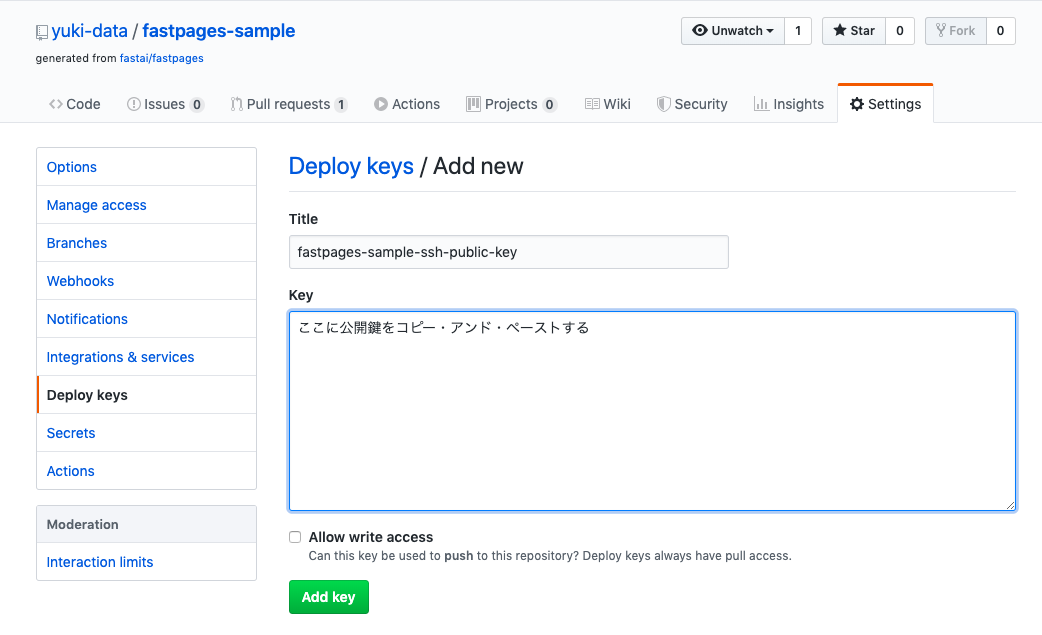
That's it.
After merging the pull requests and waiting a few minutes, you can access the default website on github pages
After registering the ssh key-pair, finally merge the pull request.
You can now visit the website by visiting the url on github pages.
You can check the series of steps up to this point on youtube videos.
Recommended Posts
