Try deploying a Rails app on EC2-Part 1-
Assumptions about this article
Registered as a user on AWS Rails has already created some kind of application
- This article does not deploy. This is the preparation before deploying. I would like to actually deploy it in the second part. This time, I will describe up to the point of logging in to the EC2 instance in the terminal.
Launch an instance
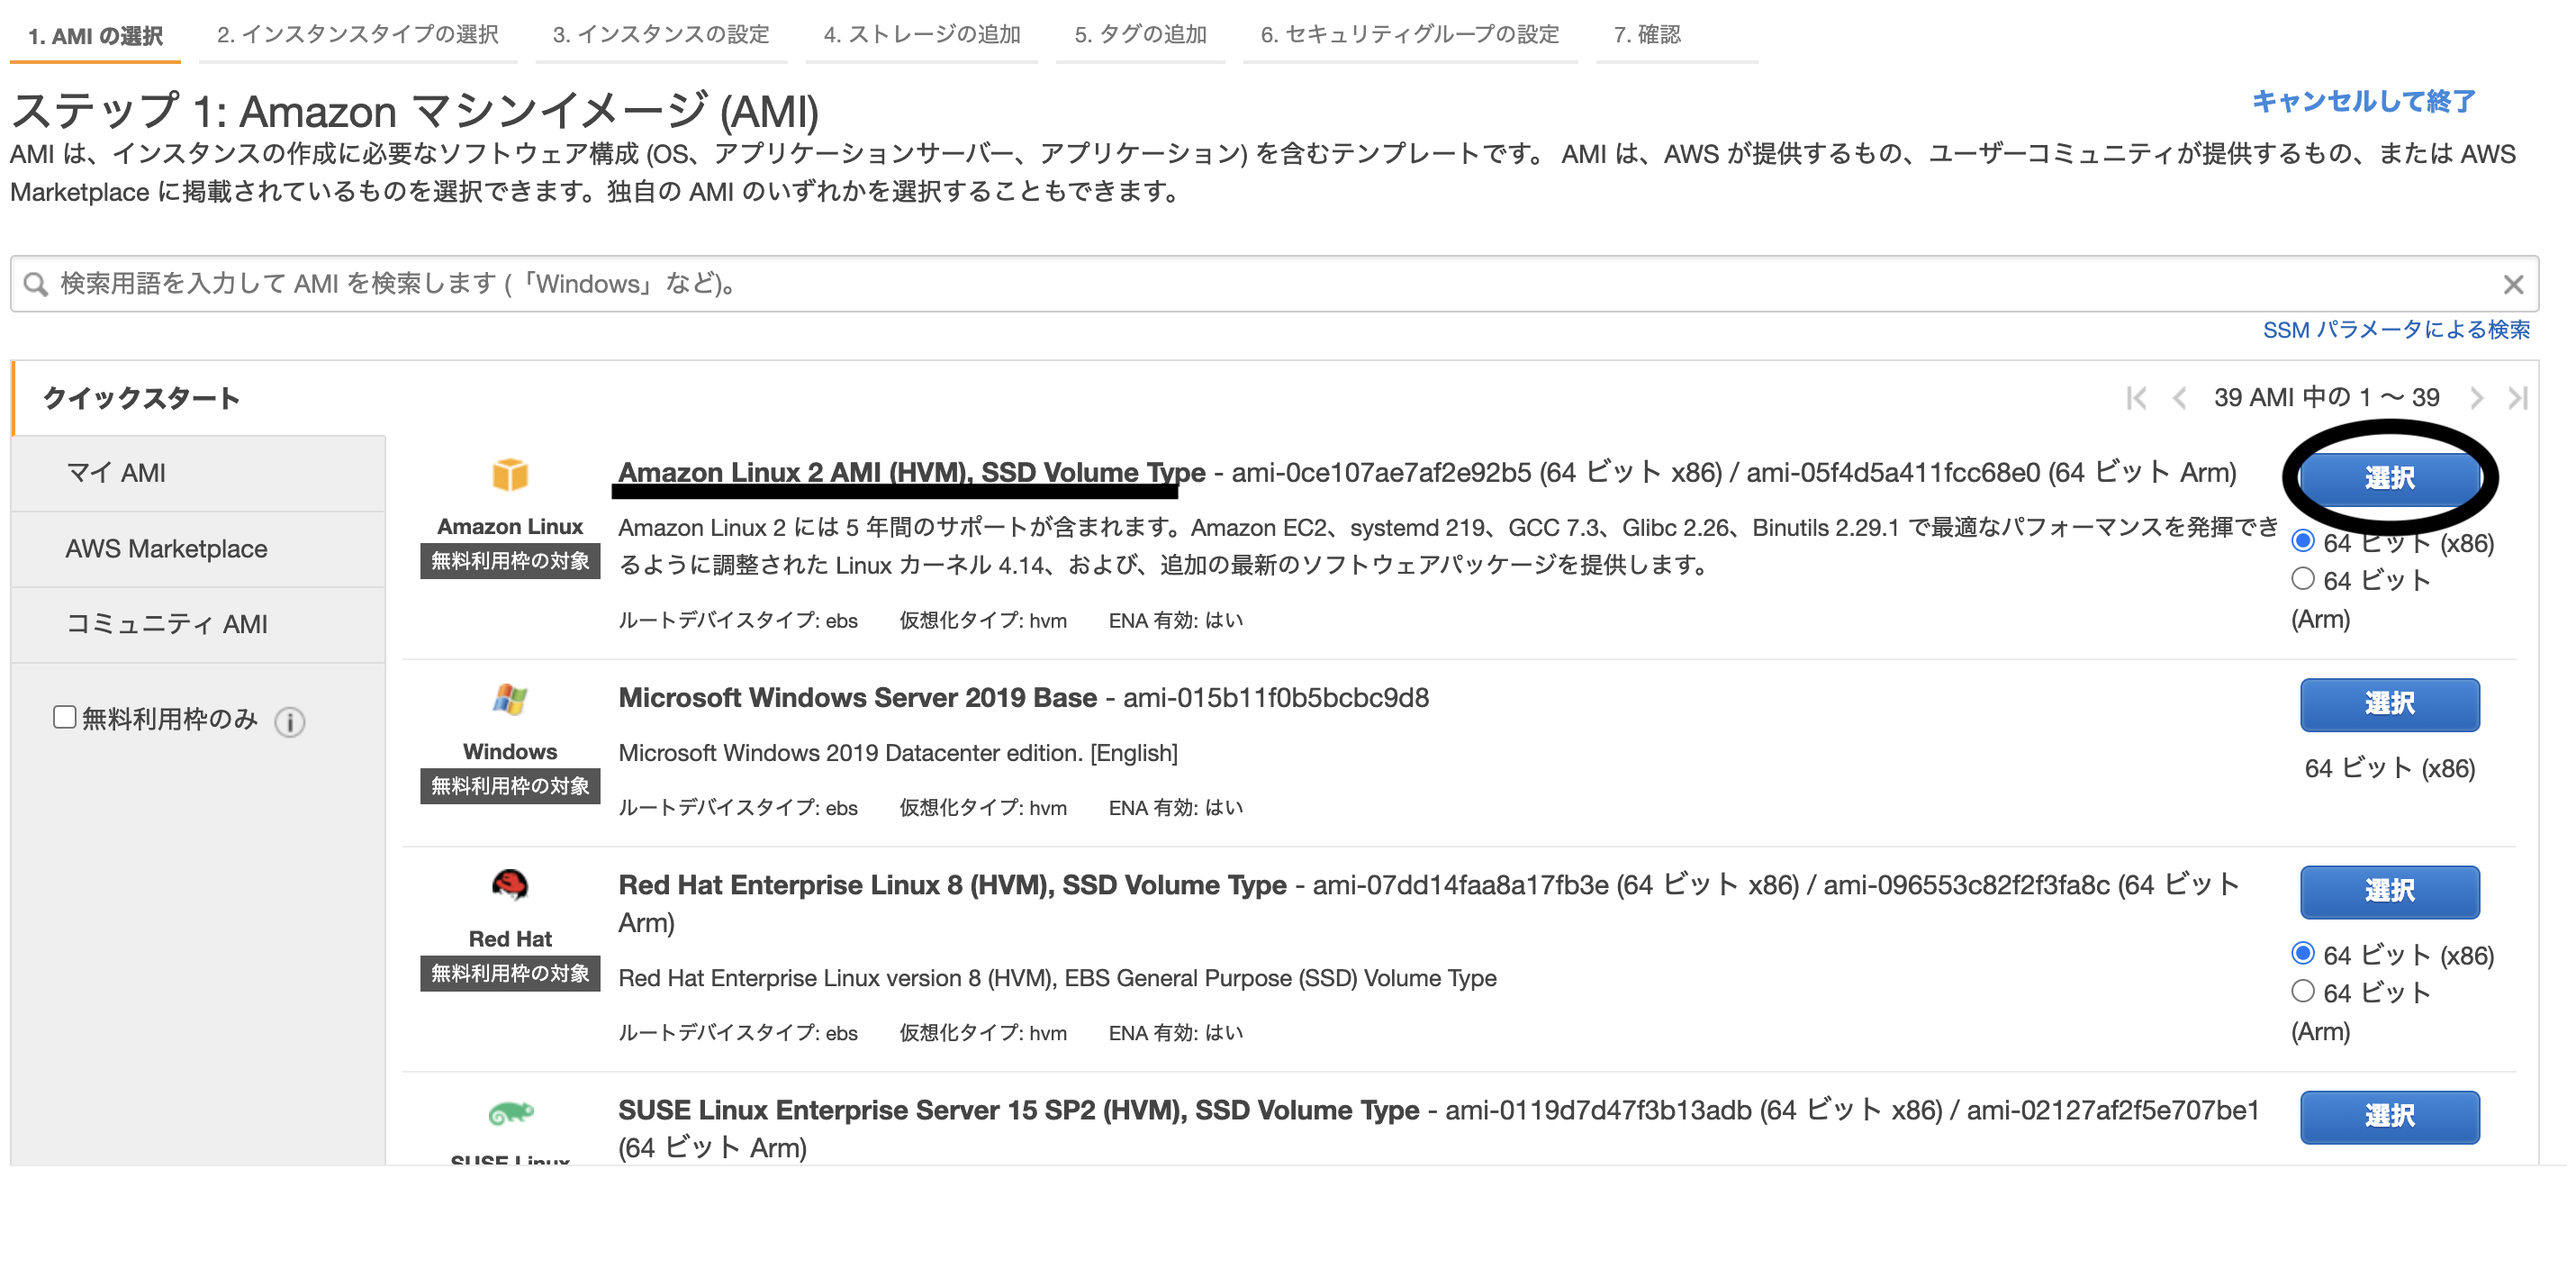
This time, I will select Amazon Linux 2 for free.
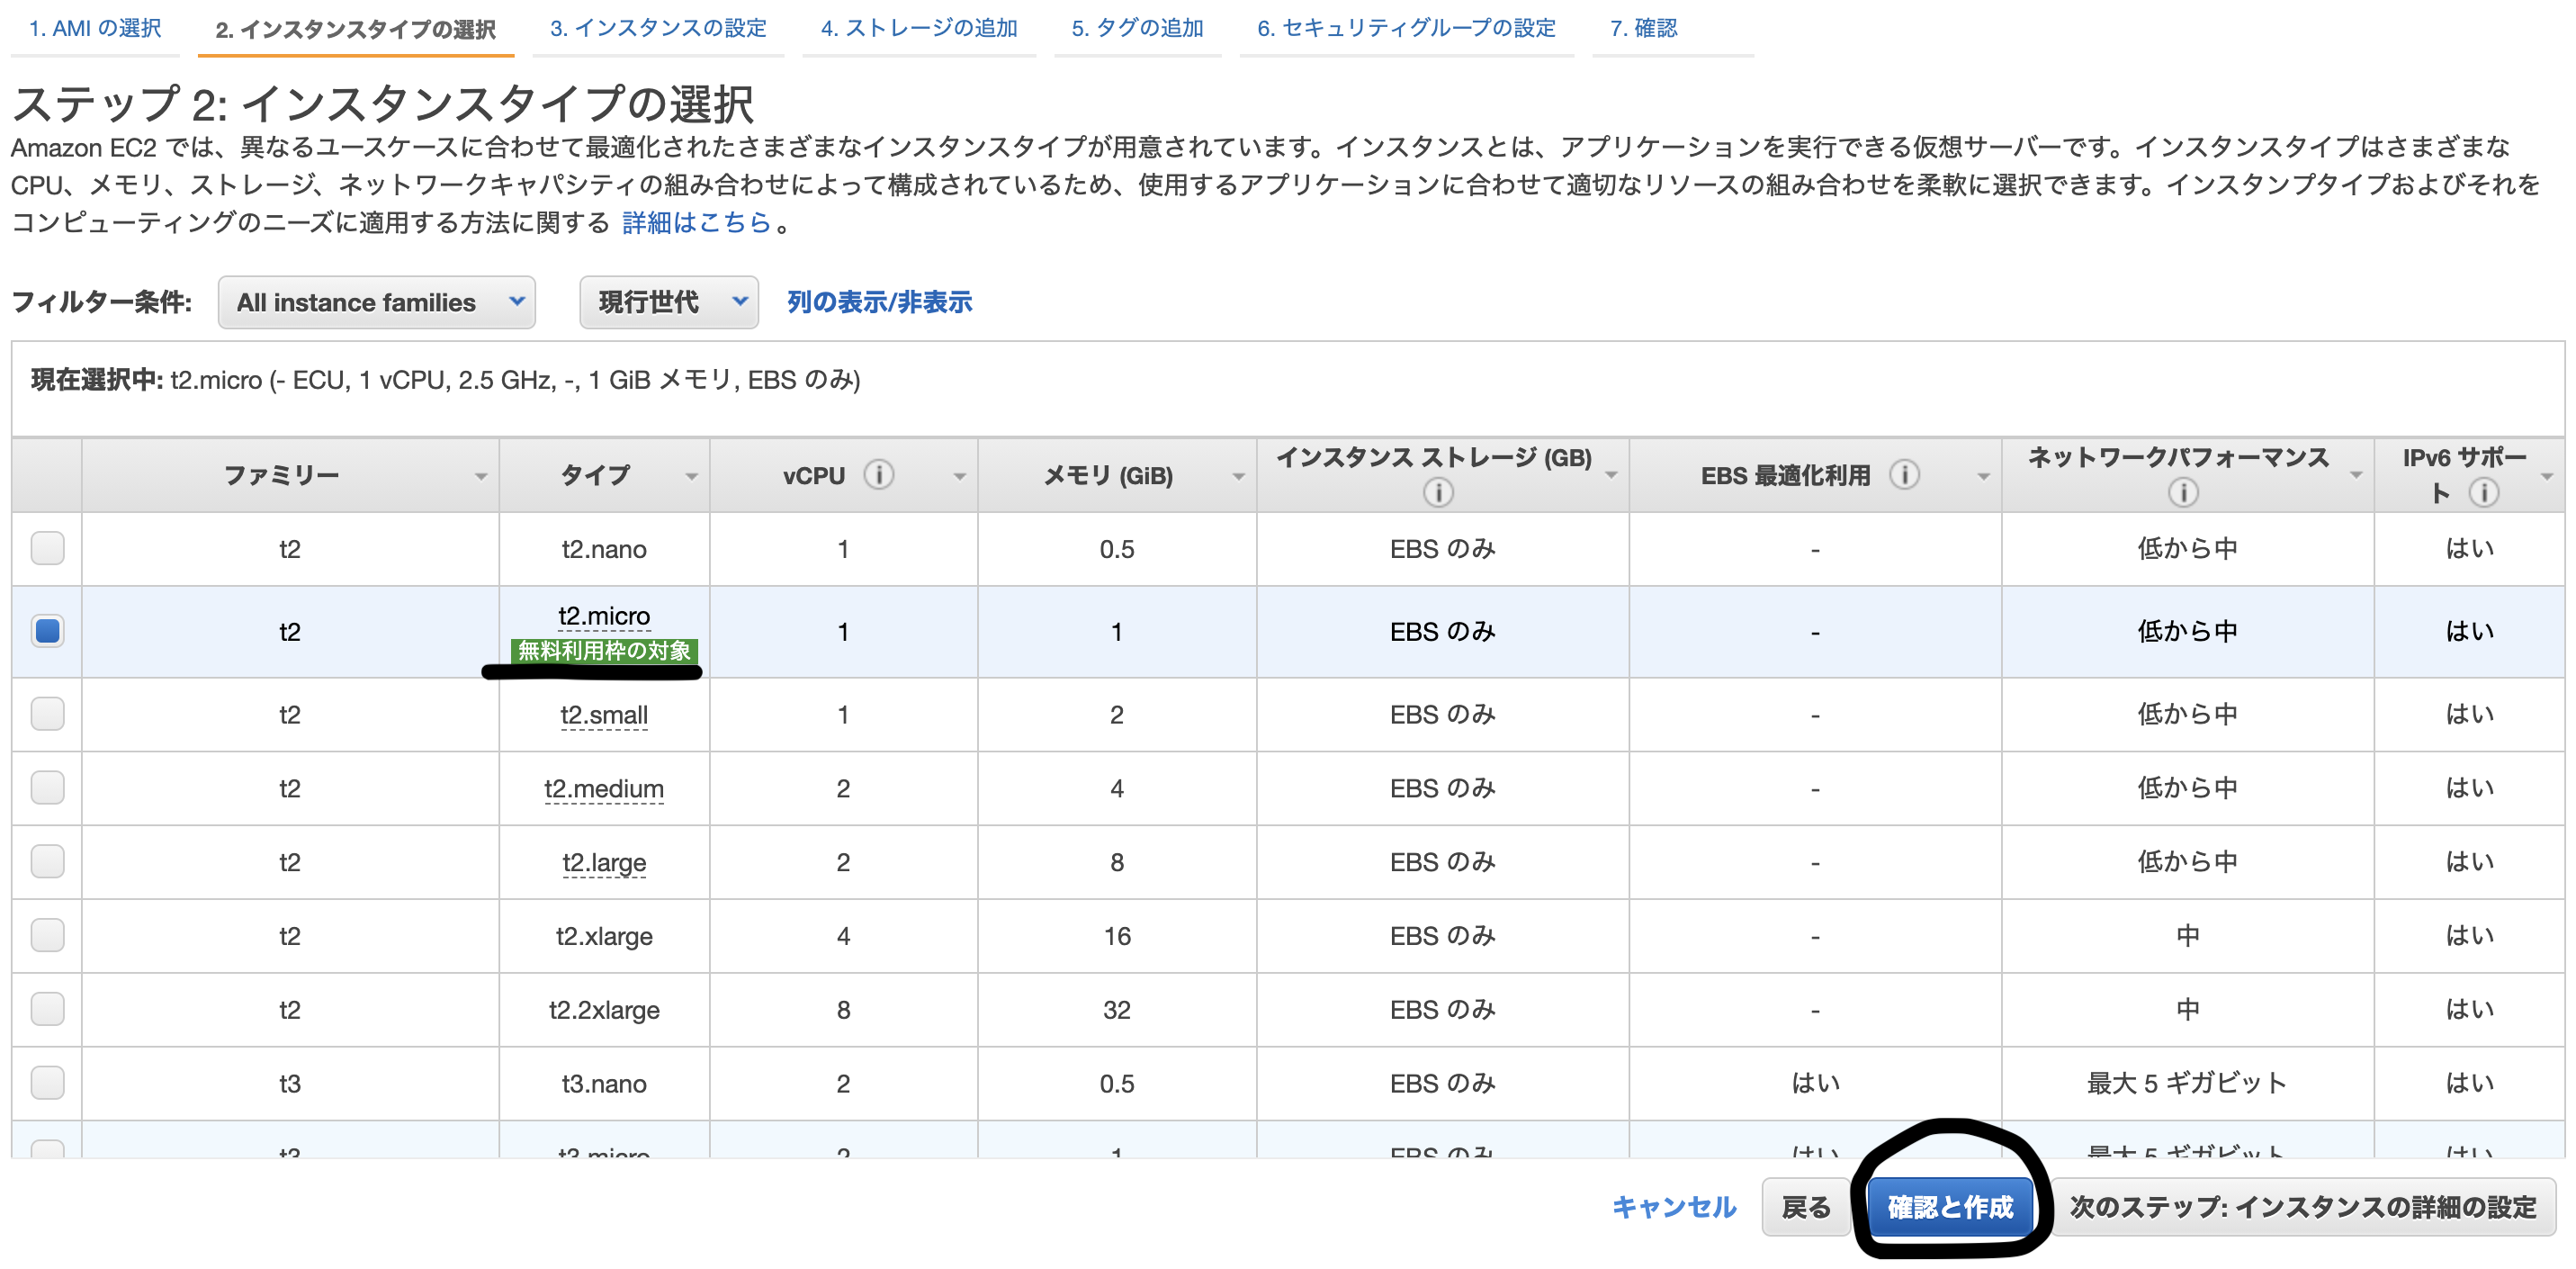
 The instance type also adopts a free frame
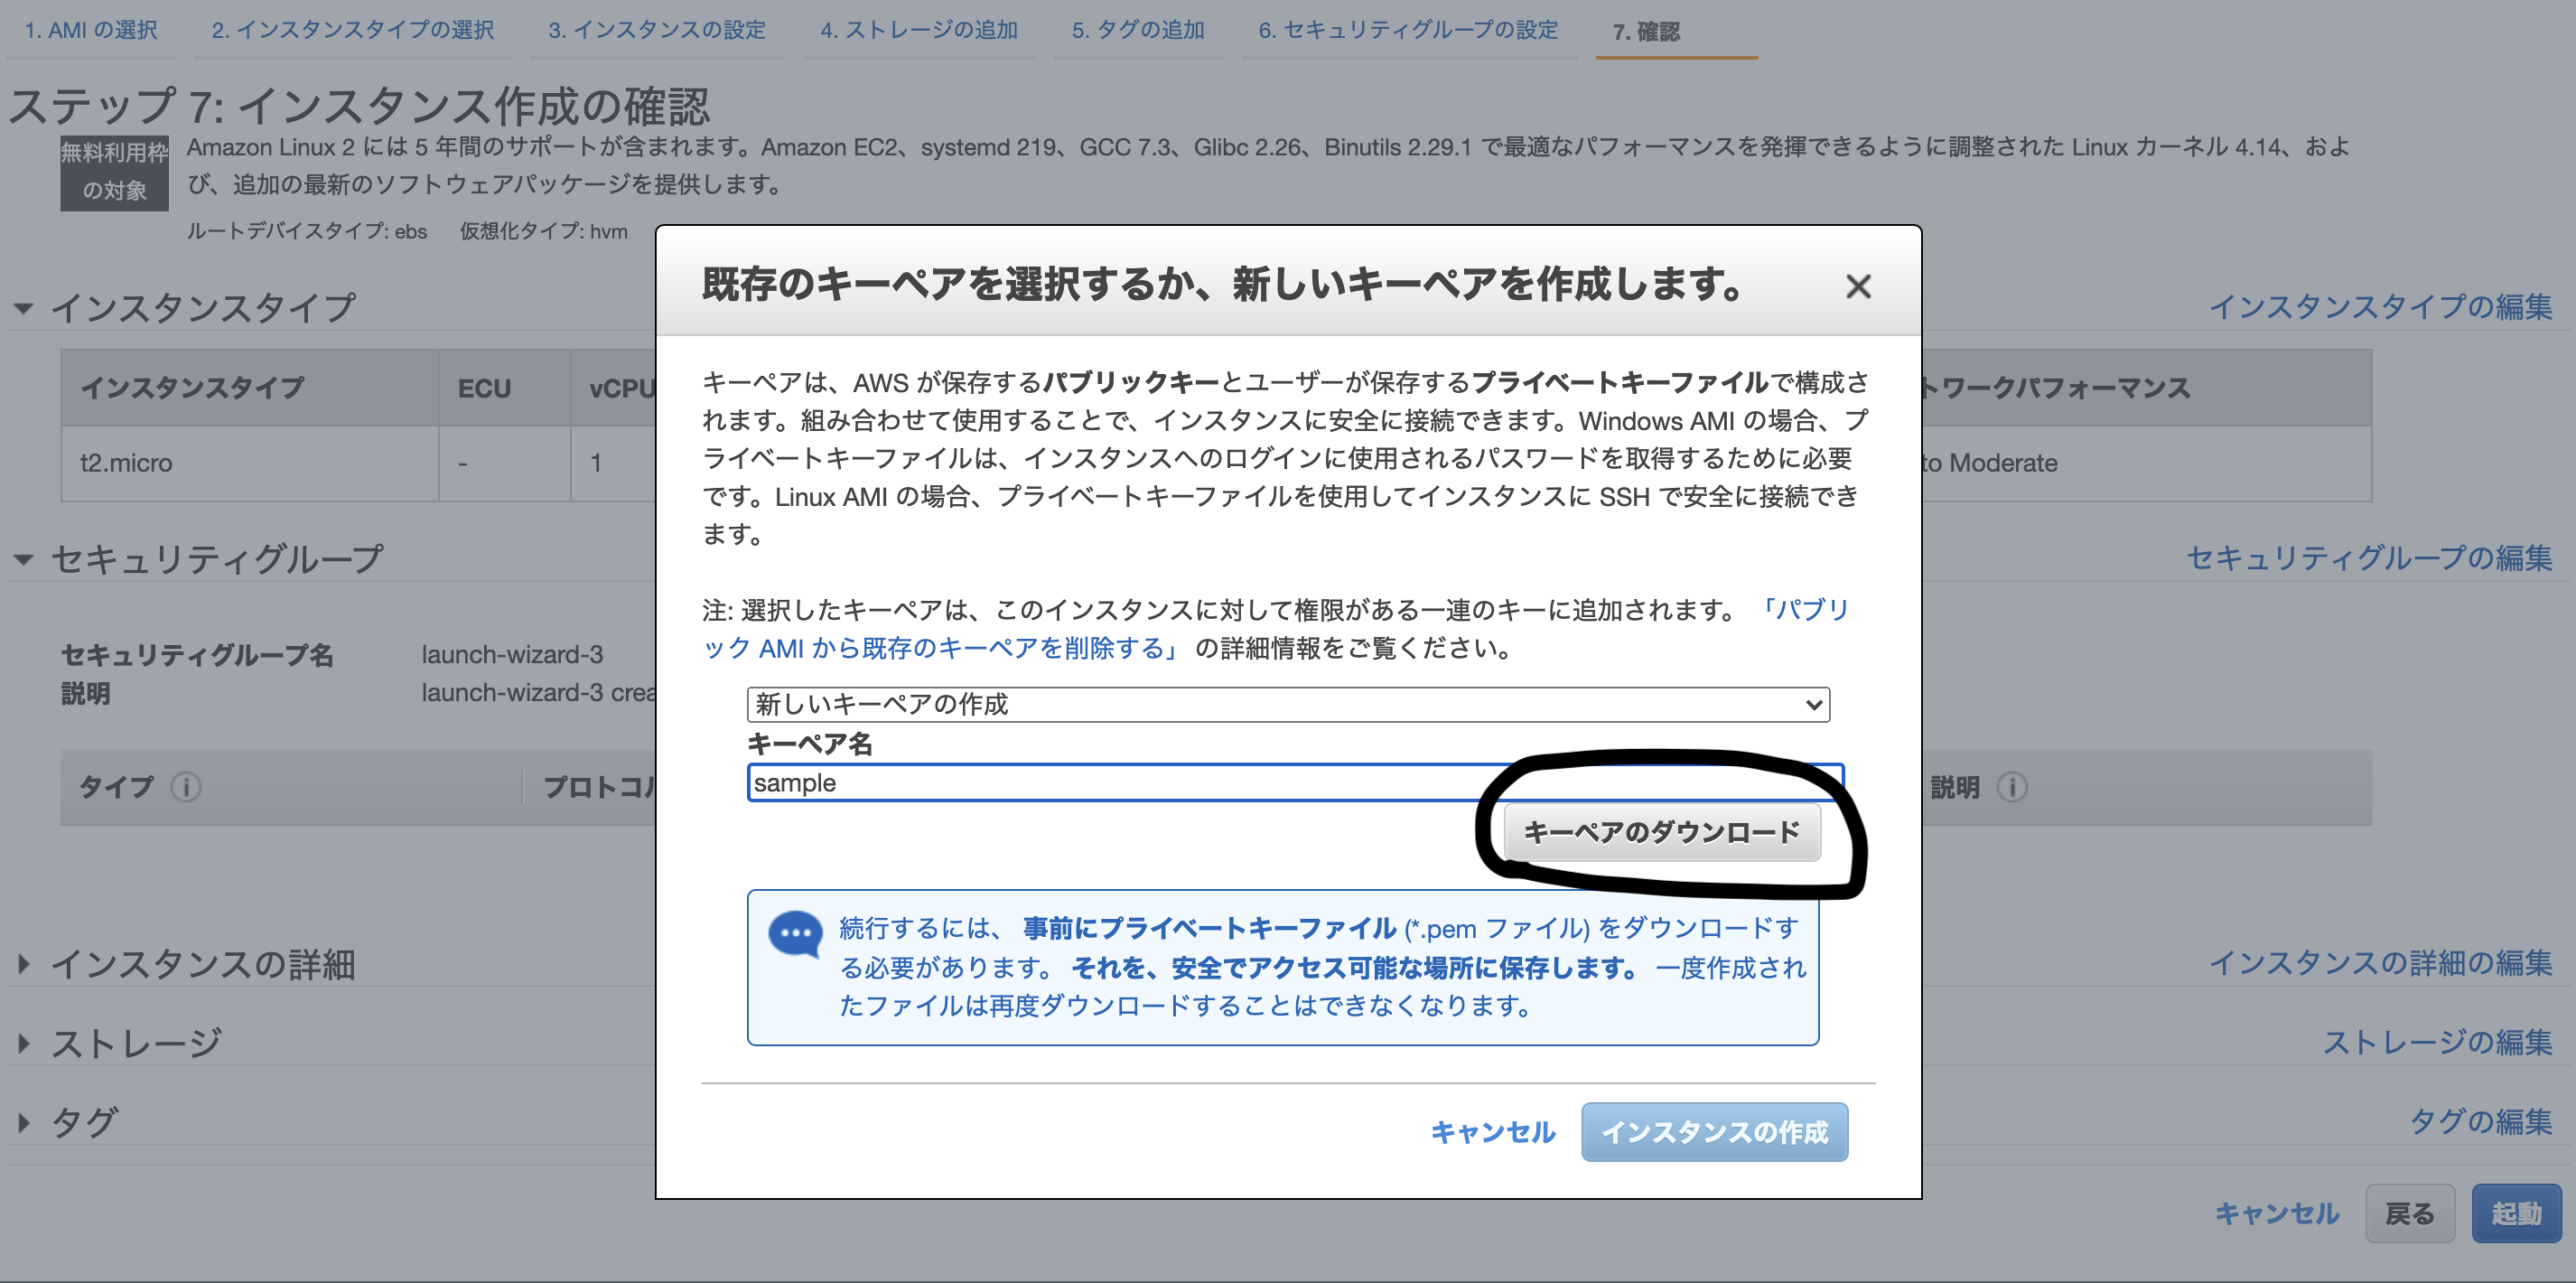
 Finally, create a key pair.
The key pair name can be decided arbitrarily.
After deciding on a name, don't forget to "download the key pair".
If you can, click "Create Instance" to "launch".
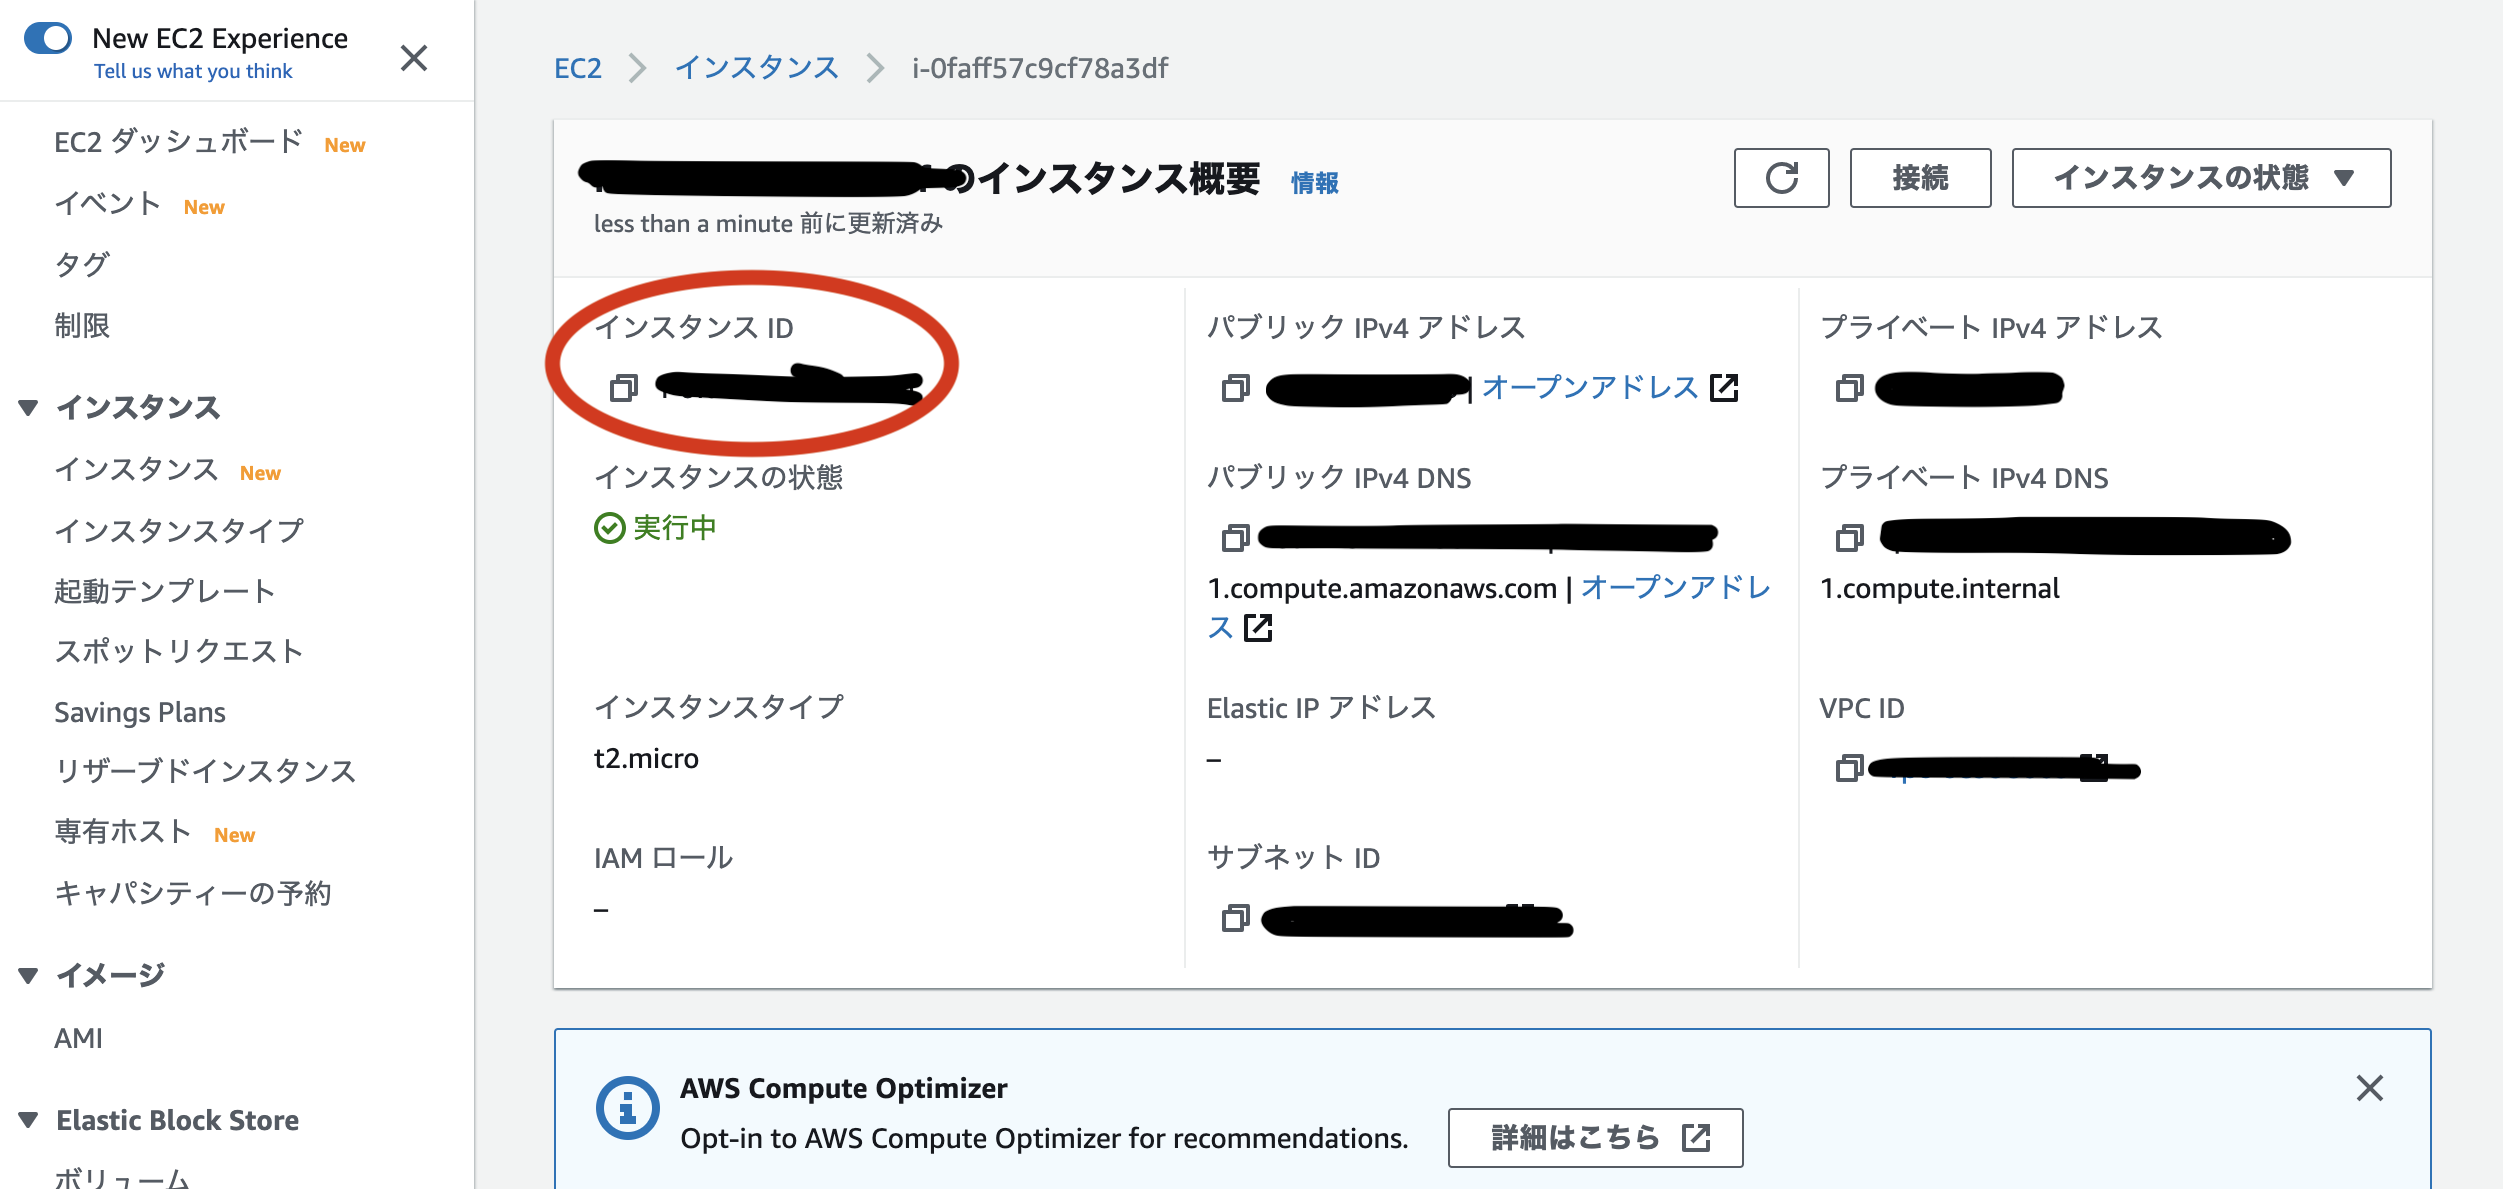
 Go to the launched instance and copy the instance ID in a memo.
Elastic IP creation & linking with instance
By associating an Elastic IP with an instance, you can access it regardless of whether the instance is started or stopped.
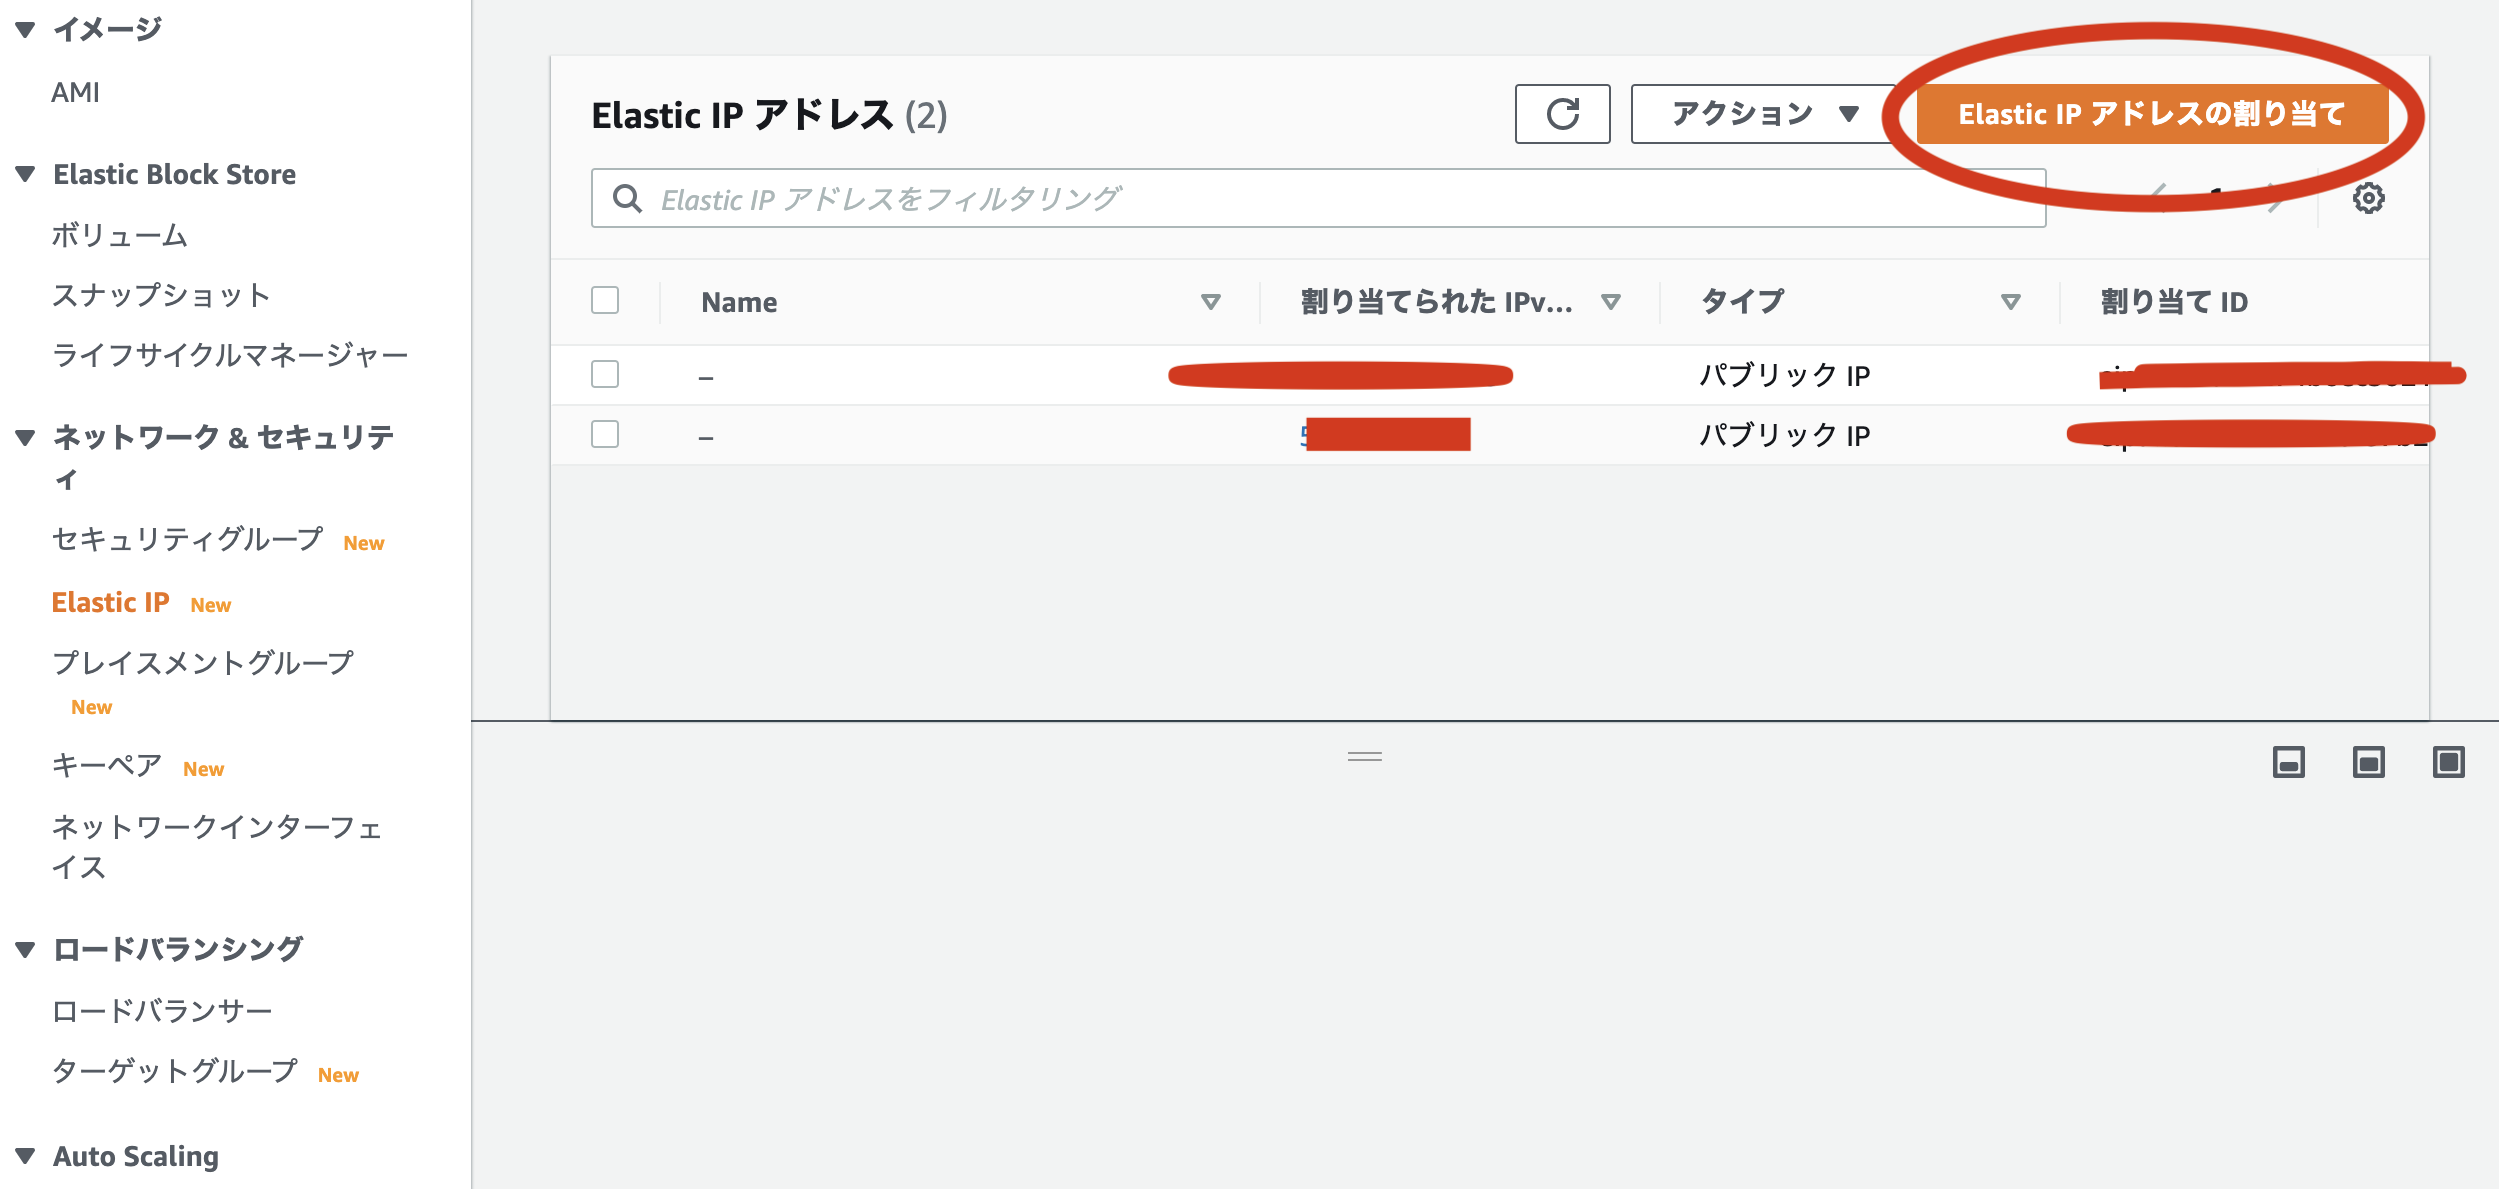
Click "Assign Elastic IP Address" as shown in the image.
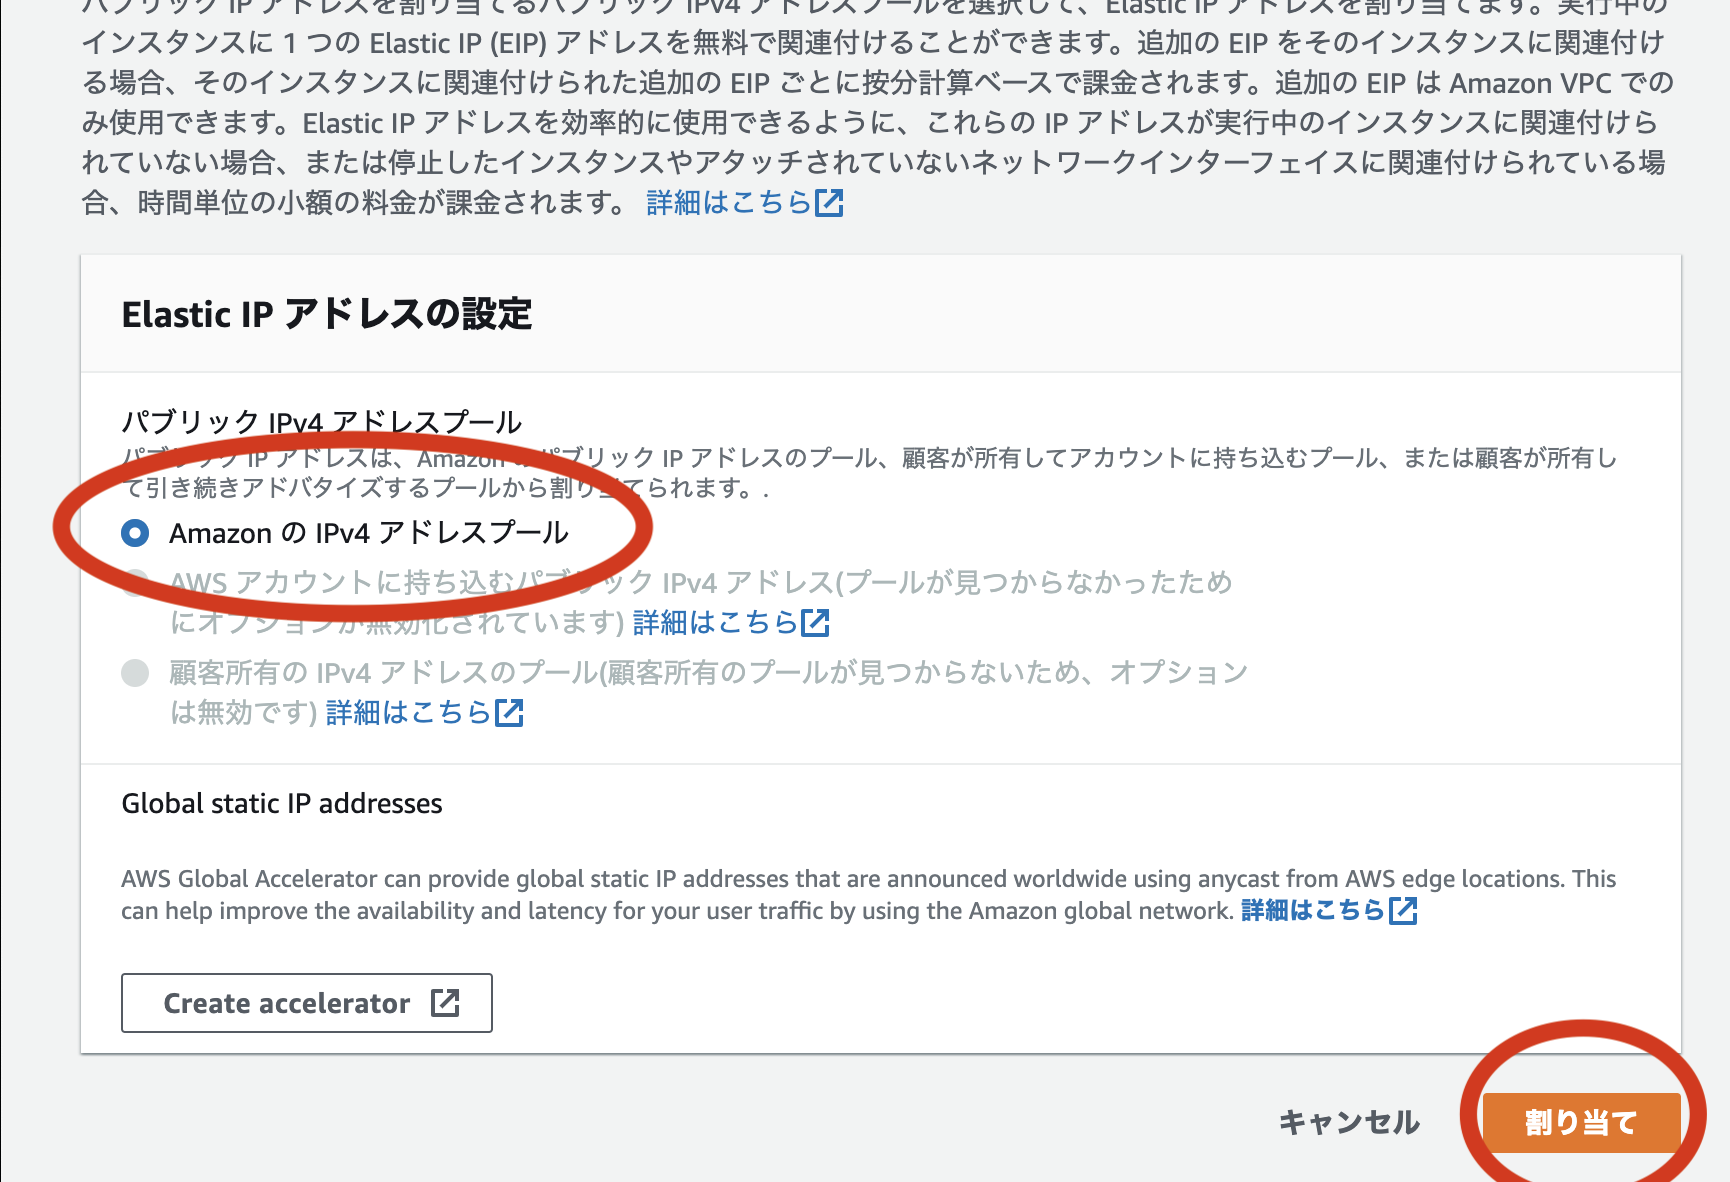
 Make sure "IPv4 Address Pool" is selected and click Assign
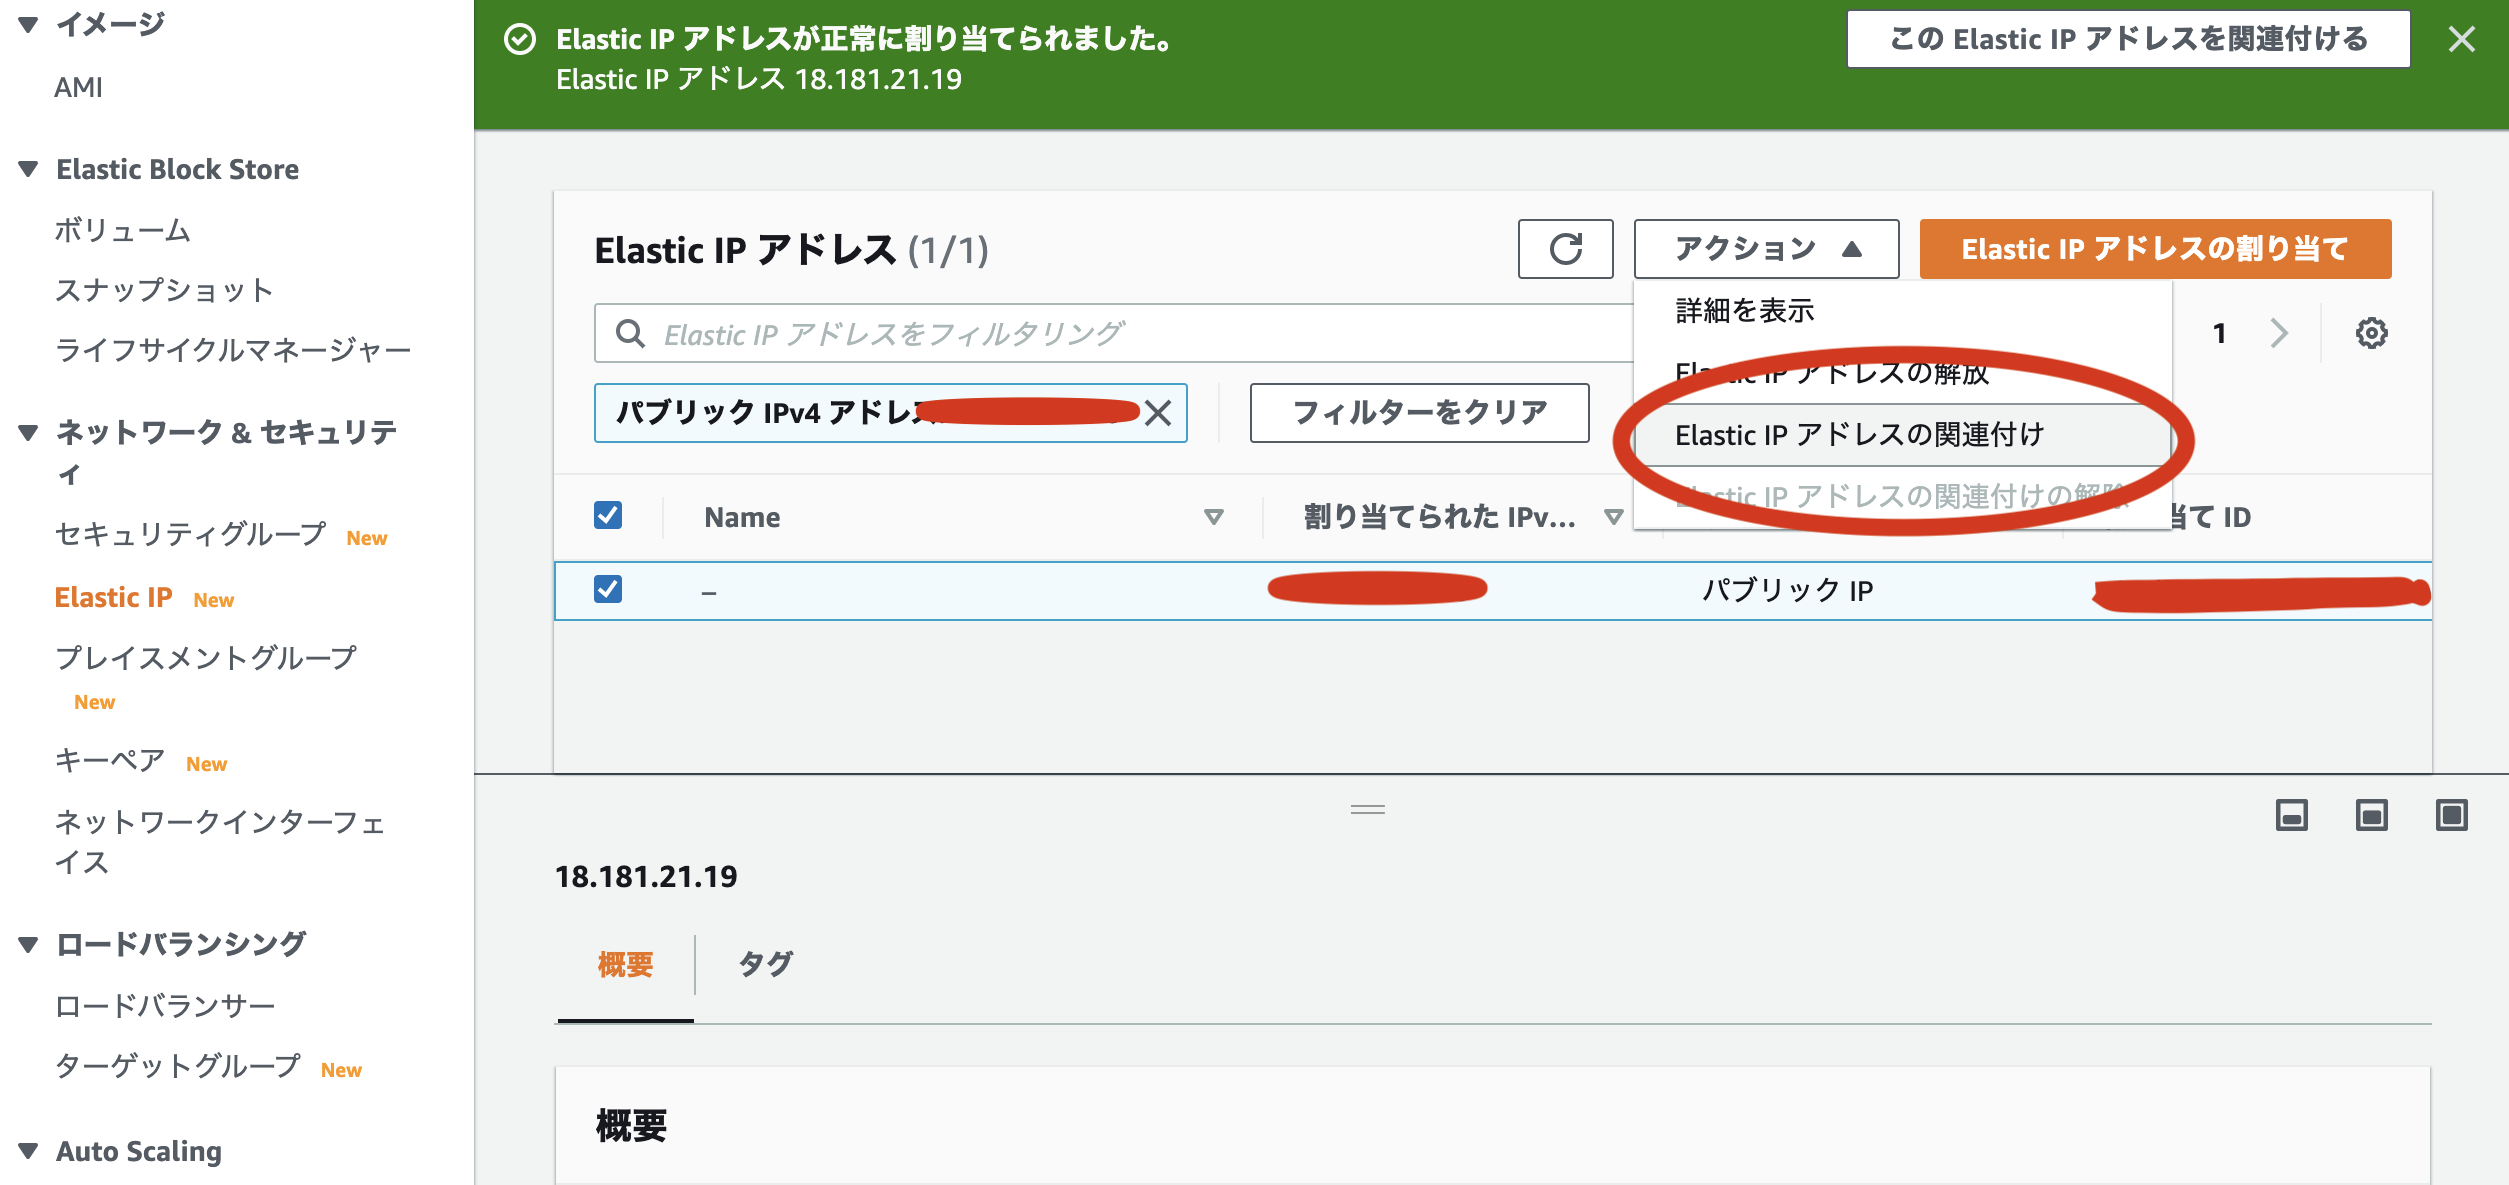
 After creating the Elastic IP, we will link it with the instance.
Click "Associate" in "Action" of Elastic IP.
 Paste the instance ID you copied and pasted into the "instance" item enclosed in red.
- There are times when it is automatically selected, but in that case you may specify the selected instance.

Instance security settings
Click the "Security Group" link for your instance to set up inbound rules.
Security groups allow you to configure network settings for your instances all at once.
Let's edit as follows.
"0.0.0.0" and ":: / 0" mean "allow all access".
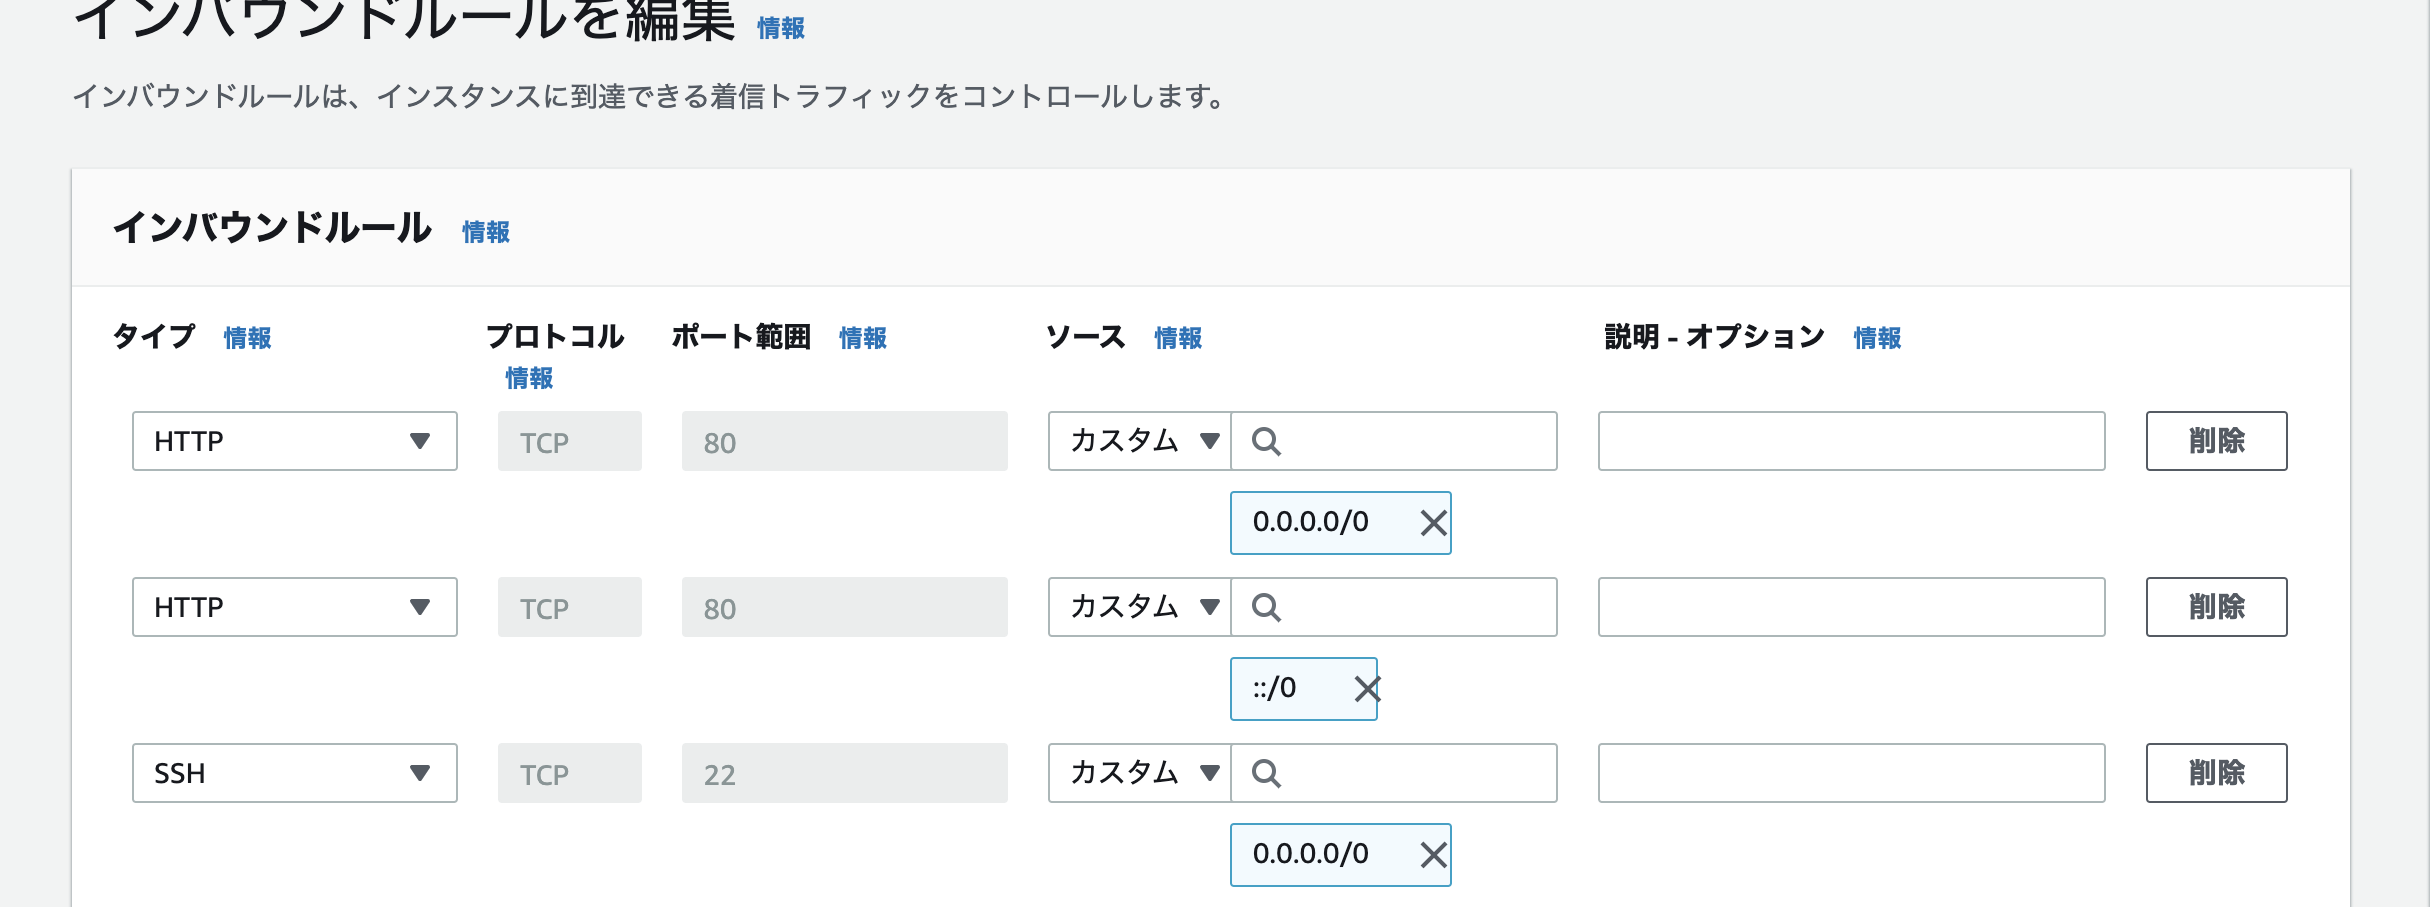
For the time being, the settings on the web are now ready.
Log in to your EC2 instance
Now that the instance settings are complete, let's actually log in to the instance from the terminal.
% cd
% mkdir ~/.ssh
% mv Downloads/The name of the downloaded key.pem .ssh/
#Move the key you downloaded earlier to ssh.
% cd .ssh/
% ssh -i Downloaded key name.pem ec2-user@Elastic IP associated with the instance
If you execute the following command, you will be asked to select yes or no, so let's say yes.
% ssh -i Downloaded key name.pem ec2-user@Elastic IP associated with the instance
If the login is successful and the message "Amazon Linux 2 AMI" is returned, it is successful. And let's install software such as Ruby, yarn and node in the instance. After that, let's install the repository you want to deploy with git clone etc. This completes the preparation for the time being.
In the next sequel, we will start the database on the EC2 instance. After the second part is over, we will move on to the deployment part, so we plan to have three parts in total.
Recommended Posts