[PYTHON] A series of amateur infrastructure engineers touching Django with Docker ⑤: View, Template, CSS
TL;DR Continuation of Amateur infrastructure engineer touches Django with Docker ④: urls.py. If you want to read from 1, ↓ here. Amateur infrastructure engineer touches Django with Docker (1): Make Django with Docker This time as well, I will play with django while making a sample of Django Girls. In view, you can pass the data received via model to Template and perform other processing. Template is the part that adjusts the appearance. HTML, CSS, etc. correspond to this Template. First, let's look at the structure by creating a simple View.
view
① Edit views.py
views.py
views.py
from django.shortcuts import render
from django.utils import timezone
from .models import Post

def post_list(request):
    posts = Post.objects.filter(published_date__lte=timezone.now()).order_by('published_date')
    return render(request, 'blog/post_list.html', {'posts': posts})
Well-understood commentary
from django.shortcuts import render
The shortcuts function defines the functions and classes needed to bridge each level of MTV in Django. This time, we are importing a function called render that renders the template specified as an argument and returns HttpResponse.
from django.utils import timezone
from .models import Post
The timezone that provides the time function included in the utility function and the Post model created when the model was created are imported. I touched on the standing position of View in the second time, but since it also has the role of actually acquiring data using the model function and passing it to Template, import the model you want to use in View and use Template. Must be delivered as an option.
def post_list(request):
    posts = Post.objects.filter(published_date__lte=timezone.now()).order_by('published_date')
    return render(request, 'blog/post_list.html', {'posts': posts})
The definition part of the post_list function. Remember that you specified views.post_list when you wrote the last urls.py? When a request comes to urls.py, the function in views.py specified according to the path is called and the request is forwarded. Then, after performing the necessary processing, the Template is rendered and the response is returned. In the second line, using the Post model, published_date gets posts earlier than the current time, sorts them in chronological order, and passes them to blog / post_list.html.
Template
① Create a directory for html
cd ~/blog/template
mkdir blog
There is a directory called template under the blog directory, which is the application directory, so create another directory called blog under that directory. You may be wondering why this is a complicated structure, but when managing large-scale applications, it seems better to separate directories for each function even for html.
② Edit post_list.html
post_list.html
blog/template/blog/post_list.html
{% load static %}
<html>
    <head>
        <title>Django Girls blog</title>
        <link rel="stylesheet" href="//maxcdn.bootstrapcdn.com/bootstrap/3.2.0/css/bootstrap.min.css">
        <link rel="stylesheet" href="//maxcdn.bootstrapcdn.com/bootstrap/3.2.0/css/bootstrap-theme.min.css">
        <link rel="stylesheet" href="{% static 'css/blog.css' %}">
    </head>
    <body>
        <div class="page-header">
            <h1><a href="/">Django Girls Blog</a></h1>
        </div>

        <div class="content container">
            <div class="row">
                <div class="col-md-8">
                    {% for post in posts %}
                        <div class="post">
                            <div class="date">
                                <p>published: {{ post.published_date }}</p>
                            </div>
                            <h2><a href="">{{ post.title }}</a></h2>
                            <p>{{ post.text|linebreaksbr }}</p>
                        </div>
                    {% endfor %}
                </div>
            </div>
        </div>
    </body>
</html>
Since it is not the main point to explain the basic part of HTML, only the important part will be explained here.
Well-understood commentary
{% load static %}
{% load static%} is a description for loading static content such as CSS file described later.
<link rel="stylesheet" href="{% static 'css/blog.css' %}">
The CSS to be read is specified here.
                    {% for post in posts %}
                        <div class="post">
                            <div class="date">
                                <p>published: {{ post.published_date }}</p>
                            </div>
                            <h2><a href="">{{ post.title }}</a></h2>
                            <p>{{ post.text|linebreaksbr }}</p>
                        </div>
                    {% endfor %}
What I would like to pay attention to in this part is the part where the item of Post model is specified by {{post.OBJECT}}. Posts obtained using the Post model are passed to this Template in the views.py mentioned above, so they can be called easily like this. Since the posts acquired by the Post model are in the form of a list, multiple displays can be realized by using the for statement.
③ Create a directory for CSS
cd ~/blog/static
mkdir css
④ Edit blog.css
blog/static/css/blog.css
.page-header {
background-color: #C25100;
margin-top: 0;
padding: 20px 20px 20px 40px;
}
.page-header h1, .page-header h1 a, .page-header h1 a:visited, .page-header h1 a:active {
color: #ffffff;
font-size: 36pt;
text-decoration: none;
}
.content {
margin-left: 40px;
}
h1, h2, h3, h4 {
font-family: 'Lobster', cursive;
}
.date {
color: #828282;
}
.save {
float: right;
}
.post-form textarea, .post-form input {
width: 100%;
}
.top-menu, .top-menu:hover, .top-menu:visited {
color: #ffffff;
float: right;
font-size: 26pt;
margin-right: 20px;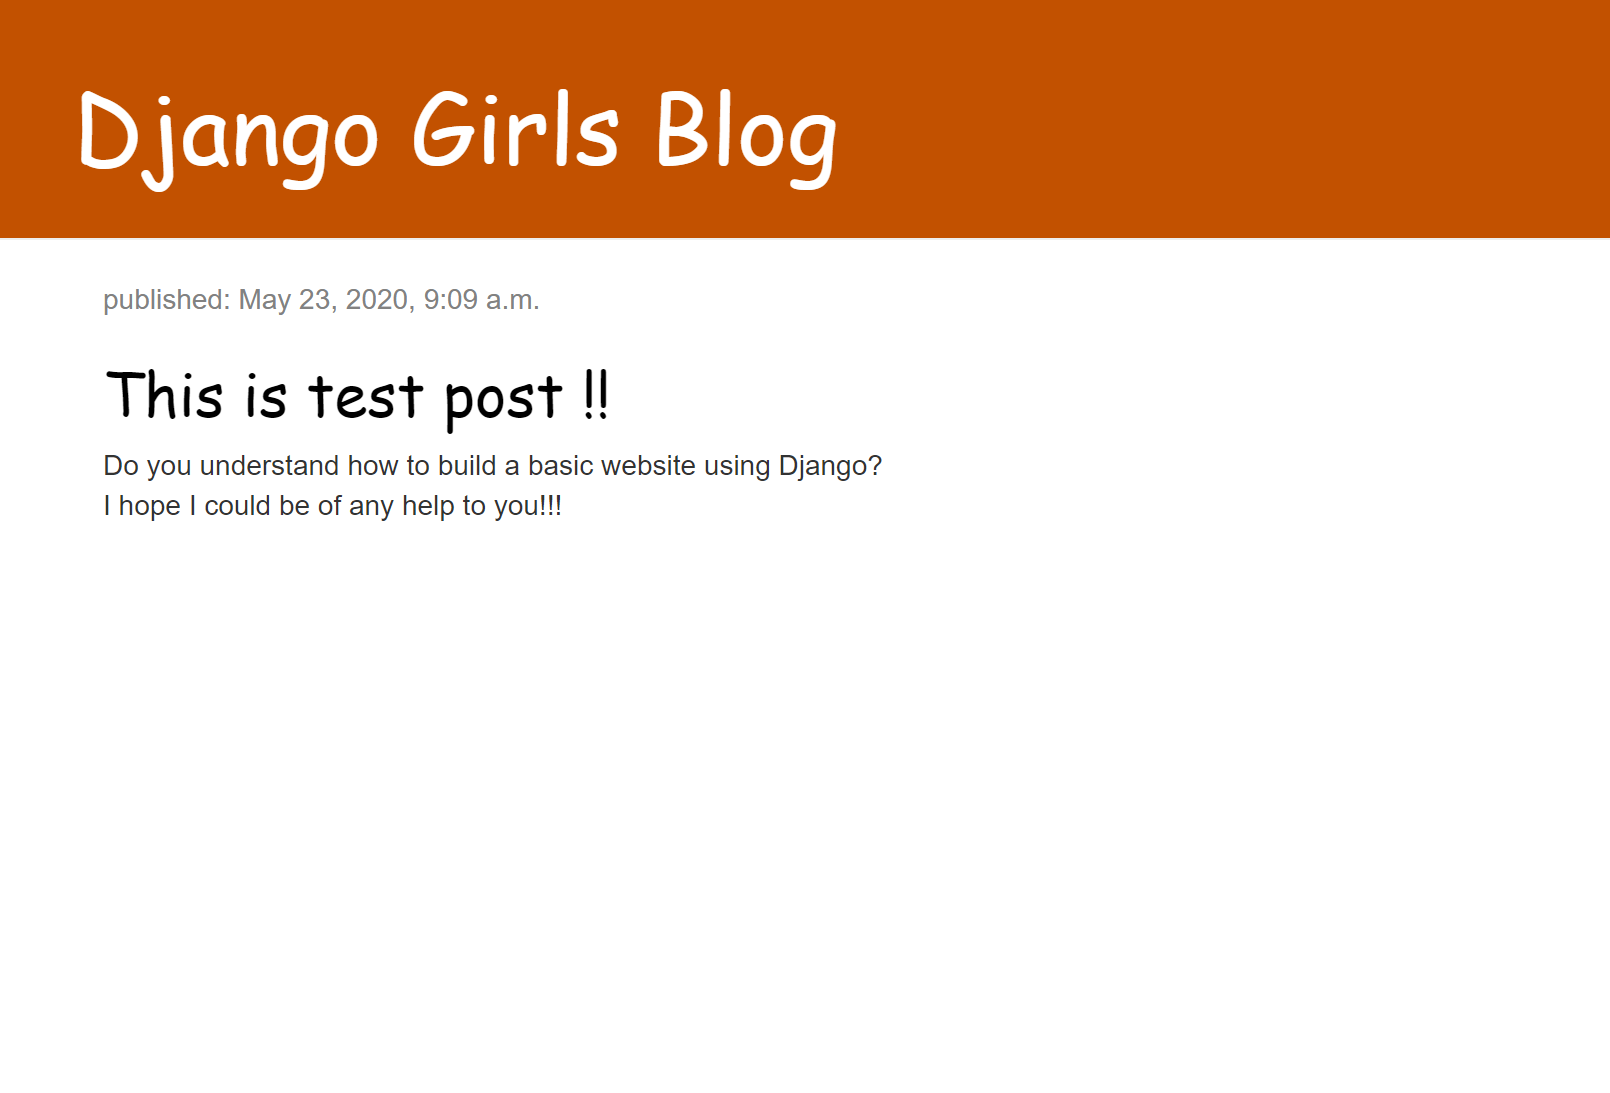
}
.post {
margin-bottom: 70px;
}
.post h2 a, .post h2 a:visited {
color: #000000;
}
The explanation of CSS is not the main point, so I hope you can copy it with the recognition that you write something like this in order to shape it. It is recommended that you study HTML and CSS in a book dedicated to it.
Launching a blog display site
docker-compose up
At this point, your website should be complete (although it only displays).
Go to the directory where dockercompose.yaml is located and use docker-compose up to actually start it.
docker-compose up
http://[IPADDRESS]:8000/にアクセスしてみる。

It was displayed! By the way, the post "This is test post" was posted using the admin page explained in Part 3. In order for a user to post, they need to create a page with a post form. When creating forms, Django offers a handy feature called forms. The story will come again next time.
First of all, is it like a break? ..
to be continued
Recommended Posts