[PYTHON] Object detection (Single Shot MultiBox Detector) XML file creation GUI for image data
table of contents
--Reference page --Download link --How to use
Reference page
-Dataset creation support tool for object recognition (Faster R-CNN or SSD -[Try using Python Tkinter](https://qiita.com/nnahito/items/ad1428a30738b3d93762#tkinter%E3%81%A7%E8%A1%A8%E7%8F%BE%E3%81%A7 % E3% 81% 8D% E3% 82% 8B% E3% 81% 93% E3% 81% A8) -You can do it with copy and paste! Tkinter -[Python] Specify the range from the image by dragging the mouse
- https://shizenkarasuzon.hatenablog.com/entry/2018/12/31/080612
- http://y-okamoto-psy1949.la.coocan.jp/Python/misc/DrawFigs/
- https://detail.chiebukuro.yahoo.co.jp/qa/question_detail/q10220548240 -[Python] Creating multiple windows with Tkinter -Values that can be used in Tkinter color specification -Python: How to select a processing file from GUI -GUI with Python tkinter -Save file- -Generate and read xml file by ElementTree --Create XML document -[Qiita article creation method beginner's memorandum](https://qiita.com/U-MA/items/996ae933ae94c5711883#%E4%BB%96%E3%81%AE%E8%A8%98%E4%BA% 8B% E3% 82% 92% E5% 8F% 82% E8% 80% 83% E3% 81% AB% E3% 81% 97% E3% 81% 9F% E3% 81% 84% E3% 82% 93% E3% 81% A0% E3% 81% 91% E3% 81% A9) -Creating a country by rail (see image on November 25, 2020)
Download link
https://gist.github.com/mozra/5ad2ce73db6b74e2bed9b2f8db6ac8b6
How to use
Operating environment: Ubuntu18.04, Ubuntu20.04
0: Install required libraries
Basically, the libraries used are standard modules other than pyautogui and PIL, so they can be used without installation. puautogui and PIL can be installed with the pip command, so execute pip install as appropriate.
1: Copy and paste the executable file from the download link
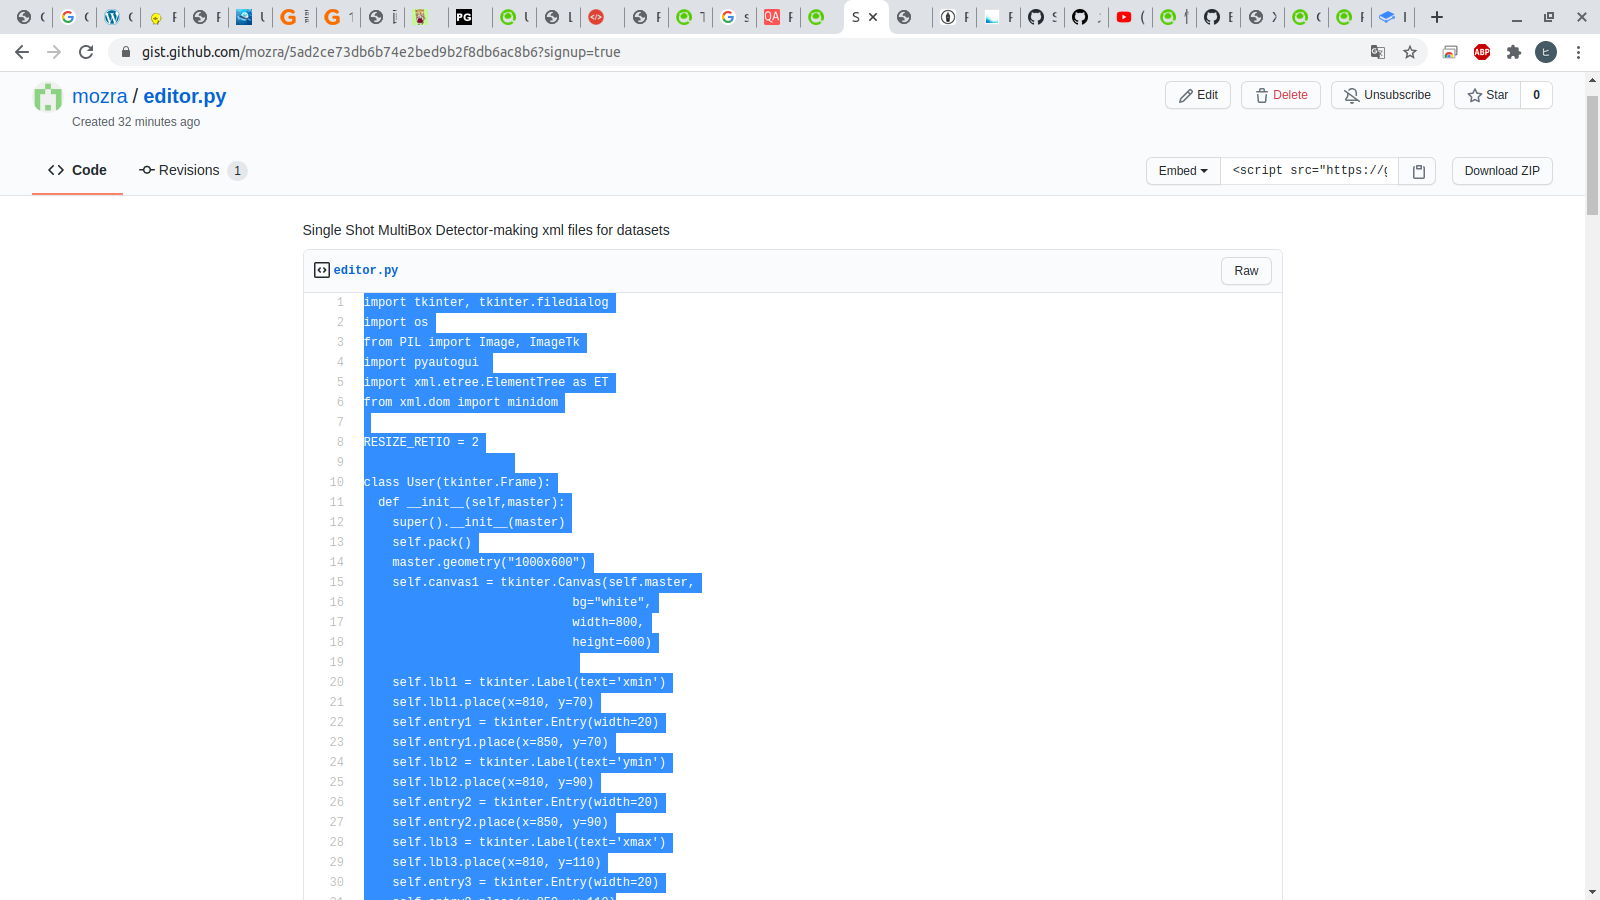
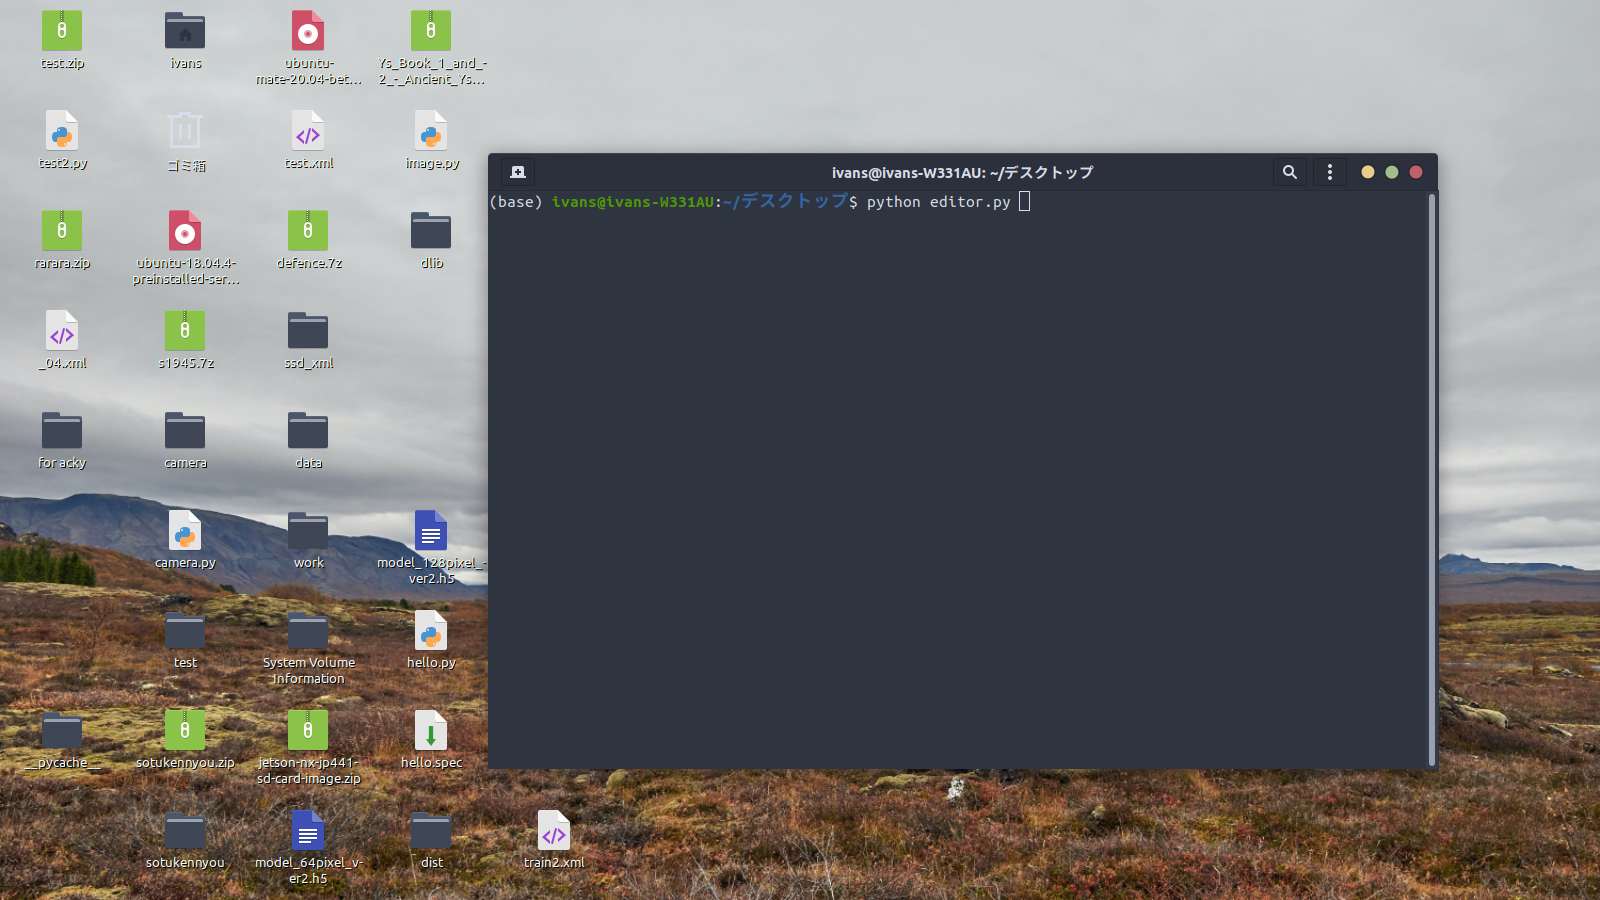
2: Put the copied executable file in an appropriate folder and start the GUI from the terminal
This time, I saved it on the desktop with the file name editor.py, so on the terminal, execute cd desktop → python editor.py.
3: Read image file
Click the [Open] button at the bottom right.
 Select an image file from the file dialog.
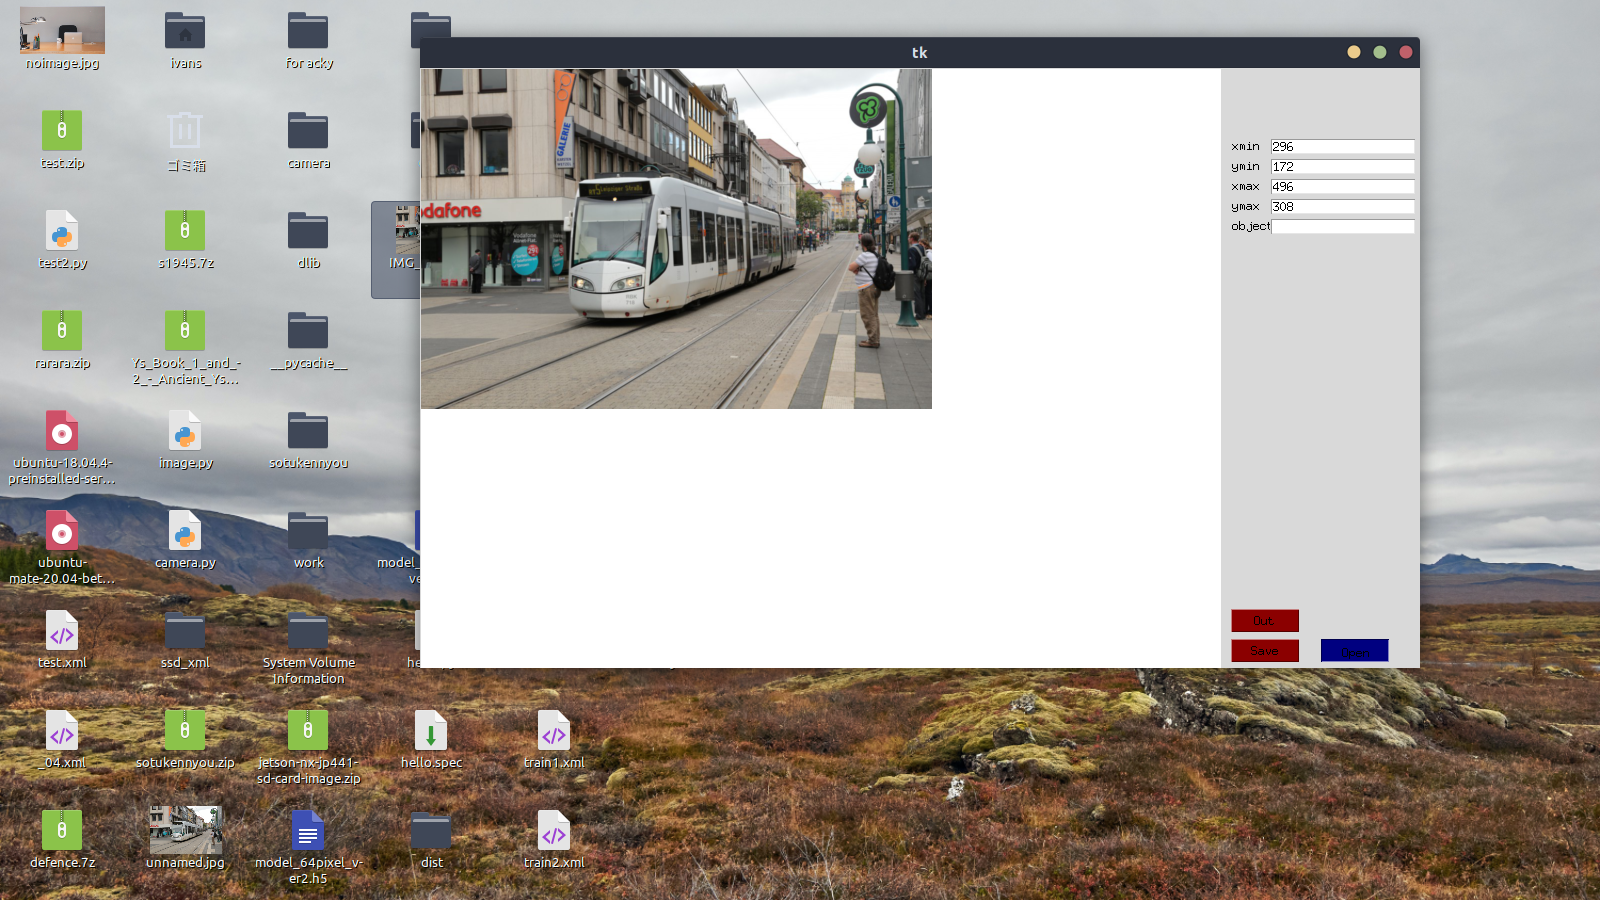
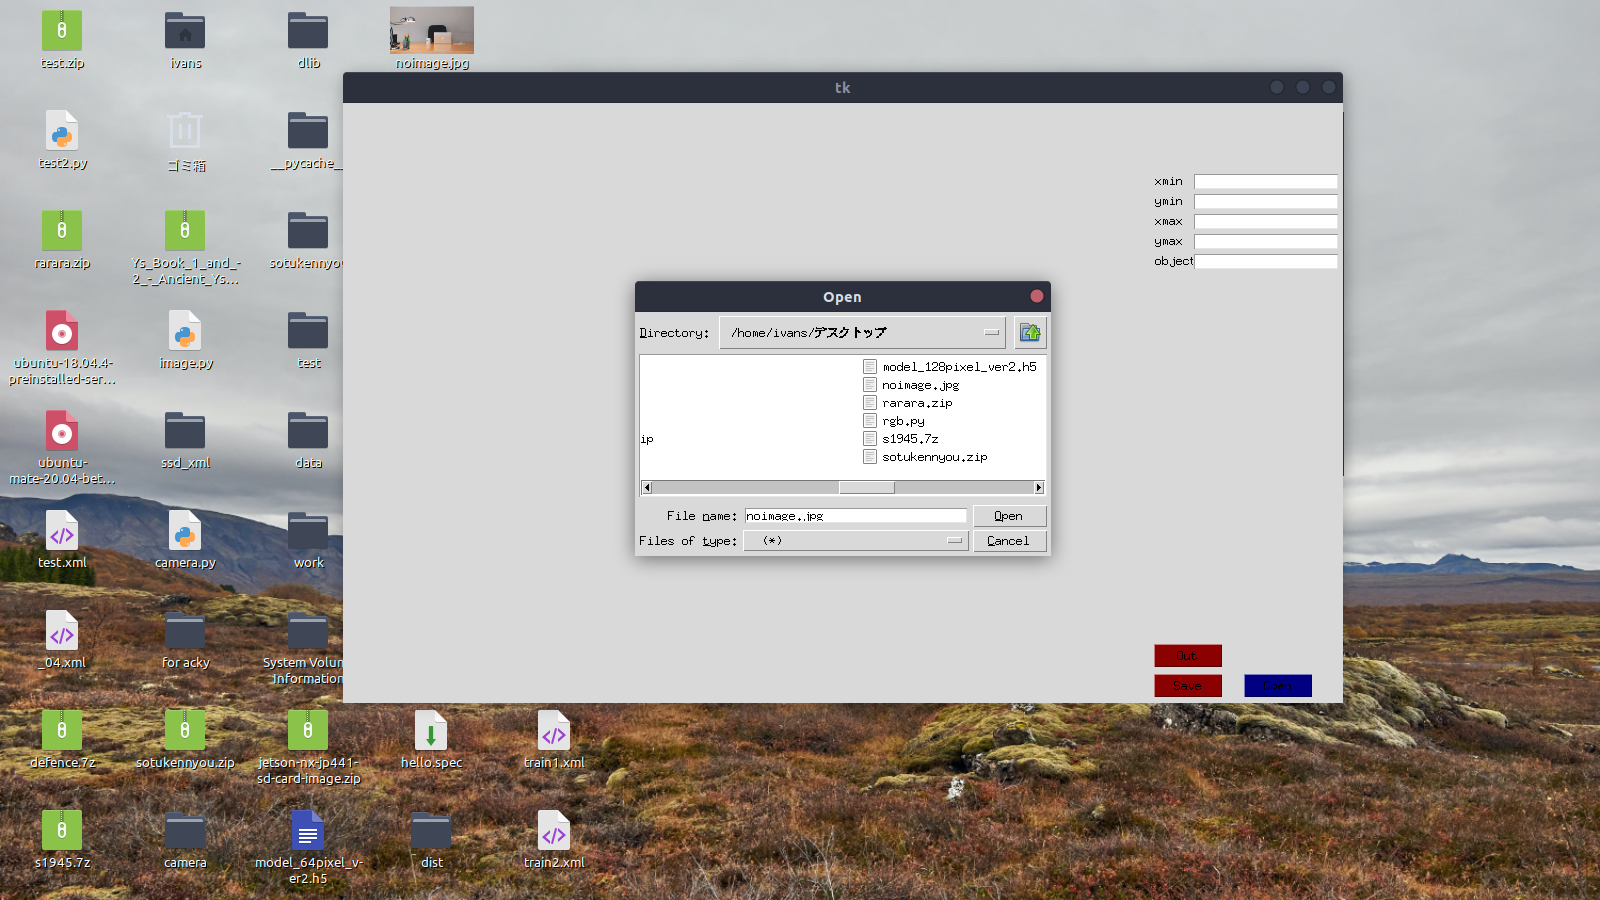 The selected image is displayed.
4: Label in the image
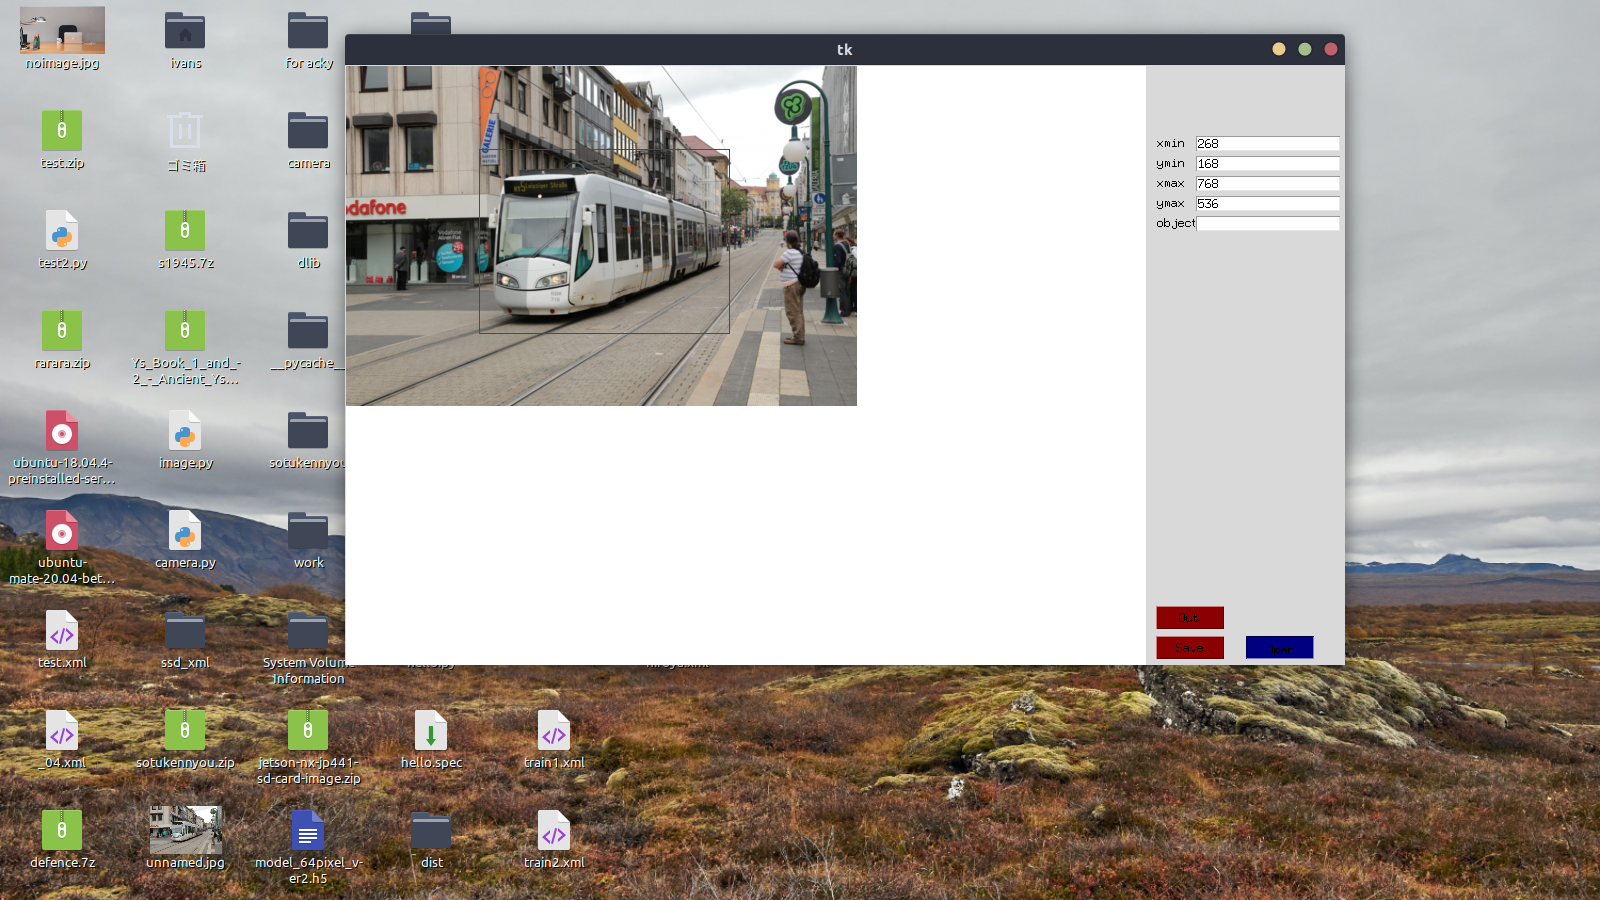
A red frame is created by dragging and dropping on the displayed image. The red frame can be moved up, down, left and right with the arrow keys.
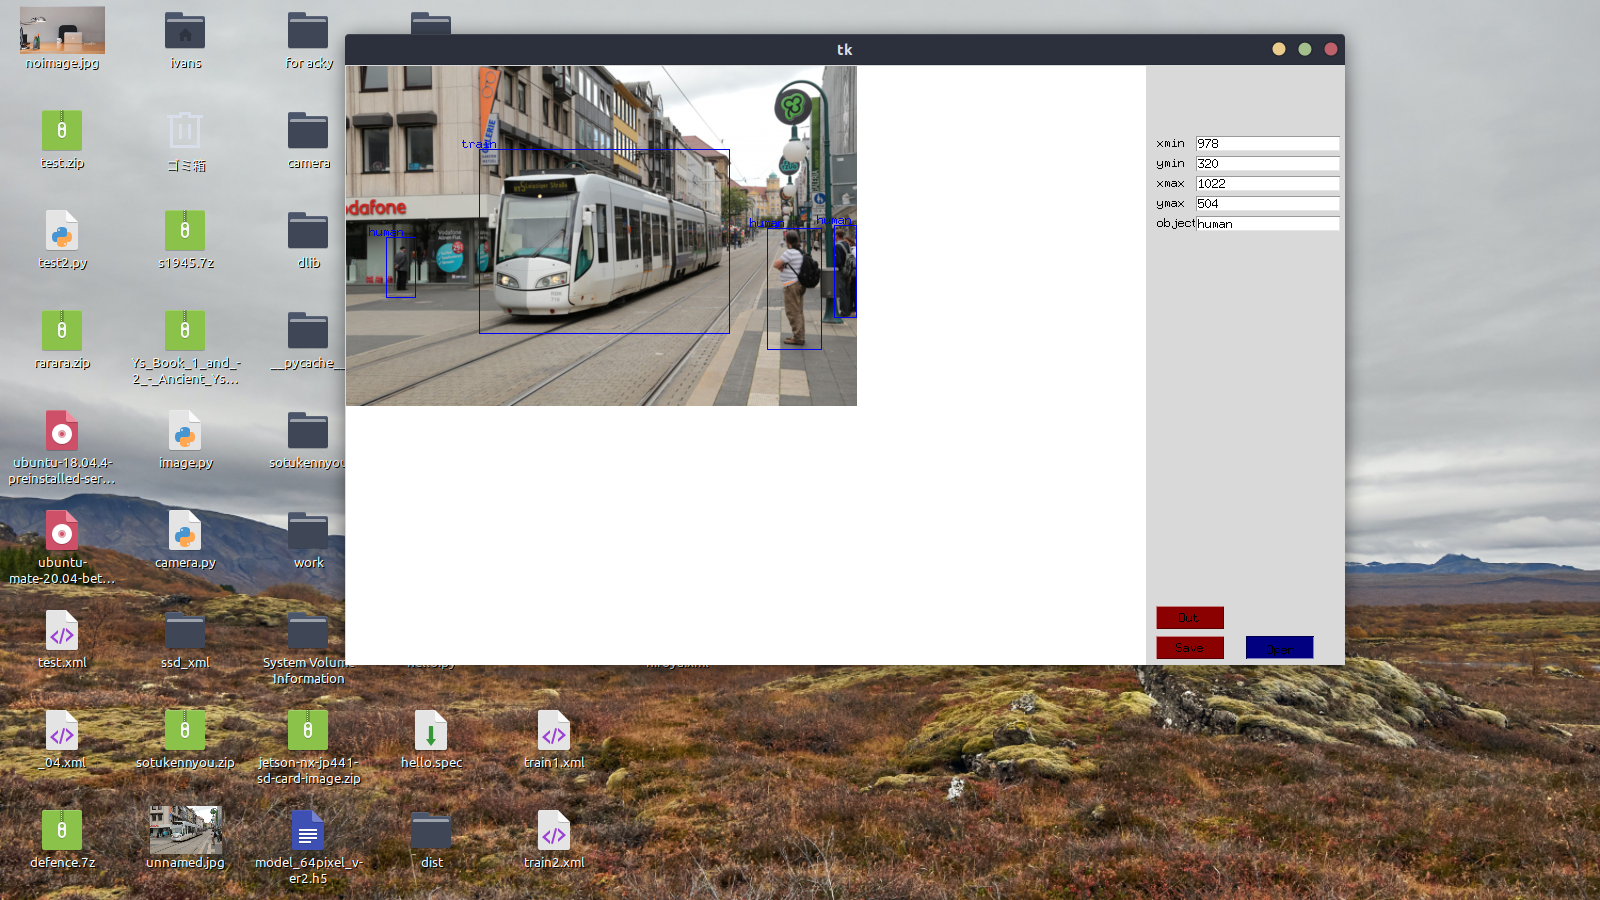
 Enter the object name (train this time) in the text box labeled [object] on the right, and press the [Save] button below to display the blue frame and the entered object name in the image. At this point, the train in the image was labeled "train".
 Objects in other images can be renamed and labeled in the same way.
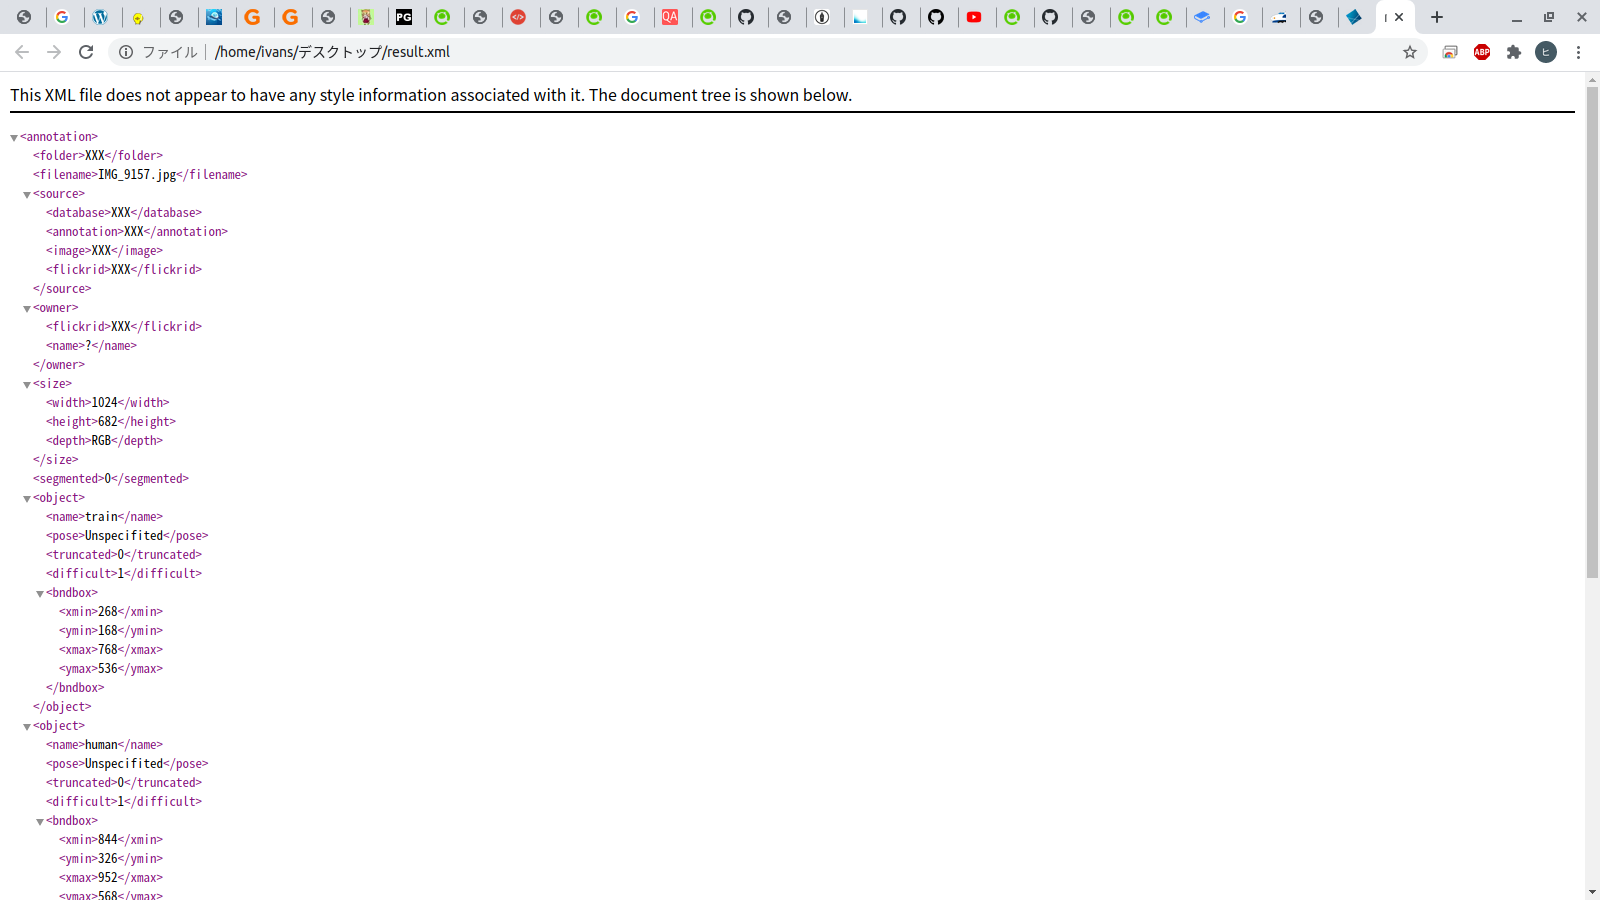
Save labeled data as an XML file
Click the [Out] button below to display the file dialog, where you can specify the save destination.
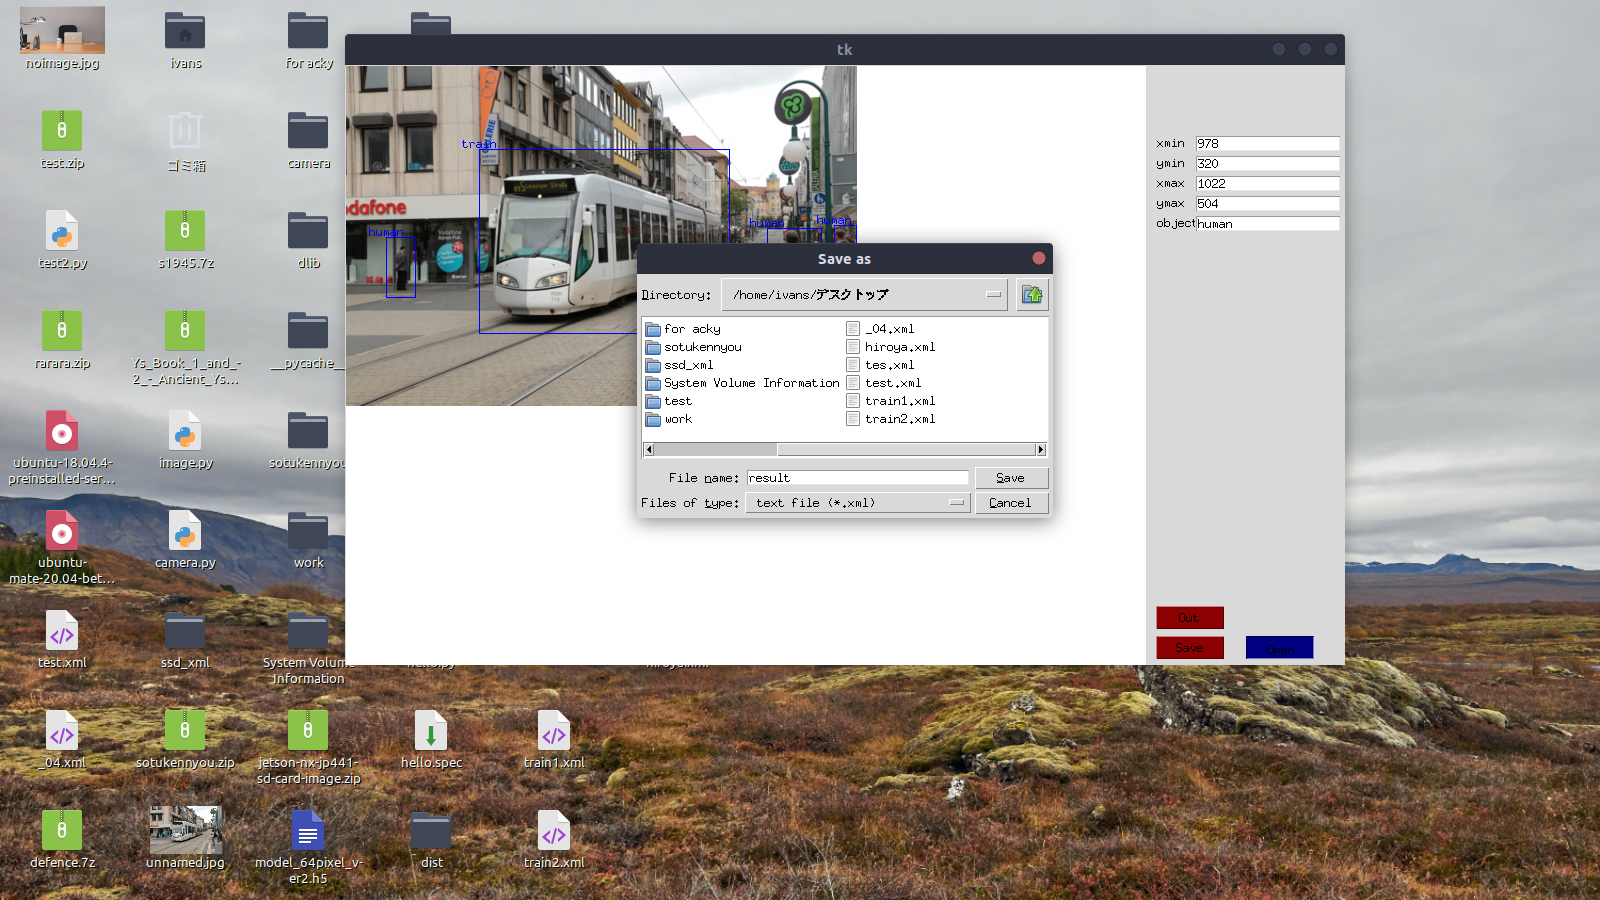 All created files are saved as .xml.