[LINUX] RHCSA test preparation-Network settings using networkManager nmtui
RHCSA test preparation --Network settings using NetworkManager
From around Red Hat Enterprise Linux 7, software called Network Manager has appeared, and it has become possible to set IP settings for NICs in an easy-to-understand format from cli / cui. The author stopped at the knowledge of RHEL5,6, so I was doing the work of directly editing the configuration file under / etc / sysconfig / network-scripts ... with the vi command.
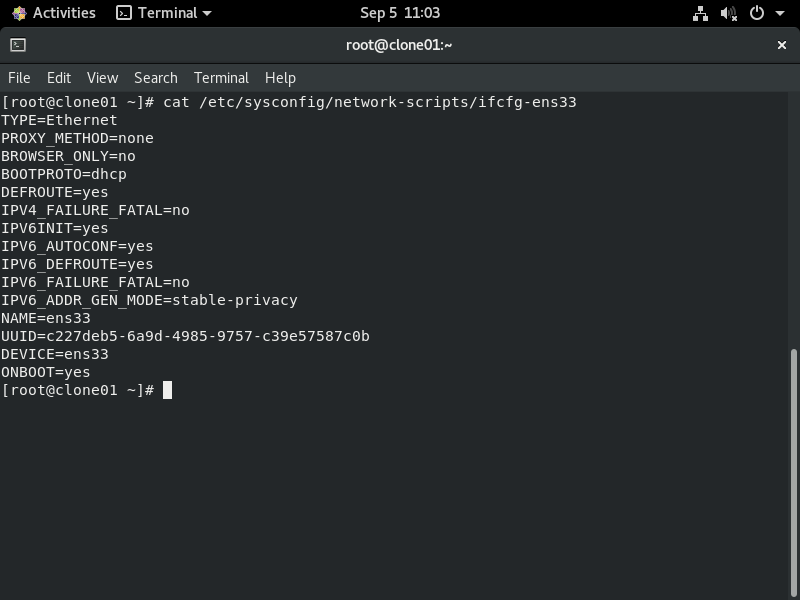
Direct editing of the file is also good, but this may cause input errors in the settings, so I would like to work more safely.
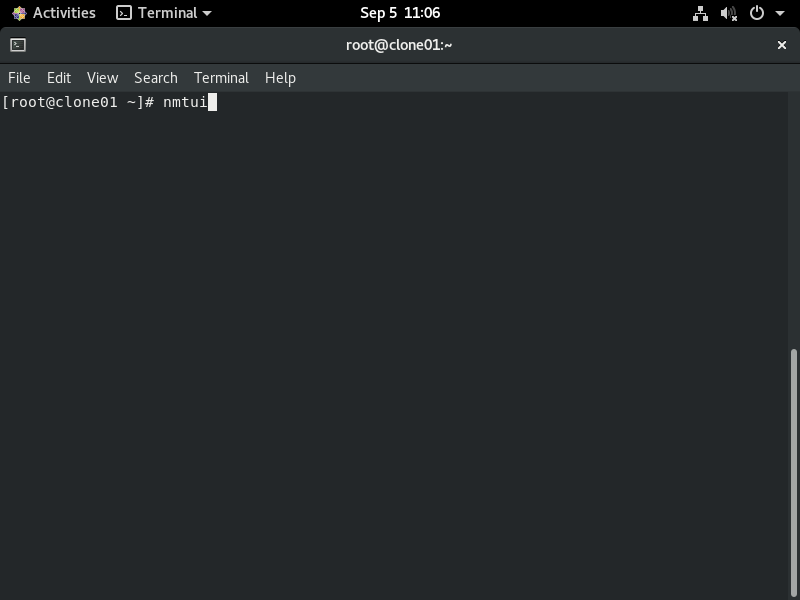
So, this time, I would like to work safely using software called nmtui.
Please check the following link for details on this function.
Chapter 8 Configuring IP Networks with NMTUI --Red Hat Enterprise Linux 8
About nmtui
nmtui is one of the functions of NetworkManager, and is a UI that allows you to edit settings around the network via the terminal screen.
Just type nmtui and press Enter, as shown below. ..
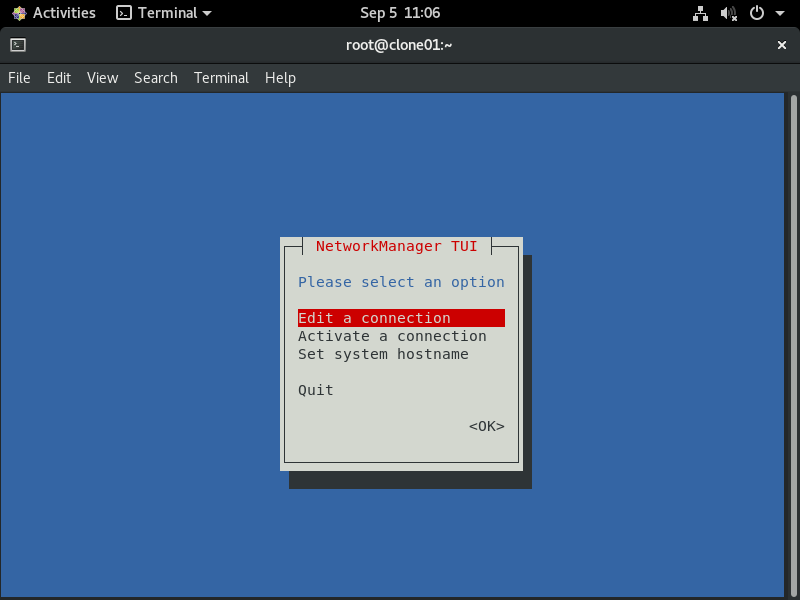
Moves to the next screen. It's a BIOS-like screen, operated with the keyboard.
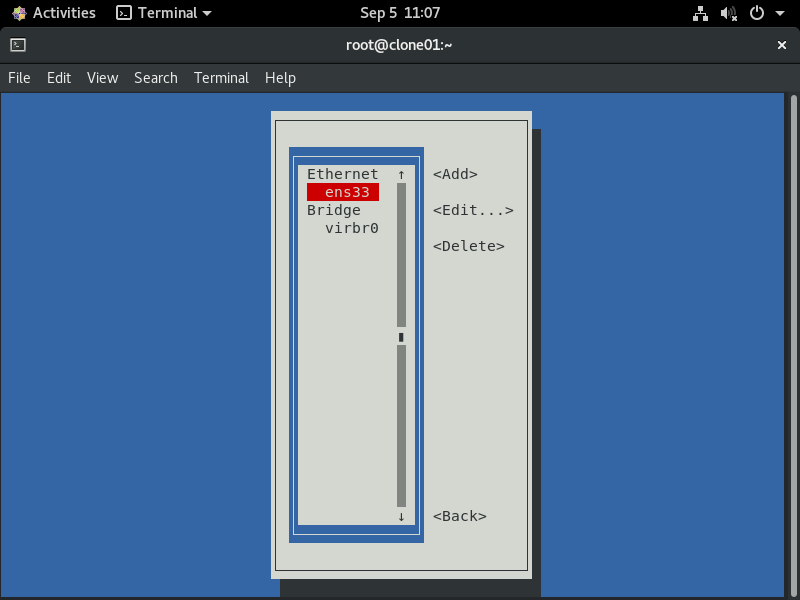
The Edit Connection screen shows the interface currently owned by the OS. This time, we will check about "ens33".
The setting posted at the top of this article was the IP address acquisition setting by DHCP, but you can also check the situation on the following screen.
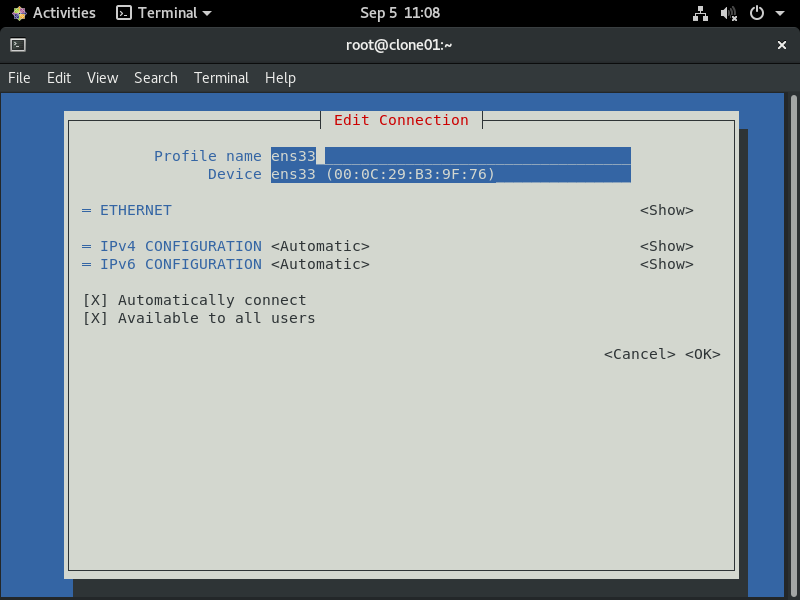
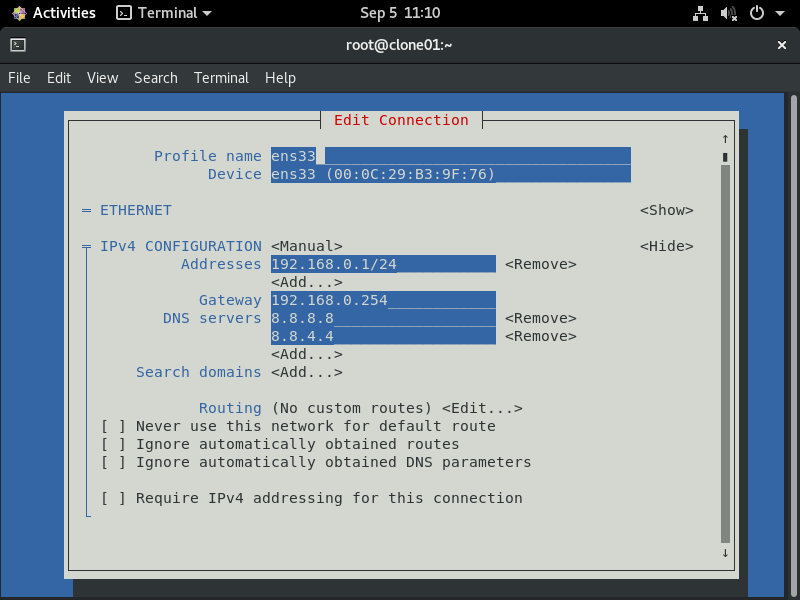
Let's try changing to a static IP setting.
 Basically, use the arrow cursor keys / Enter and number keys on the keyboard to enter settings. It was very easy to set up with intuitive work.
After the above settings, I checked the settings for the "ens33" NIC that I checked first with the cat command.
Especially from the bottom 5 lines of the output, it was confirmed that the setting was reflected via nmtui this time.

Recommended Posts